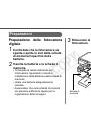
7
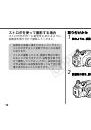
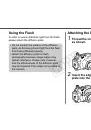
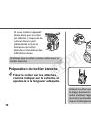
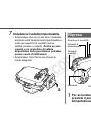
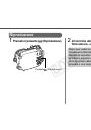
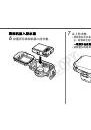
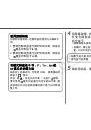
• Achten Sie darauf, nicht zu viel Silikon-Paste
aufzutragen (ein Tropfen genügt). Sonst könnte
ein Eindringen von Wasser die Folge sein.
• Benutzen Sie zum Auftragen der Paste weder
Papier noch Stoff.
• Eine beschädigte oder rissige Dichtung kann
Lecks verursachen. Bitte wenden Sie sich an
Ihren Canon-Kundendienst.
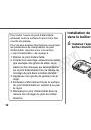
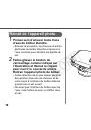
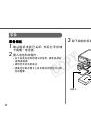
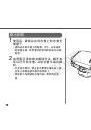
Pflege und Wartung
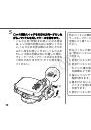
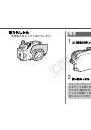
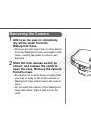
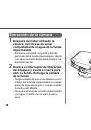
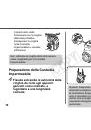
• Waschen Sie die Außenseite des
wasserdichten Gehäuses nach dem Gebrauch
so bald wie möglich mit reichlich klarem
Wasser ab, z. B. mit Leitungswasser (maximal
30 °C). Besonders nach der Verwendung in
Salzwasser ist mehrstündiges Einweichen des
geschlossenen wasserdichten Gehäuses in
Leitungswasser zu empfehlen, um
Salzablagerungen zu entfernen.
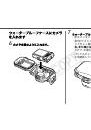
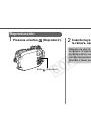
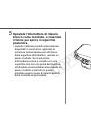
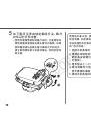
Bitte prüfen
Sie, dass Sie die Verriegelung richtig
geschlossen haben, damit kein Wasser in
das Gehäuse dringt.
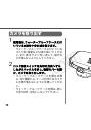
Wischen Sie es nach
dem Waschen mit einem weichen Lappen
trocken. Um ein Zerkratzen des wasserdichten
Gehäuses zu vermeiden, wischen Sie es nicht
ab, wenn noch Staub oder Sand daran haftet.
Wenn Salzreste zurückbleiben, können
Metallteile zu rosten beginnen oder Tasten
schwergängig werden.Wischen Sie das Innere
des Gehäuses mit einem weichen, trockenen
Tuch ab. Verwenden Sie kein Wasser.
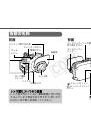
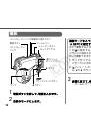
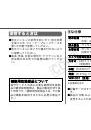
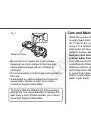
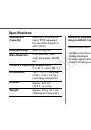
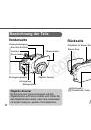
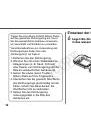
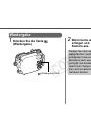
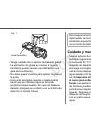
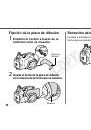
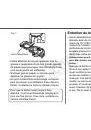
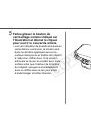
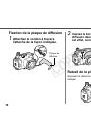
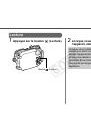
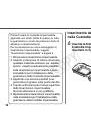
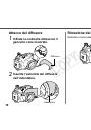
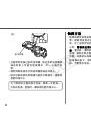
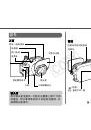
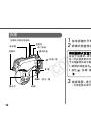
Abb. 1
Dichtungsring
Damit das wasserdichte Gehäuse auch
wasserdicht bleibt, ist es empfehlenswert,
den Dichtungsring einmal pro Jahr
auszuwechseln. Wenden Sie sich dazu an
Ihren Canon-Kundendienst.
COP
Y
 1
1
 2
2
 3
3
 4
4
 5
5
 6
6
 7
7
 8
8
 9
9
 10
10
 11
11
 12
12
 13
13
 14
14
 15
15
 16
16
 17
17
 18
18
 19
19
 20
20
 21
21
 22
22
 23
23
 24
24
 25
25
 26
26
 27
27
 28
28
 29
29
 30
30
 31
31
 32
32
 33
33
 34
34
 35
35
 36
36
 37
37
 38
38
 39
39
 40
40
 41
41
 42
42
 43
43
 44
44
 45
45
 46
46
 47
47
 48
48
 49
49
 50
50
 51
51
 52
52
 53
53
 54
54
 55
55
 56
56
 57
57
 58
58
 59
59
 60
60
 61
61
 62
62
 63
63
 64
64
 65
65
 66
66
 67
67
 68
68
 69
69
 70
70
 71
71
 72
72
 73
73
 74
74
 75
75
 76
76
 77
77
 78
78
 79
79
 80
80
 81
81
 82
82
 83
83
 84
84
 85
85
 86
86
 87
87
 88
88
 89
89
 90
90
 91
91
 92
92
 93
93
 94
94
 95
95
 96
96
 97
97
 98
98
 99
99
 100
100
 101
101
 102
102
 103
103
 104
104
 105
105
 106
106
 107
107
 108
108
 109
109
 110
110
 111
111
 112
112
 113
113
 114
114
 115
115
 116
116
 117
117
 118
118
 119
119
 120
120
 121
121
 122
122
 123
123
 124
124
 125
125
 126
126
 127
127
 128
128
 129
129
 130
130
 131
131
 132
132
 133
133
 134
134
 135
135
 136
136
 137
137
 138
138