Инструкция для CLAVIA NORD Electro 4D SW61

(скачивание инструкции бесплатно)
Формат файла: PDF
Доступность: Бесплатно как и все руководства на сайте. Без регистрации и SMS.
Дополнительно: Чтение инструкции онлайн
background image

14 | NorDElEctro4DUsErMaNUalosv1.1x

Samp Env

When the Samp Lib type is active, the Samp Env LEDs and button can 
be used to set a desired velocity response and attack and release time 
behavior that affects the playback of the samples .

When none of the Attack LEDs are lit, the sample playback is not 
affected by any additional attack from the Electro 4D and it does not 
respond to keyboard velocity .  

Slow At 

– select this when you want to play the samples with a slower 

attack . 

Vel Dyn

 - select this when you want to control the volume and the 

timbre of the samples with velocity from the keyboard . 
When both LEDs are lit, both the slow attack and the velocity option 
are active .

Press and hold the Shift button and operate the Samp Env button to 
set the desired release times . 
When none of the Release LEDs are lit, the sample playback is not af-
fected by any additional release .  

Rel 1

: Short release 

Rel 2

: Medium release 

Rel 1&2

: Long release

Piano Type

Use the Type selector to choose which piano sound you want to use . 
Each type may consist of several models; press repeatedly on the 
model selector to cycle through the models within a selected type . 

Category

Description

Grand

Acoustic and electric grand pianos

Upright

Upright pianos

E Piano 1

Electric pianos with tines

E Piano 2

Electric pianos with reeds

Clav/Hps

Clavinets and Harpsichords

Samp Lib

Samples

Model

Press repeatedly on the model selector to cycle through the available 
models within a selected type . 


M

The type of a piano has been set by Mo’ Bones, the company 
pitbull. You cannot move a piano from one type to another.
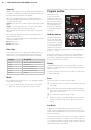
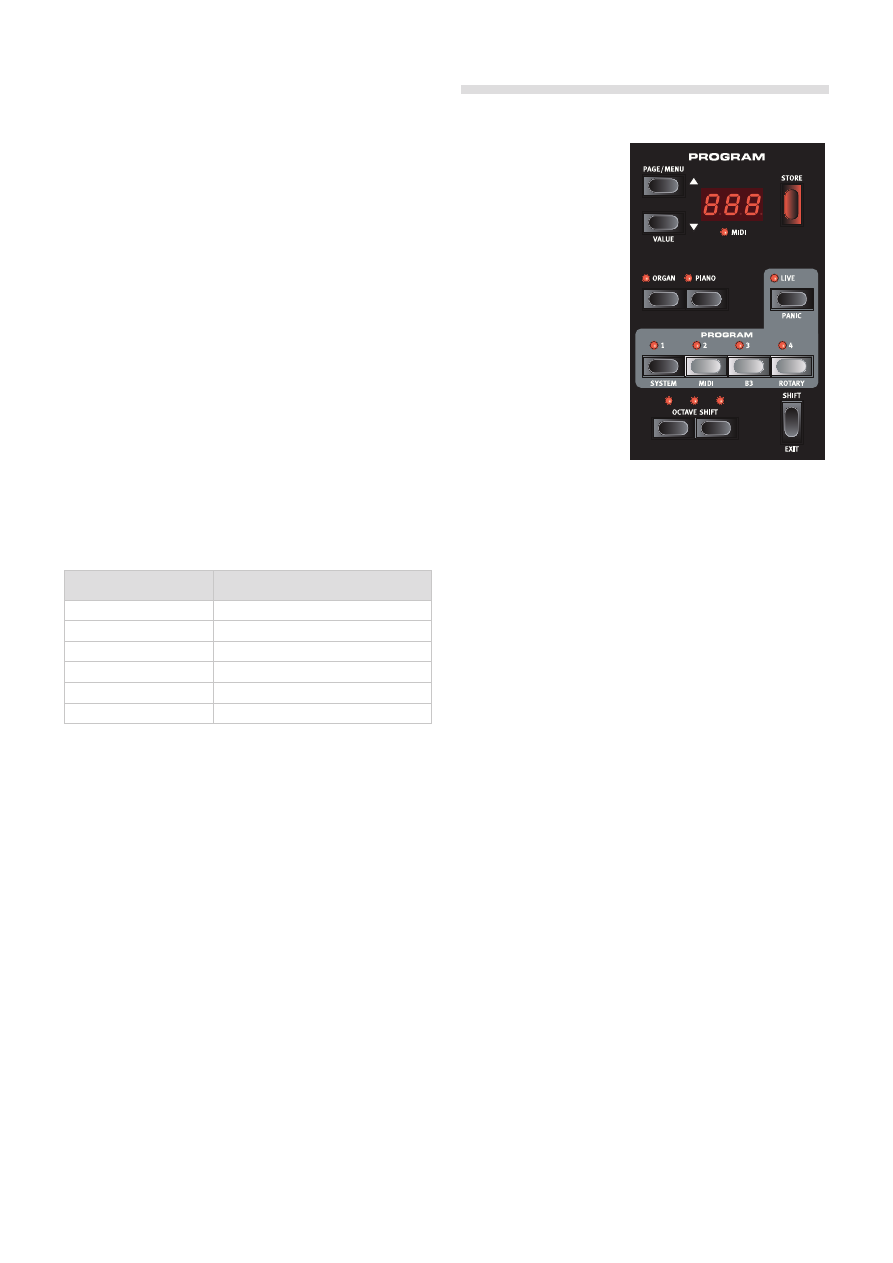
Program section 

The Program section 
is where you select the 
program, where the Store 
functions are activated and 
where you enter the System, 
MIDI . B3 and Rotary menus . 
The 128 programs in the 
Electro 4D are organized in 
32 pages with 4 programs in 
each page . 

Up/Down buttons 

The Up/Down buttons to 
the left of the display have 
several functions in the Nord 
Electro 4D . Press repeatedly 
to select one of the 32 pag-
es; the page and program 
number be presented in the 
display . Press Shift together with Up/Down to scroll through every loca-
tion (1 .1, 1 .2, 1 .3 etc) .

If you have activated any of the four menus, the System, MIDI, B3 or 
Rotary menus, these buttons are used to select a function, and to-
gether with the Shift button to change the value of a selected function . 
Read more about the menus on page 17 .

Display

The LED display will show the active program number . If you edit a 
program, a dot will appear next to the program number, at the bottom 
right of the display .

If you have activated any of the menus, the setting for each menu item 
is shown with the LEDs .

Store

The red Store button is used when storing Programs . 

Press the Store button once and the current program number will 
start to flash . 

Select the desired location with the Up/Down buttons and press 
Store again to confirm your intentions and to store the current set-
tings to the selected location . 

Press any button to abort the store procedure . 


M

In order to be able to store settings the Memory Protection must 
be turned off. Read more about this in “Memory Protection” on 
page 9.

Live Mode

In addition to the program memories, there are 4 Live locations in 
the Electro 4D that automatically saves the changes you make to the 
settings . The 4 Program Buttons are used to access the Live locations 
when the LIve LED is lit .

If you press the Live button, all changes to panel settings you make will 
be continuously saved in the “Live Buffer” . If you switch the power off, 
or select another program, the settings are still stored in the Live mem-
ory, so when you power up next time (or return to the Live memory) all 
settings will be exactly as you left them . 

1
2
3
4
5
6
7
8
9
10
11
12
13
14
15
16
17
18
19
20
21
22
23
24
25
26
Оглавление инструкции
  • Страница 1 из 27
    User Manual Nord Electro 4d OS Version 1.1x Part No. 50384 Copyright Clavia DMI AB Print Edition D
  • Страница 2 из 27
    The lightning flash with the arrowhead symbol within an equilateral triangle is intended to alert the user to the presence of uninsulated voltage within the products enclosure that may be of sufficient magnitude to constitute a risk of electric shock to persons. CAUTION - ATTENTION RISK OF ELECTRIC
  • Страница 3 из 27
     | Nord Electro 4D Table of Contents Piano section 1 Introduction Thank you! . . . . . . . . . . . . . . . . . . . . . About this manual . . . . . . . . . . . . . Disclaimer . . . . . . . . . . . . . . . . . . . . . . OS and internal memory . . . . . . . Factory presets . . . . . . . . . . . . . .
  • Страница 4 из 27
    4 | Nord Electro 4D User Manual OS v1.1x 1 Introduction Thank you! OS and internal memory We’d first like to thank you for purchasing the Nord Electro 4D. Our goal when we developed the Nord Electro instruments was to create the best emulations of traditional electromechanical keyboard instruments
  • Страница 5 из 27
    Chapter 2 Overview 2 Overview The front panel of the Nord Electro 4D has four main areas, Organ, Piano, Program and Effects. We’ll familiarize ourselves briefly with the panel here and describe the functions in detail in the following chapters. On the left part of the panel is the Master Level
  • Страница 6 из 27
    6 | Nord Electro 4D User Manual OS v1.1x 3 Connections CONTROL PEDAL ROTOR PEDAL SUSTAIN PEDAL USB MIDI OUT MIDI IN MONITOR IN RIGHT OUT LEFT OUT MONO HEADPHONES Audio connections MIDI Connections Headphones MIDI In This is where you connect a ¼" stereo connector from a pair of headphones. MIDI
  • Страница 7 из 27
    Chapter 3 Connections Sustain Pedal Pedal Connections CONTROL PEDAL ROTOR PEDAL SUSTAIN PEDAL USB MIDI OUT ¼" connector for a switch type pedal. When a connected pedal is operated, the notes you play will be sustained. MIDI IN MONITOR IN RIGHT OUT LEFT OUT MONO HEADPHONES Rotor Pedal ¼" connector
  • Страница 8 из 27
    8 | Nord Electro 4D User Manual OS v1.1x 4 Getting Started Let’s take a few minutes to get familiar with the Electro 4D. The user interface is designed to be as intuitive as possible, and to perform as well as you do in a live situation. We hope that you soon will feel confident in using it, and by
  • Страница 9 из 27
    Chapter 4 Getting Started Use the Model selector buttons to select one of the samples that are included in the Electro 4D from the factory. 5 Press the Samp Env button repeatedly. This will cycle through the four options for the sample’s attack and velocity settings. 6 Press and hold Shift and the
  • Страница 10 из 27
    10 | Nord Electro 4D User Manual OS v1.1x Storing a program Adding effects If you are happy with a change to a program that you have made, you should probably store the program. 1 Select the program number 1.2 which is a Grand Piano with a hint of reverb. 1 2 Turn on Effect 2 (the On LED should be
  • Страница 11 из 27
    Chapter 5 Nord Electro 4D Reference 5 Nord Electro 4D Reference Master level knob This control sets the overall output level of the Electro 4D, at the line and the headphone outputs. This is not a programmable control. If you want to set an output level for a particular program, this can be
  • Страница 12 из 27
    12 | Nord Electro 4D User Manual OS v1.1x Rotary Speed Percussion The rotary speaker speed is controlled with the rotary speed buttons or with an external pedal connected to the rotor pedal input on the rear panel. The Percussion effect adds extra attack to the B3 sound by having a single envelope
  • Страница 13 из 27
    Chapter 5 Nord Electro 4D Reference Additional MIDI keyboard Clavinet sound You can connect an additional MIDI keyboard to the Electro 4D to use the organ in a dual manual fashion, with the external keyboard operating as the lower manual. 1 Connect the external MIDI keyboard’s MIDI out to the
  • Страница 14 из 27
    14 | Nord Electro 4D User Manual OS v1.1x Samp Env When the Samp Lib type is active, the Samp Env LEDs and button can be used to set a desired velocity response and attack and release time behavior that affects the playback of the samples. When none of the Attack LEDs are lit, the sample playback
  • Страница 15 из 27
    Chapter 5 Nord Electro 4D Reference If the Live memory is selected and you decide you wish to store the settings permanently as a program you can do so using the standard methods (see above). You can also store programs into the Live memory location, in which case the program settings will replace
  • Страница 16 из 27
    16 | Nord Electro 4D User Manual OS v1.1x Comp is a compressor that will even out the dynamics of what you play, making low level sounds louder and high level sounds lower in volume. This produces a tight, punchy sound and makes the overall level easier to control in a live mix situation. When this
  • Страница 17 из 27
    Chapter 6 The Menus 6 The Menus Any settings that you change in the System, MIDI, B3 or Rotary menu will take immediate effect on a global basis, and will be stored until you change them the next time. Enter the menus by pressing and holding Shift and the System, MIDI, B3 or Rotary button (Prog 1,
  • Страница 18 из 27
    18 | Nord Electro 4D User Manual OS v1.1x 10 - Ctrl Pedal Mode 4 - Lower Channel A connected control pedal can be used to control several things. It can be used as a solitary organ swell pedal (swell is a combination of volume and frequency control), as a combined organ swell/volume pedal for the
  • Страница 19 из 27
    Chapter 6 The Menus B3 Menu Rotary Menu 1 - Tonewheel Mode 1- Rotary Model Sets the level of tonewheel crosstalk and cable leakage artifacts of the B3 organ model. There is one rotary model available, with two separate microphone positions. The 122 is modeled with the microphones placed
  • Страница 20 из 27
    20 | Nord Electro 4D User Manual OS v1.1x 7 Nord Sound Manager Nord Sound Manager The Nord Sound Manager is the application that allows you to organize the various memory areas, the partitions in the Nord Electro 4D. It is also used to download pianos or programs to the Nord Electro 4D or to upload
  • Страница 21 из 27
    Chapter 8 MIDI functions 8 MIDI functions About the MIDI implementation The following MIDI messages can be transmitted and received from the Nord Electro 4D: Nord Electro 4D with a sequencer Note On/Off Connections • Note On and Note Off messages are transmitted and received. 1 Connect the MIDI
  • Страница 22 из 27
    22 | Nord Electro 4D User Manual OS v1.1x Program and Controller dumps To dump a Program SysEx, or MIDI Controller data via MIDI, either to another Nord Electro 4D or for recording the data into another MIDI device, proceed as follows: Sending program dumps 1 Connect the MIDI OUT on the Nord
  • Страница 23 из 27
    Chapter 8 MIDI functions MIDI Implementation Chart Function Transmitted Recognized Basic Channel 1 - 16 1 - 16 Default Channel 1 - 16 1 - 16 Default Mode 3 Mode 3 Message X X 0-127 0-127 Mode Altered Note Number True Voice Velocity Note ON O, v= 1 - 127 O, v= 1 - 127 Note Off O, v= 1 - 127 O, v= 1
  • Страница 24 из 27
    24 | Nord Electro 4D User Manual OS v1.1x 9 Index Index K S Key Bounce 19 Key Click Level 19 A Auto-Panning 15 A-Wa 15 L LED 14 Left Out 6 Live 10 Local 18 Lower Channel 18 Lower Manual 12 B B3 11 B3 Menu 19 Balance Bass/Horn 19 Bass Rotor 19 M C Master level 11 Memory Protect 17 MIDI 18 MIDI
  • Страница 25 из 27
    FCC Information (U.S.A.) 1. IMPORTANT NOTICE: DO NOT MODIFY THIS UNIT! This product, when installed as indicated in the instructions contained in this manual, meets FCC requirements. Modifications not expressly approved by Clavia may void your authority, granted by the FCC, to use the product. 2.
  • Страница 26 из 27
  • Страница 27 из 27