20
o
v
A
o
w
c
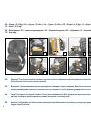
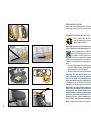
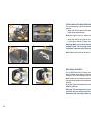
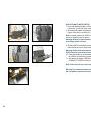
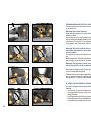
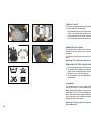
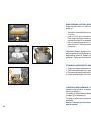
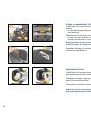
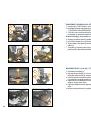
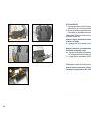
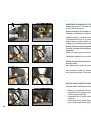
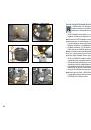
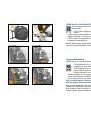
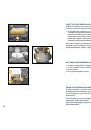
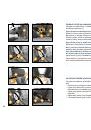
isofiX-ConneCt moDifiCation
7. Press the adjusting handle (c) of the main frame (w) and pull out the ISOfIX
connectors (o) until you feel a resistance.
8. Simultaneously hold the adjusting handle (c) and release the two snap-fits (A) with your
fingers or the aid of a screw driver.
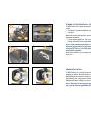
10. Press the handle (v) situated centrally on the bottom of the seat cushion (d) and push
the ISOfIX connectors (o) into the seat cushion until they are completely hidden.
11. We refer to the section “INSTALLING Of THE CHILD SEAT WITH THE ISOfIX-
CONNECT SYSTEM” for further installation steps.
9. Shift the ISOfIX connectors (o) into the designed chamber on the bottom side of the
seat cushion (d) until you feel a resistance.
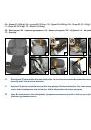
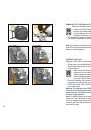
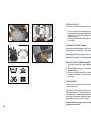
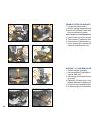
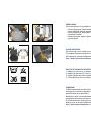
note!
In correct position, the ISOfIX connectors (o) release automatically from the main
frame (w), simply by force of gravity.
note!
Please keep all spare parts together and store them properly.
Warning! observe a minimum drop height to avoid damaging parts of the child seat
or hurting yourself or others.
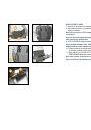
Warning! Please make sure that the adjustment and fixation teeth are on top of the
isofiX Connect arms before mounting to the booster seat.
Warning! for reassembly please proceed with these steps in reverse order. Check
the user guide in advance to make sure no parts are missing.