20
Status Indicator Information, Troubleshooting, and Specifications
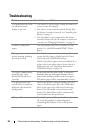
Troubleshooting
Problem
Possible Causes and Solutions
The printer does not turn
on when the power
button is pressed.
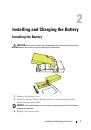
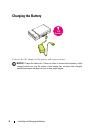
1 The battery is out of charge. Charge the battery or
connect to the AC adapter.
2 The battery is not inserted correctly. Ensure that
the battery is inserted correctly (see "Installing the
3 The AC adapter is not connected to the printer
correctly. Ensure that the AC adapter is connected
correctly (see "Charging the Battery" on page 8).
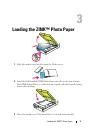
Unable to load photo
paper.
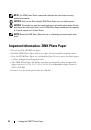
The photo papers may not be suitable for your
printer. Use only Dell-branded ZINK™ Photo
Papers.
The paper jammed
before printing (nothing
has been ejected).
Check if there is paper in the media tray. If so,
ensure that the paper is loaded correctly. If not,
load a new pack of ZINK Photo Paper.
Check if the photo paper is bent or wrinkled. If so,
replace with a new photo paper. Ensure that it is
loaded correctly (see "Important Information:
ZINK Photo Paper" on page 10).
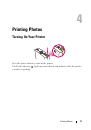
The paper jammed while
printing (part of the
photo has already been
ejected).
Do not pull out the photo paper. It will cause
hardware damage and expire warranty. Please
turn off the printer, and then turn it on again.
The photo paper will be automatically ejected.
The printed photo has
streaks (lines or marks of
different color from the
background).
Turn off the printer. Open the media cover and
remove the photo paper. Place the ZINK Smart
Sheet in the paper tray with its barcode facing
down. Close the media cover and turn on the
printer. The Smart Sheet will be automatically
ejected and cleans the print head.
Other problems
Turn off the printer. If the printer does not turn
off,
reset the printer by removing and
reinserting the battery
. Turn on the printer
again.