34007776EN/AD - Page 12
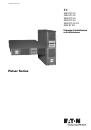
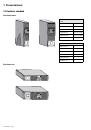
2. Installation
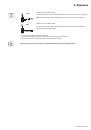
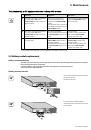
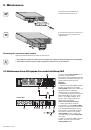
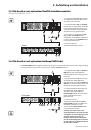
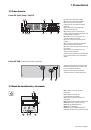
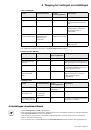
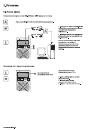
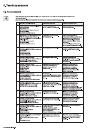
HotSwap MBP-module operation
UPS start-up with the HotSwap MBP module
1 - Check that the UPS is correctly connected to the
HotSwap MBP
module.
2 - Set switch
(53)
to the Normal position.
3 - Start the UPS by pressing the ON/OFF button
(27)
on the UPS control panel.
The load is supplied by the UPS.
LED
(51)
"UPS ON - OK to switch" on the
HotSwap MBP
module goes ON.
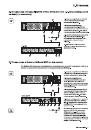
HotSwap MBP-module test
1 - Set switch
(53)
to the Bypass position and check that the load is still supplied.
2 - Set switch
(53)
back to the Normal position.
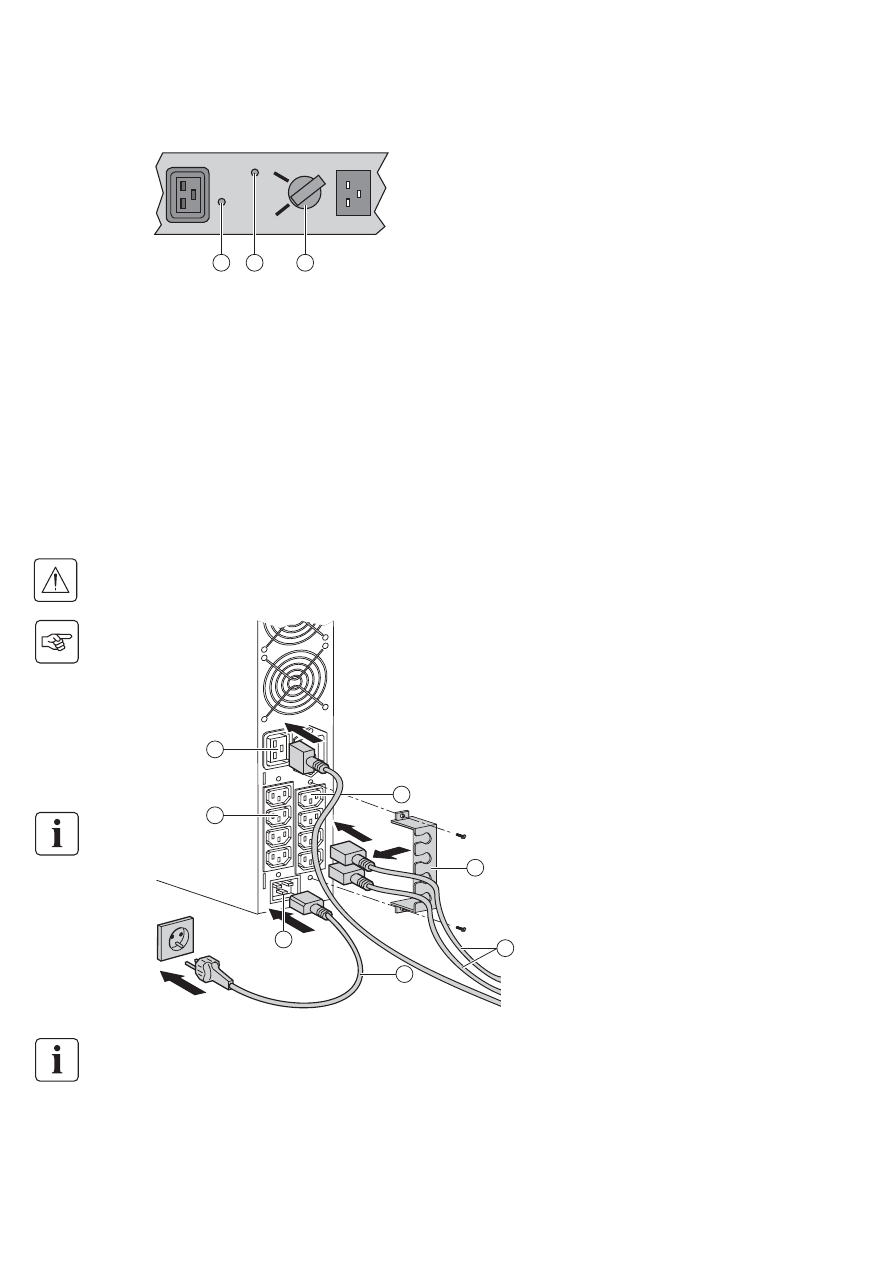
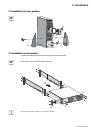
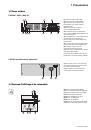
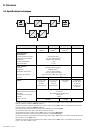
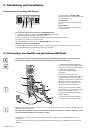
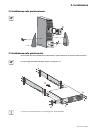
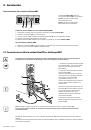
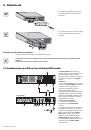
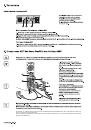
2.7 UPS connection without a FlexPDU or HotSwap MBP module
The
HotSwap MBP
module has a rotary
switch
(53)
with two positions:
Normal
-
the load is supplied by the UPS,
Bypass
-
the load is supplied directly by
the AC-power source.
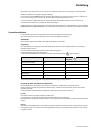
Check that the indications on the name plate located on the back of the UPS correspond to the AC-power source
and the true electrical consumption of the total load.
1 - Connect the supplied cable
(31)
(250 V -
16 A) to the socket
(10)
, then to the AC-
power source.
2 - Connect the loads to the UPS using the
cables
(32)
.
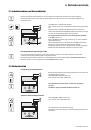
It is preferable to connect the priority loads
to the four outlets marked
(9)
and the non-
priority loads to the four outlets marked
(8)
that can be programmed in pairs (1 and 2).
Connect any high-power devices to the 16
A outlet
(7).
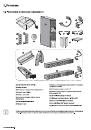
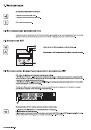
To program shutdown of outlets
(8)
during
operation on battery power and thus
optimise the available backup time, the
EATON communication software is
required.
3 - Fit the connection securing system
(35)
that prevents the plugs from being pulled
out accidentally.
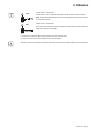
Note.
The UPS charges the battery as soon as it is connected to the AC-power source, even if button
(27)
is not
pressed.
Once the UPS is connected to the AC-power source, eight hours of charging are required before the battery can
supply the rated backup time.
EX 3000 XL: at least one additionnal EXB battery module must be connected to the UPS because it does not have
internal batteries.
Refer to EXB battery module installation manual (doc n° 34008167) for further information about connections.
By-p
ass
Normal
UPS ON - OK to switch
BY
P
ASS SWITCH
51
52
53
10
8
9
31
32
35
7
 1
1
 2
2
 3
3
 4
4
 5
5
 6
6
 7
7
 8
8
 9
9
 10
10
 11
11
 12
12
 13
13
 14
14
 15
15
 16
16
 17
17
 18
18
 19
19
 20
20
 21
21
 22
22
 23
23
 24
24
 25
25
 26
26
 27
27
 28
28
 29
29
 30
30
 31
31
 32
32
 33
33
 34
34
 35
35
 36
36
 37
37
 38
38
 39
39
 40
40
 41
41
 42
42
 43
43
 44
44
 45
45
 46
46
 47
47
 48
48
 49
49
 50
50
 51
51
 52
52
 53
53
 54
54
 55
55
 56
56
 57
57
 58
58
 59
59
 60
60
 61
61
 62
62
 63
63
 64
64
 65
65
 66
66
 67
67
 68
68
 69
69
 70
70
 71
71
 72
72
 73
73
 74
74
 75
75
 76
76
 77
77
 78
78
 79
79
 80
80
 81
81
 82
82
 83
83
 84
84
 85
85
 86
86
 87
87
 88
88
 89
89
 90
90
 91
91
 92
92
 93
93
 94
94
 95
95
 96
96
 97
97
 98
98
 99
99
 100
100
 101
101
 102
102
 103
103
 104
104
 105
105
 106
106
 107
107
 108
108
 109
109
 110
110
 111
111
 112
112
 113
113
 114
114
 115
115
 116
116
 117
117
 118
118
 119
119
 120
120
 121
121
 122
122
 123
123
 124
124
 125
125
 126
126
 127
127
 128
128
 129
129
 130
130
 131
131
 132
132
 133
133
 134
134
 135
135
 136
136
 137
137
 138
138
 139
139
 140
140
 141
141
 142
142
 143
143
 144
144
 145
145
 146
146
 147
147
 148
148
 149
149
 150
150
 151
151
 152
152
 153
153
 154
154
 155
155
 156
156
 157
157
 158
158
 159
159
 160
160
 161
161
 162
162
 163
163
 164
164
 165
165
 166
166
 167
167
 168
168
 169
169
 170
170
 171
171
 172
172