17
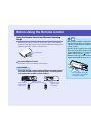
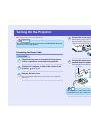
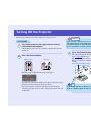
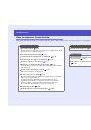
Connecting to a Computer
Projecting Images from the Computer
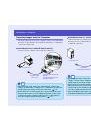
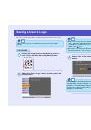
The shape and specifications of the computer's monitor port will determine
what type of cable should be used. Check the following to see which type
of port your computer has.
Use the accessory computer cable to make the connection.
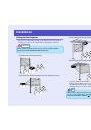
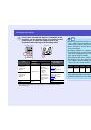
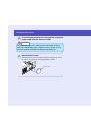
Some workstation-type computers have a 13w3 monitor port.
In such cases, use a commercially-available 13w3
⇔
D-Sub 15-pin cable
to make the connection.
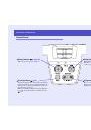
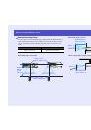
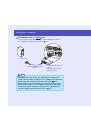
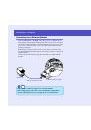
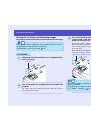
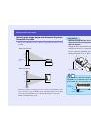
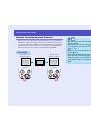
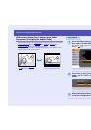
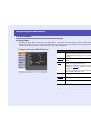
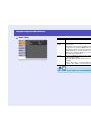
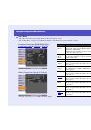
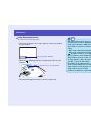
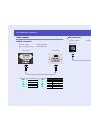
If the Monitor Port is a Mini D-Sub 15-pin Port
Computer cable
(accessory)
To monitor port
To [Computer1/Component
Video1]
or [Computer2/Component
Video2] port (blue)
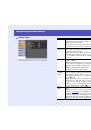
TIP
• After projection starts, change the "Input Signal" setting in the
"Image" menu to either "Computer1" or "Computer2" to match the
signals from the port being used for the connection.
• If more than one external component is connected to the projector,
after projection starts, use the [Computer1/2] button on the remote
control or the [Source] button on the projector's control panel to
select the Computer port as the input source.
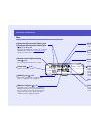
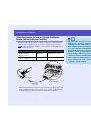
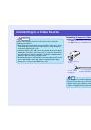
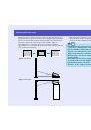
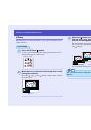
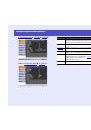
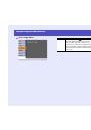
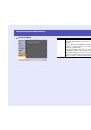
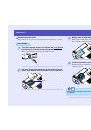
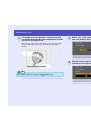
If the Monitor Port is a 13w3 Port
13w3 cable
(commercially-available)
To monitor port
To [Computer1/Component
Video1]
or [Computer2/Component
Video2] port (blue)
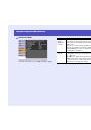
TIP
• After projection starts, change the "Input Signal" setting in the
"Image" menu to either "Computer1" or "Computer2" to match the
signals from the port being used for the connection.
• If more than one external component is connected to the projector,
after projection starts, use the [Computer1/2] button on the remote
control or the [Source] button on the projector's control panel to
select the Computer port as the input source.
• Some workstations may require a special cable. Consult the
workstation manufacturer for further details.
 1
1
 2
2
 3
3
 4
4
 5
5
 6
6
 7
7
 8
8
 9
9
 10
10
 11
11
 12
12
 13
13
 14
14
 15
15
 16
16
 17
17
 18
18
 19
19
 20
20
 21
21
 22
22
 23
23
 24
24
 25
25
 26
26
 27
27
 28
28
 29
29
 30
30
 31
31
 32
32
 33
33
 34
34
 35
35
 36
36
 37
37
 38
38
 39
39
 40
40
 41
41
 42
42
 43
43
 44
44
 45
45
 46
46
 47
47
 48
48
 49
49
 50
50
 51
51
 52
52
 53
53
 54
54
 55
55
 56
56
 57
57
 58
58
 59
59
 60
60
 61
61
 62
62
 63
63
 64
64
 65
65
 66
66
 67
67
 68
68
 69
69
 70
70
 71
71
 72
72
 73
73
 74
74
 75
75
 76
76
 77
77
 78
78
 79
79
 80
80
 81
81
 82
82
 83
83
 84
84
 85
85
 86
86
 87
87
 88
88
 89
89
 90
90
 91
91
 92
92
 93
93
 94
94
 95
95
 96
96
 97
97
 98
98
 99
99
 100
100
 101
101
 102
102
 103
103
 104
104
 105
105
 106
106
 107
107