4
proper room ventilation. This process will remove any agents and odors remaining
in the oven from the factory treatment.
•
Be sure that the power cords of adjacent or other appliances do not come into
contact with burner, oven door or other hot parts of the range while in operation.
включенной в течение 30 минут. Выполнив данную операцию, а затем
тщательно проветрив помещение, устраните тем самым из духовки запах от
консервации.
•
Убедитесь, что подводящие шнуры иных приборов не будут иметь контакт с
варочным столом или другими горячими частями плиты.
The manufacturer declines responsibility for any injuries to persons or
damages to the appliance resulting from improper usage of the appliance.
В случае несоблюдения нормативных указаний и рекомендаций
настоящей инструкции, производитель не несет ответственность в случае
возникших дефектов и случайных травм.
ATTENTION!
Before first using of oven remove all stickers from oven door.
ВНИМАНИЕ!
Перед первым использованием духовки удалить все наклейки из духовки двери.
OPERATION
OБСЛУЖИВАНИЕ ПЛИТЫ
CAUTION:
•
The appliance is not a toy and may be operated only by adult persons in
accordance with these instructions. Do not leave small children without supervision
in a room where the appliance is installed.
•
Gas cooker is an appliance whose operation requires supervision.
•
Never close the lid while the hob burners or oven burner ar still in operation.
•
The maximum baking pan load inserted in guides is 3kg, and the maximum baking
pan load placed on a grid is 7kg.
•
The baking plates and roasting pans are not designed for a long-term storage of
food (exceeding 48 hours). For longer storage use convenient dishes.
ПРЕДУПРЕЖДАЕМ!
•
Плиту могут обслуживать только взрослые! В помещении с установленной газовой
плитой недопустимо оставлять детей без присмотра!!!
•
Газовая плита - прибор, который требует постоянного внимания в период его
эксплуатации.
•
Не закрывайте крышку плиты, если плита работает, или пока горелки горячие.
•
Перед тем, как открыть крышку варочного стола, вытрите её, если это необходимо,
чтобы устранить с её поверхности случайно разлитую жидкость.
•
Вес противня с приготавливаемым блюдом, вставляемого в пазы или решётки
боковых стенок духовки, может быть максимально 3 кг, a устанавливаемого на
решётку максимально 7 кг.
•
Противни из принадлежностей плиты не предназначены для длительного хранения
пищи (не дольше 48 часов). Для длительного хранения пищи используйте
соответствующую для этой цели посуду.
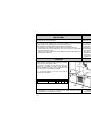
COOKING HOB
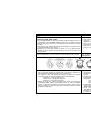
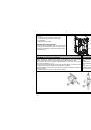
LIGHTING THE HOB BURNERS
Press the appropriate burner control knob slightly towards the appliance and turn it
anti-clockwise to the „MAXIMUM POWER“ position. Light the gas using a match or
any gas ignition device.
ВАРОЧНАЯ ПЛИТА
ЗАЖИГАНИЕ ГОРЕЛКИ
Повернуть кнопку влево на позицию «МАКСИМАЛЬНАЯ МОЩНОСТЬ» и зажечь
газ спичкой или зажигалкой.
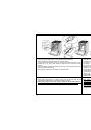
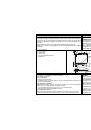
LIGHTING THE BURNERS WITH HIGH VOLTAGE IGNITION
KNOB
•
Press the appropriate burner control knob slightly towards the appliance and turn it
anti-clockwise to the „MAXIMUM POWER“ position.
•
Then push the knob towards the panel to a limit position.
•
High voltage ignition device starts firing the burner.
ЗАЖИГАНИЕ ГОРЕЛКИ ВЫСОКОВОЛЬТНОЙ ЗАЖИГАЛКОЙ
(выключатель под ручкой крана горелки)
•
Легко нажмите на ручку крана горелки и поверните её влево в положение
“МАКСИМАЛЬНАЯ МОЩНОСТЬ”.
•
Затем прижмите ручку к панели управления до упора и подержите прижатой,
пока от искры загорится газ.
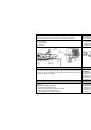
LIGHTING THE BURNERS WITH HIGH VOLTAGE GAS
IGNITION KNOB
Press the appropriate burner control knob slightly towards the appliance and turn it
anti-clockwise to the „MAXIMUM POWER“ position. Now use another hand and press
ЗАЖИГАНИЕ ГОРЕЛКИ C ПОМОЩЬЮ
ЭЛЕКТРОРОЗЖИГА
Легко нажать на кнопку и поворачивать влево на позицию «максимальная
мощность». Второй рукой нажать на выключатель высоковольтного зажигания,
пока искра не воспламенит горелку у плит, оборудованных выключателем