11
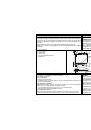
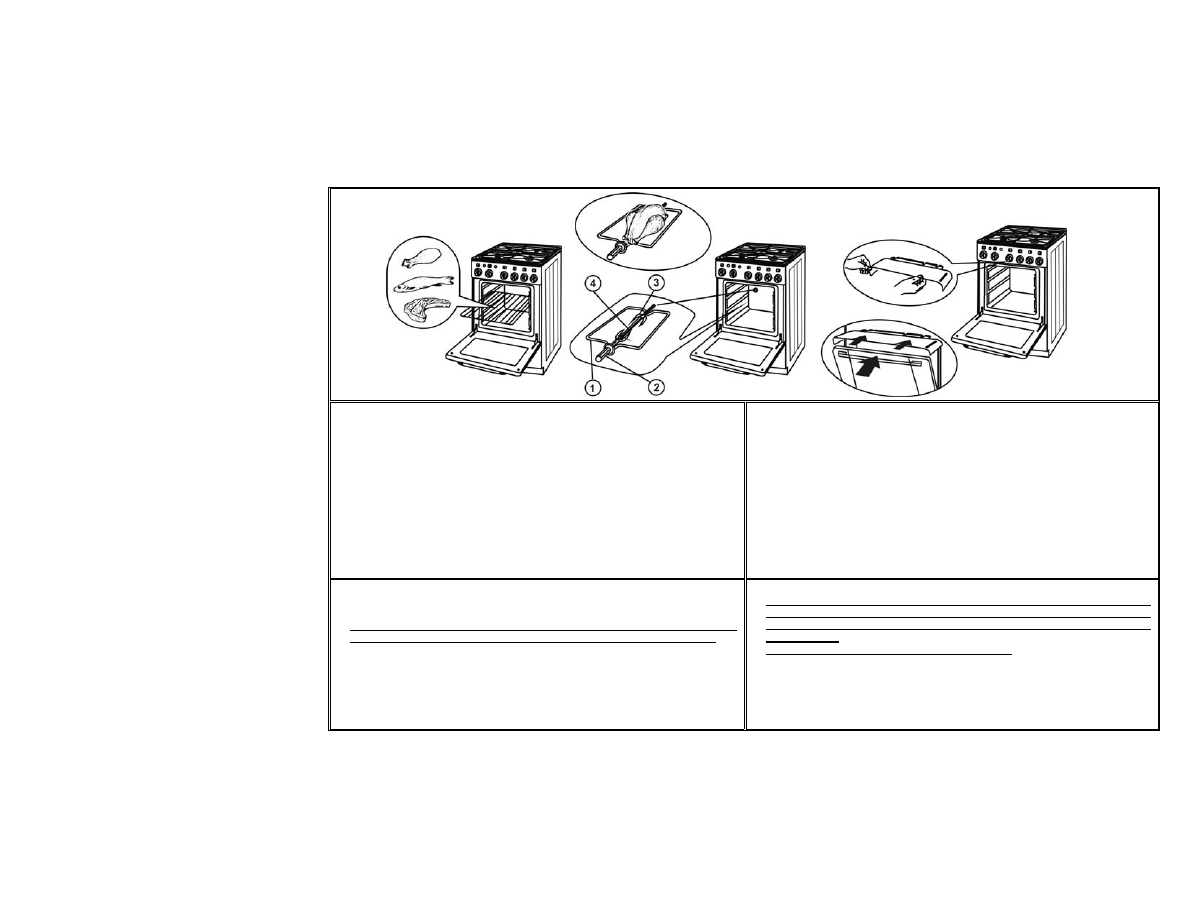
ASSEMBLING GRILLING EQUIPMENT
•
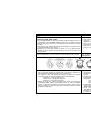
Insert roasting spit support into the third guide from the oven bottom.
•
Place the dripping tray into first guide from the oven bottom.
•
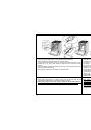
Fix the roast on the spit step by step, by first fixing the nearer fork then the meat,
followed by the far fork in such manner to keep the food in balance for easy
rotation.
•
Place the spaded roast into the spit support (front roller into the guide and the back
end into the back wall opening).
•
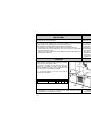
Start grilling by switching on the relevant control panel knob.
ПОРЯДОК СБОРКИ ПОВОРОТНОГО ВЕРТЕЛА:
•
Подставку поворотного вертела вставьте в третьи от дна духовки пазы
боковых стен.
•
В первые от дна духовки пазы боковых стен установите решётку с
противнем.
•
На вертел (4) поочерёдно насадите вилку (3), приготовленные для гриля
продукты, затем другую вилку.
•
Продукты разместите на вертеле равномерно и вилками закрепите так,
чтобы вертел мог свободно вращаться.
•
Подготовленный таким образом вертел положите направляющими пазами в
углубления подставки и продвигая внутрь духовки, одновременно поверните
вертел так, чтобы его конец попал в отверстие поводкового
патрона
электромикродви- гателя на задней стене духовки.
•
Поворотный вертел приводится в движение выключателем.
NOTICE:
•
When grilling large roasts (e.g. chicken) make sure that the food fixed on the
roasting spit is well balanced, so that the spit rotates with ease.
•
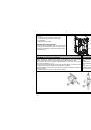
When grilling with the oven door opened, always use the protection sheet to
shield the control panel, otherwise the control knobs might get damaged.
ВНИМАНИЕ!
•
При гриле на поворотном вертеле с открытой дверцей духовки
обязательно должна быть установлена защитная пластина ручек,
расположенных на панели управления, чтобы не произошло их
повреждение.
•
При готовке на гриле дверка духовки открыта.
•
При гриле объёмных продуктов (куры и др.) следите за тем, чтобы продукты
на вертеле были размещены равномерно и вертел мог свободно вращаться.