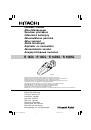
9
English
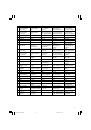
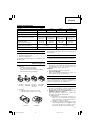
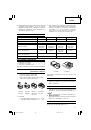
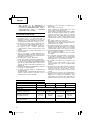
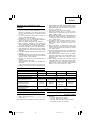
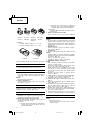
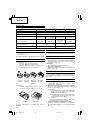
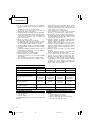
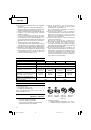
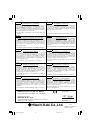
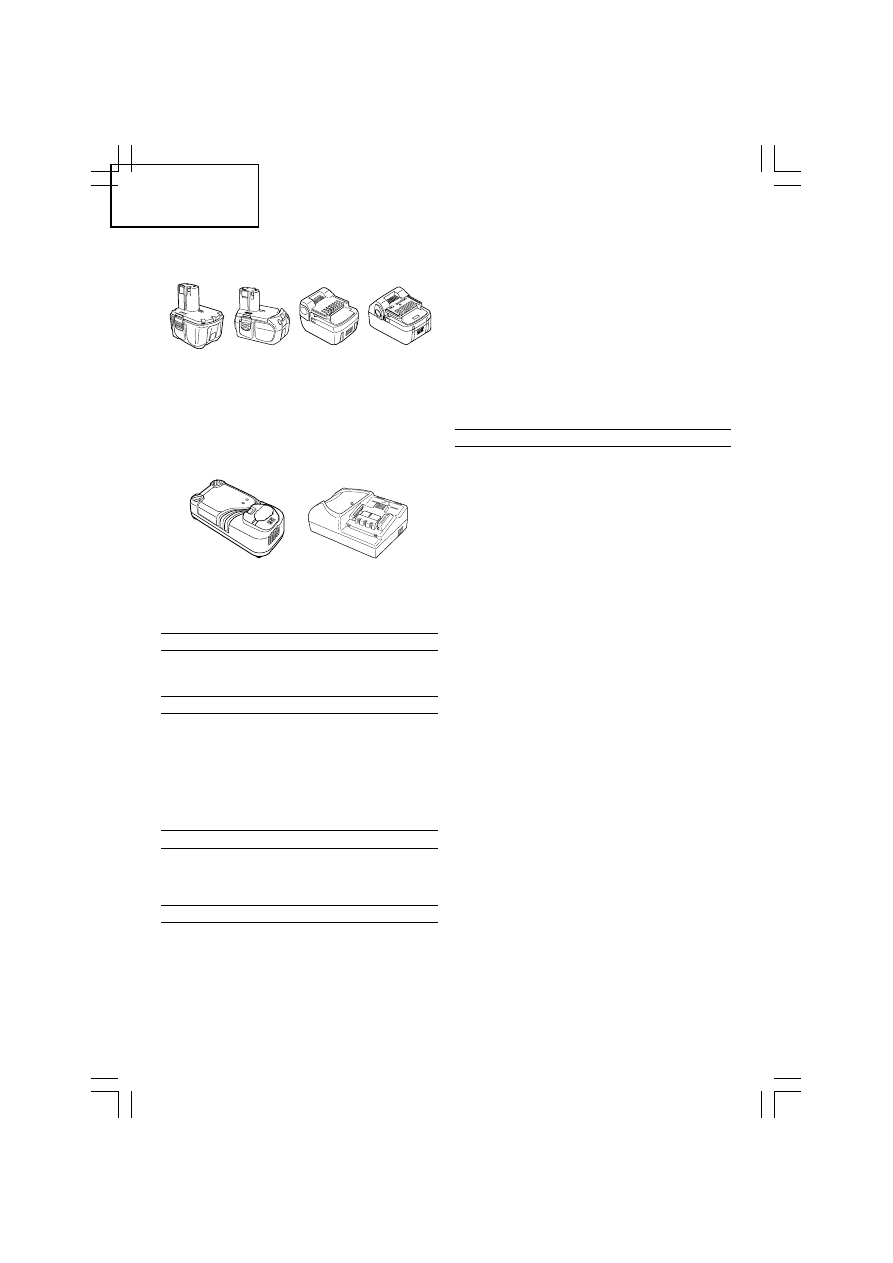
BCL1415
BCL1815
BSL1415
BSL1815X
BCL1430
EBM1830
BSL1415X
BSL1830
BSL1430
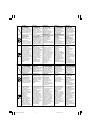
2. Charger
䡬
UC18YRL (Charging voltage: 7.2 V – 18 V)
䡬
UC18YRSL (Charging voltage: 7.2 V – 18 V)
UC18YRL
UC18YRSL
Optional accessories are subject to change without
notice.
APPLICATIONS
䡬
Light-duty vacuuming of dry surfaces
䡬
Light-duty vacuuming of damp or wet surfaces
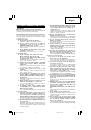
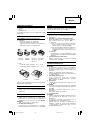
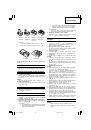
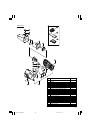
BATTERY REMOVAL/INSTALLATION
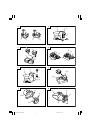
1. Battery removal
Hold the handle tightly and push the battery latch
(2 pcs.) to remove the battery (see
Figs. 1, 2, 4
and
5
).
CAUTION
Never short-circuit the battery.
2. Battery installation
Insert the battery while observing its polarities (see
Figs. 1, 2, 4
and
5
).
CHARGING
For rechargeable batteries, please charge in according
to the handling instructions of the charger which you are
using. (
Figs. 3
and
6)
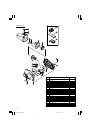
PRIOR TO OPERATION
1. Setting up and checking the work environment
Check if the work environment is suitable by
following the precautions.
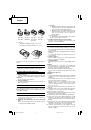
2. Mounting and dismounting the water guard and
filter
Before using the appliance, check that the filter is
securely mounted. (
Figs. 7
and
8
)
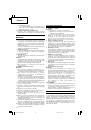
(1) Mounting
1
Match the outside diameter of the filter to the
inside diameter of the water guard and insert
as far as the filter ring will go. (
Fig. 7
)
2
Match the shape of the water guard (with the
filter attached) to the shape of the hole in the
dust case and insert as far as it will go (6
points). (
Fig. 8
)
(2) Dismounting
To dismount the water guard and the filter, follow
the above procedures in reverse.
3. Attaching and removing the suction opening
Insert the suction opening into the suction port of the
appliance as required. (
Fig. 10
)
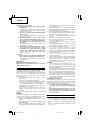
HOW TO USE THE CORDLESS CLEANER
CAUTION
䡬
To prevent accidents when installing or removing
the rechargeable battery, make sure that the appliance
is switched off.
䡬
Make sure that the rechargeable battery is properly
installed.
If not properly installed, the battery may fall out,
causing injury.
1. Switch operation
Flip the switch towards you to start operation and
back to stop operation. (
Fig. 11
)
2. Vacuuming water
Attach the squeegee nozzle as required. (
Figs. 10
and
12
)
CAUTION
䡬
The maximum line on the dust case indicates the
maximum amount of water that can be vacuumed.
Do not vacuum beyond this line. (
Fig. 12
)
䡬
Empty the water immediately after vacuuming.
䡬
Do not carry the appliance with water in the dust
case.
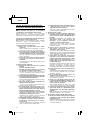
3. Emptying the dust case
CAUTION
䡬
To prevent accidents, make sure the power is switched
off and remove the rechargeable battery from the
appliance.
䡬
Do not subject the dust case to strong impacts as this
may cause deformation or damage.
䡬
Empty the dust case frequently and keep the
appliance, filter, etc. clean. Failure to do so may
reduce vacuuming efficiency or cause malfunction of
the motor or odor.
(1) Press the release button and remove the dust case.
(
Fig. 9
)
(2) Hold the knob on the water guard (with the filter
attached) to remove it from the dust case. (
Fig. 8
)
(3) Empty the dust case. (
Fig. 13
)
(4) Take hold of the knob on the filter and remove the
filter from the water guard. (
Fig. 7
)
(5) Lightly tap the filter to remove all the dust. (
Fig. 14
)
(6) Fit the filter to the water guard. Match the outside
diameter of the filter to the inside diameter of the
water guard and insert as far as the filter ring will go.
(
Fig. 7
)
(7) Match the shape of the water guard (with the filter
attached) to the shape of the hole in the dust case
and insert as far as it will go (6 points). (
Fig. 8
)
(8) Insert the projecting part of the appliance into the
hole in the dust case and fit the dust case to the
appliance. (
Fig. 9
)
01Eng_R14DL_EE
3/20/09, 12:08
9