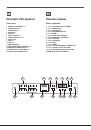
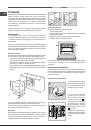
Инструкция для HOTPOINT-ARISTON 7OFKQ 1038 EC(K)RU/HA

(скачивание инструкции бесплатно)
Формат файла: PDF
Доступность: Бесплатно как и все руководства на сайте. Без регистрации и SMS.
Дополнительно: Чтение инструкции онлайн
background image

GB

9

Cooling ventilation

In order to cool down the external temperature of the oven, a cooling fan 

blows a stream of air between the control panel and the oven door, as well 

as towards the bottom of the oven door.

!

 Once cooking has been completed, the cooling fan continues to operate 

until the oven has cooled down sufficiently.

Oven light

The light comes on when the oven door is opened or when a cooking mode 

starts.

When models featuring LED INSIDE technology begin cooking, the LEDs on 

the door light up for improved illumination of all cooking levels.
The 

 button can be used to switch on the light at any time.

Residual heat indicators

The appliance is fitted with a residual heat indicator. When the oven is off, 

the “residual heat” bar on the display lights up to indicate high temperatures 

inside the oven cavity. The individual segments of the bar switch off one by 

one as the temperature inside the oven falls.
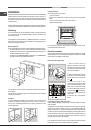
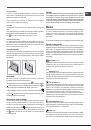
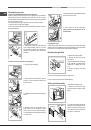
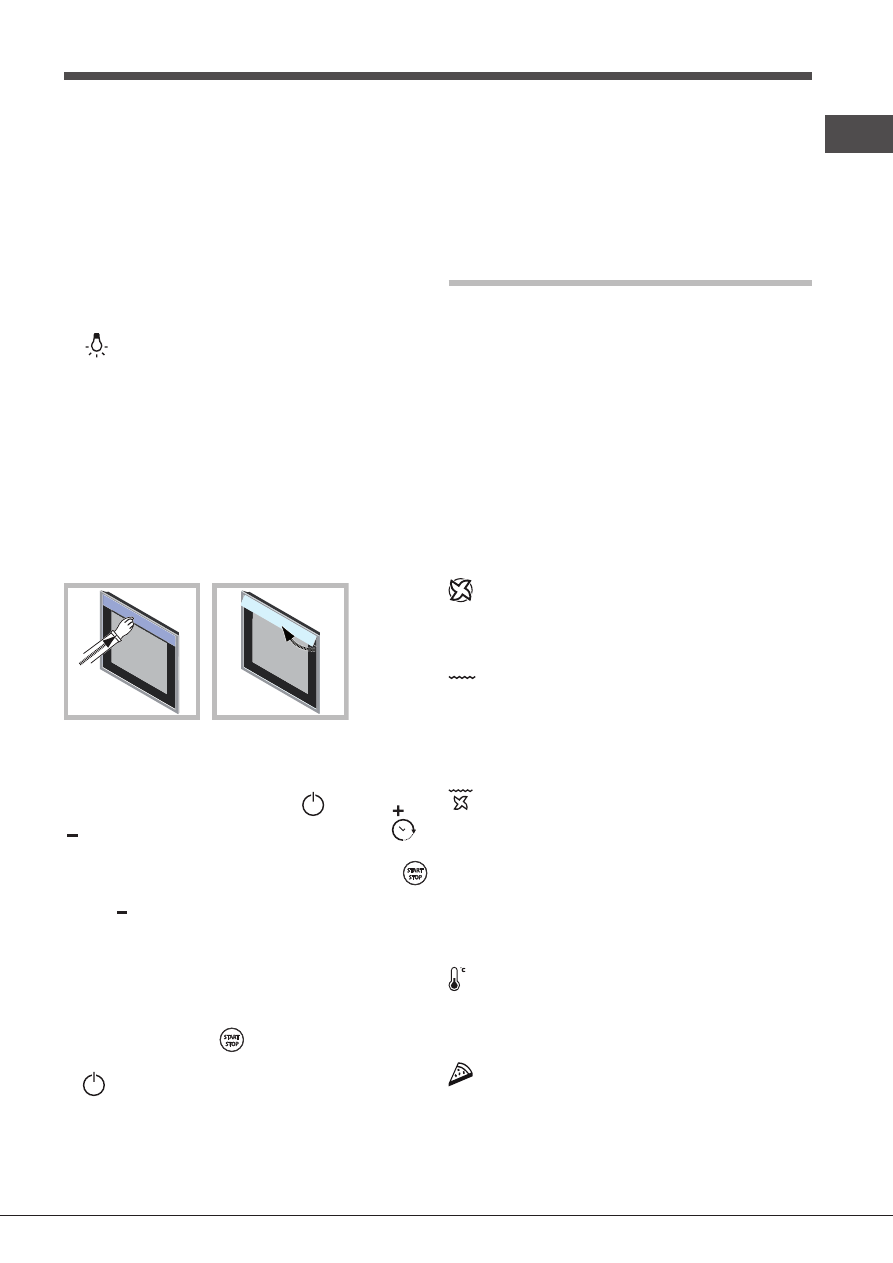
Concealed handle

Some models have a concealed handle built into the oven door. Simply press 

lightly and the push/push opening will improve your grip when opening and 

closing the oven. When you have finished using it, close it again by applying 

light pressure.

Demo mode

The oven can operate in the DEMO mode: all heating elements are 

deactivated, and the controls remain operative.
To activate DEMO mode, press and release button 

, then


buttons “ ” and 

“ ” simultaneously for 6 seconds, and then press and release button 

. A 

buzzer sounds and the TEMPERATURE display shows “dEon”.
To deactivate DEMO mode, when the oven is off press and hold button 


and button 


simultaneously for 3 seconds. A buzzer sounds and the “dEoF” 

message disappears from the display.

Restoring the factory settings

The oven factory settings can be restored to reset all selections made by 

the user (clock and customised durations). To carry out a reset, switch off 

the oven, then press and hold the button corresponding to the first manual 

cooking mode (top left) and the 

 button simultaneously for 6 seconds.  

Once the restore procedure is complete, a buzzer will sound. The first time 

the 

 button is pressed, the oven will behave as if it is being switched 

on for the first time.

Standby

This product complies with the requirements of the latest European Directive 

on the limitation of power consumption of the standby mode. If no buttons 

are pressed for 30 minutes and the control panel/door lock has not been 

activated, the appliance automatically reverts to standby mode. Standby mode 

is indicated by the high luminosity “Clock button” light. As soon as interaction 

with the machine resumes, the system’s operating mode is restored.
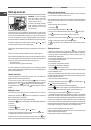
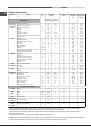
Modes

!

 In order to guarantee wonderfully soft and crunchy foodstuffs, the oven 

releases – in the form of water vapour - the humidity naturally withheld in 

the food itself.   In this way, optimal cooking results can be achieved for all 

types of food.

!

 Every time the oven is switched on, it suggests the first manual cooking mode.

Manual cooking modes

!

 All cooking modes have a default cooking temperature which may be 

adjusted manually to a value between 30°C and 250°C as desired (300°C for 

GRILL mode). Any temperature adjustments will be stored in the appliance 

memory and suggested again the next time this mode is used. If the selected 

temperature is lower than the temperature inside the oven, the text “Hot” 

appears on the TEMPERATURE display. However, it will still be possible to 

start cooking.


MULTILEVEL

 mode

All heating elements and the fan are activated. Since the heat remains constant 

throughout the oven, the air cooks and browns food in a uniform manner. A 

maximum of two racks may be used at the same time.


BARBECUE

 mode

The top heating element and the rotisserie spit (where present) are activated. 

The high and direct temperature of the grill is recommended for food which 

requires a high surface temperature. Always cook in this mode with the oven 

door closed (see “Practical cooking advice”).


FAN GRILLING

 mode

The top heating element and the rotisserie spit (where present) are activated 

and the fan begins to operate. During part of the cycle the circular heating 

element is also activated. This combination of features increases the 

effectiveness of the unidirectional thermal radiation provided by the heating 

elements through the forced circulation of the air throughout the oven. 

This helps prevent food from burning on the surface and allows the heat to 

penetrate right into the food. Always cook in this mode with the oven door 

closed (see “Practical cooking advice”).


LOW TEMPERATURE

 modes

This type of cooking can be used for proving, defrosting, preparing yoghurt, 

heating dishes at the required speed and slow cooking at low temperatures. 

The temperature options are: 40, 65 and 90°C.


PIZZA

 modes

The top and circular heating elements switch on and the fan begins to operate. 

This combination heats the oven rapidly. If you use more than one rack at a 

time, switch the position of the dishes halfway through the cooking process.

1
2
3
4
5
6
7
8
9
10
11
12
13
14
15
16
17
18
19
20
21
22
23
24
25
26
27
28
Оглавление инструкции
  • Страница 1 из 29
    7OFKQ 1038EC RU/HA 7OFK1039EN X RU/HA 7OFK1039ENS X RU/HA English Operating Instructions OVEN Contents Operating Instructions,1 Warnings,2 Assistance,3 Description of the appliance,4 Description of the appliance,5 Installation,6 Start-up and use,8 Modes,9 Precautions and tips,13 Maintenance and
  • Страница 2 из 29
    Warnings Предупреждения WARNING: The appliance and its accessible parts become hot during use. Care should be taken to avoid touching heating elements. Children less than 8 years of age shall be kept away unless continuously supervised. This appliance can be used by children aged from 8 years and
  • Страница 3 из 29
    Assistance Warning: The appliance is fitted with an automatic diagnostic system which detects any malfunctions. Malfunctions are signalled through messages of the following type: “F—” followed by numbers. Call for technical assistance in the event of a malfunction. Before calling for Assistance: •
  • Страница 4 из 29
    Description of the appliance Описание изделия Overall view Общии вид 1 2 3 4 5 6 7 8 9 1 2 3 4 5 6 7 8 9 POSITION 1 POSITION 2 POSITION 3 POSITION 4 POSITION 5 GUIDES for the sliding racks DRIPPING PAN GRILL Control panel ПОЛОЖЕНИЕ 1 ПОЛОЖЕНИЕ 2 ПОЛОЖЕНИЕ 3 ПОЛОЖЕНИЕ 4 ПОЛОЖЕНИЕ 5 ВЫДВИЖНЫЕ
  • Страница 5 из 29
    Description of the appliance Описание изделия Control panel Панель управления 1 MANUAL COOKING MODE Icons 2 TEMPERATURE display 3 TEMPERATURE icon 4 DURATION icon 5 TIME display 6 END OF COOKING Icon 7 CONTROL PANEL LOCK icon 8 START / STOP 9 LIGHT icon 10 CLOCK icon 11 MINUTE MINDER Icon 12 TIME /
  • Страница 6 из 29
    Installation ! Please keep this instruction booklet in a safe place for future reference. If the appliance is sold, given away or moved, please make sure the booklet is also passed on to the new owners so that they may benefit from the advice contained within it. Centring and fixing Secure the
  • Страница 7 из 29
    Before connecting the appliance to the power supply, make sure that • the appliance is earthed and the plug is compliant with the law. • the socket can withstand the maximum power of the appliance, which is indicated on the data plate. • the voltage is in the range between the values indicated on
  • Страница 8 из 29
    GB Start-up and use Setting the minute minder WARNING! The oven is provided with a stop system to extract the racks and prevent them from coming out of the oven (1). As shown in the drawing, to extract them completely, simply lift the racks, holding them on the front part, and pull (2). ! The first
  • Страница 9 из 29
    Cooling ventilation In order to cool down the external temperature of the oven, a cooling fan blows a stream of air between the control panel and the oven door, as well as towards the bottom of the oven door. ! Once cooking has been completed, the cooling fan continues to operate until the oven has
  • Страница 10 из 29
    GB BAKING mode The rear heating element and the fan are switched on, thus guaranteeing the distribution of heat in a delicate and uniform manner throughout the entire oven. This mode is ideal for baking temperature sensitive foods (such as cakes, which need to rise). ECO mode The rear heating
  • Страница 11 из 29
    3. Once you have reached the desired end time, press the 4. Press the button again. GB button to activate the programmed mode. The and buttons will flash alternately to indicate that programming has taken place; in the time before cooking starts, the TIME display will show the duration and the
  • Страница 12 из 29
    GB Cooking advice table Modes Foods Weight (in kg) Standard guide rails Manual Multilevel* 1+1 1 1 1 Grill* Fan grilling* Low Proving / Defrosting temperature* White meringues Meat / Fish Pizza* Pizza Focaccia bread Baking* Rack position Preheating Sliding guide rails 1 and 3 2 and 4 1 and 3 2 and
  • Страница 13 из 29
    Precautions and tips ! This appliance has been designed and manufactured in compliance with international safety standards. The following warnings are provided for safety reasons and must be read carefully. General safety • The appliance was designed for domestic use inside the home and is not
  • Страница 14 из 29
    GB Cleaning the oven door 5. Rotate the pull-out hooks upwards until they touch the front of the oven. ! The door of LED INSIDE models cannot be removed. Clean the glass part of the oven door using a sponge and a non-abrasive cleaning product, then dry thoroughly with a soft cloth. Do not use rough
  • Страница 15 из 29
    D GB 3. Secure the two frames with the guide rails using the holes provided on the oven walls (see diagram). The holes for the left frame are situated at the top, while the holes for the right frame are at the bottom. 4. Finally, fit the frames on the spacers A. ! Do not place the sliding racks in
  • Страница 16 из 29
    Установка ! Важно сохранить данное руководство для его последующих консультации. В случае продажи, передачи изделия или при переезде на новое место жительства необходимо проверить, чтобы руководство оставалось вместе с изделием, для того чтобы его новыи владелец мог ознакомиться с правилами
  • Страница 17 из 29
    Подсоединение сетевого шнура изделия к сети электропитания Установите на сетевой кабель нормализованную штепсельную вилку, расчитанную на нагрузку, указанную на паспортной табличке (см. сбоку). В случае прямого подключения к сети электропитания между изделием и сетью необходимо установить
  • Страница 18 из 29
    RU Включение и эксплуатация себя (2). ВНИМАНИЕ! Духовой шкаф у к о м п л е к то ва н с и с те м о й блокировки решеток, позволяющей вынимать их из духовки не полностью (1). Для полного вынимания решеток достаточно поднять их, как показано на схеме, взяв их за передний край, и потянуть на время.
  • Страница 19 из 29
    начало приготовления в 20:30. В 19:30 прервалось энергоснабжение. При возобновлении энергоснабжения необходимо вновь выполнить программирование). ! В программах ГРИЛЬ фаза предварительного нагрева не предусмотрена. значения, что изменит все настройки, сделанные пользователем (часы и
  • Страница 20 из 29
    RU Это препятствует обгоранию поверхности продуктов, повышая проникающую способность жара. В процессе приготовления дверца духовки должна оставаться закрытой (см. «Практические рекомендации по приготовлению”). Программы НИЗКАЯ ТЕМПЕРАТУРА Этот режим приготовления служит для расстойки теста,
  • Страница 21 из 29
    Программирование приготовления ! Запрограммировать приготовление можно только после выбора программы приготовления. ! При выборе программы приготовления активируется кнопка , после чего Вы можете запрограммировать продолжительность приготовления. Задав продолжительность приготовления, активируется
  • Страница 22 из 29
    RU Таблица приготовления Программы Продукты Вес (кг) Расположение уровней Предварительный нагрев Рекомендуемая Продолжит-ть температура приготовления (°C) (минуты) стандартные выдвижные направляющие направляющие Ручной режим 2и4 2и4 2и4 1 и 2/3 2 1 или 2 2 1и3и5 1и3и5 2и4 1 и3 и3 и3 и3 и3 1 1 1
  • Страница 23 из 29
    Предосторожности и рекомендации ! Изделие спроектировано и изготовлено в соответствии с международными нормативами по безопасности. Необходимо внимательно прочитать настоящие предупреждения, составленные в целях вашеи безопасности. Общие требования к безопасности • Данное изделие предназначается
  • Страница 24 из 29
    RU • Наружные эмалированные элементы или детали из нержавеющей стали, а также резиновые уплотнения можно протирать губкой, смоченной в теплой воде или в растворе нейтрального моющего средства. Для удаления особо трудных пятен используйте специальные чистящие средства, имеющиеся в продаже. После
  • Страница 25 из 29
    Крепление комплекта выдвижных направляющих A RU Порядок монтажа выдвижных направляющих: 1. Отсоедините две рамы, сняв их с распорных элементов А (см. схему). 2. Выберите уровень, на который будет установлена выдвижная н а п р а вл я ю щ а я . П р о ве р и в направление выкатывания самой
  • Страница 26 из 29
    RU Неисправности и методы их устранения Неисправность Возможные причины Методы устранения Программа приготовления не включается. Имел место сбой в энергоснабжении. Вновь запрограммировать приготовление. Только «Кнопка Часы» включена с яркой подсветкой. Изделие находится в режиме энергосбережения.
  • Страница 27 из 29
    RU 27
  • Страница 28 из 29
    195114248.02 11/2013 - XEROX FABRIANO RU 28
  • Страница 29 из 29