IT
Istruzioni per l’uso
PIANO
Sommario
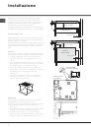
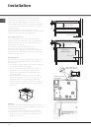
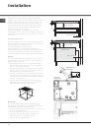
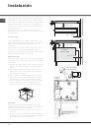
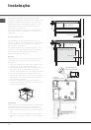
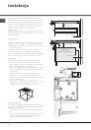
Installazione, 2-4
Posizionamento
Collegamento elettrico
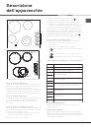
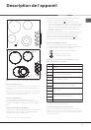
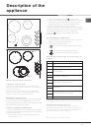
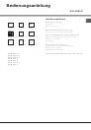
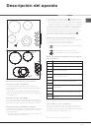
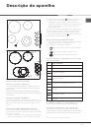
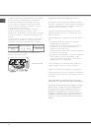
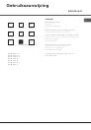
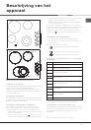
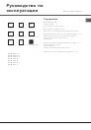
Descrizione dell’apparecchio, 5
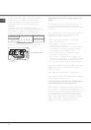
Accensione del piano vetroceramica
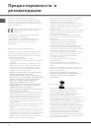
Precauzioni e consigli, 6
Consigli pratici per l’uso dell’apparecchio
Sicurezza generale
Smaltimento
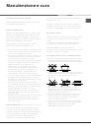
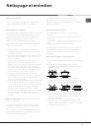
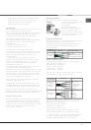
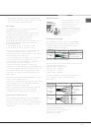
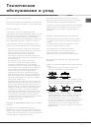
Manutenzione e cura, 7
Escludere la corrente elettrica
Pulire l’apparecchio
Smontare il piano
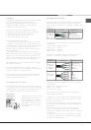
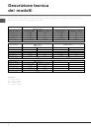
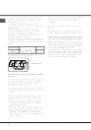
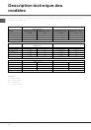
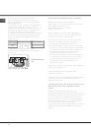
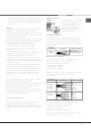
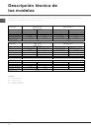
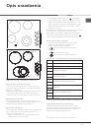
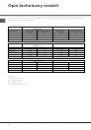
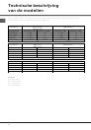
Descrizione tecnica dei modelli, 8
Italiano, 1
IT
KEM 645 D C
KEM 645 D X
KEM 646 D C
KRM 640 C
KRM 640 X
KRM 641 D X
KRM 630 C
Espanol, 33
ES
Deutsch, 25
DE
Français, 9
English,17
GB
FR
Português, 41
Nederlands, 57
PT
RS
PL
NL