GB
21
for 3 seconds: the programming will be cancelled and the
MINUTE MINDER icon will switch off.
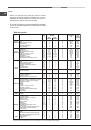
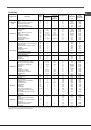
Modes
!
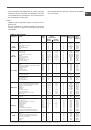
A temperature value between 60°C and MAX can be set
for all cooking modes except the following:
• BARBECUE (recommended: set only to MAX power
level)
• GRATIN (recommended: do not exceed 200°C).
TRADITIONAL OVEN
mode
When using this traditional cooking mode, it is best to use
one cooking rack only. if more than one rack is used, the
heat will be distributed unevenly.
BAKING
mode
This mode is ideal for baking temperature sensitive foods
(such as cakes, which need to rise) and for the preparation
of “bitesize pastries” on 3 shelves simultaneously.
FAST COOKING
mode
This mode is particularly suitable for cooking pre-packed
food quickly (frozen or pre-cooked). The best results are
achieved using one cooking rack only.
MULTILEVEL
mode
Since the heat remains constant throughout the oven, the
air cooks and browns food in a uniform manner. A maximum
of two racks may be used at the same time.
PIZZA
mode
This combination heats the oven rapidly by producing a
considerable amount of heat, particularly from the element
at the bottom. If you use more than one rack at a time,
switch the position of the dishes halfway through the cooking
process.
BARBECUE
mode
The high and direct temperature of the grill is recommended
for food which requires a high surface temperature. Always
cook in this mode with the oven door closed.
GRATIN
mode
This combination of features increases the effectiveness of
the unidirectional thermal radiation provided by the heating
elements through forced circulation of the air throughout the
oven. This helps prevent food from burning on the surface
and allows the heat to penetrate right into the food. Always
cook in this mode with the oven door closed.
DEFROSTING
mode
The fan located on the bottom of the oven makes the air
circulate at room temperature around the food. This is
recommended for the defrosting of all types of food, but
in particular for delicate types of food which do not require
heat, such as for example: ice cream cakes, cream or
custard desserts, fruit cakes. By using the fan, the defrosting
time is approximately halved. In the case of meat, fish
and bread, it is possible to accelerate the process using
the “multi-cooking” mode and setting the temperature to
80° - 100°C.
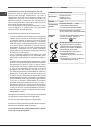
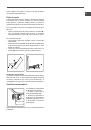
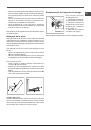
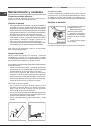
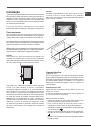
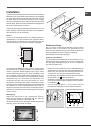
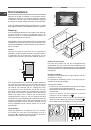
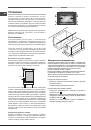
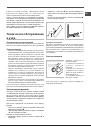
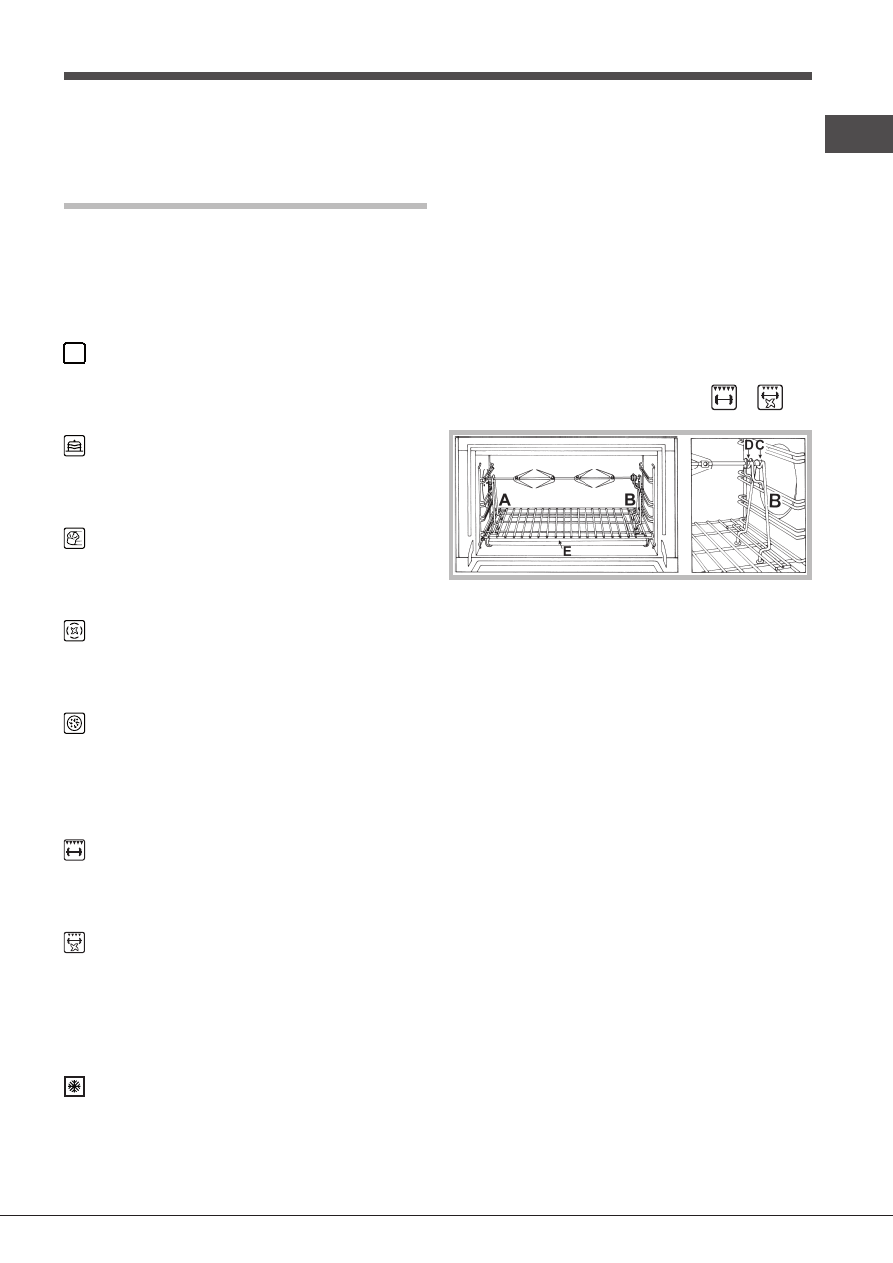
Spit roast
This accessory should only be used when cooking with
the grill. Proceed as follows: thread the meat you wish to
cook onto the rod positioned across the oven lengthwise,
fixing it in place with the adjustable forks supplied. Position
supports “
A
” and “
B
” in the relevant holes in dripping pan
“
E
”, rest the groove on the rod in slot “
C
” and use the guide
rail to place the rack in the lowest position in the oven; next
position the rod in the rotisserie spit hole, sliding the groove
forwards to slot “
D
” (see figures). Start the rotisserie using
the SELECTOR knob set to cooking mod
or
;
Practical cooking advice
!
Do not place racks in position 1 and 5 during fan-assisted
cooking. This is because excessive direct heat can burn
temperature sensitive foods.
!
In the BARBECUE and GRATIN cooking modes, particularly
when using the rotisserie spit, place the dripping pan in
position 1 to collect cooking residues (fat and/or grease).
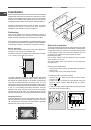
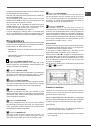
MULTILEVEL
• Use positions 2 and 4, placing the food which requires
more heat on 2.
• Place the dripping pan on the bottom and the rack on
top.
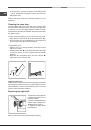
BARBECUE
• Place the rack in position 3 or 4. Position the food in the
centre of the rack.
• We recommend that the power level is set to maximum.
The top heating element is regulated by a thermostat
and may not always operate constantly.
PIZZA
• Use a light aluminium pizza pan. Place it on the rack
provided.
For a crispy crust, do not use the dripping pan as it
prevents the crust from forming by extending the total
cooking time.
• If the pizza has a lot of toppings, we recommend adding
the mozzarella cheese on top of the pizza halfway
through the cooking process.