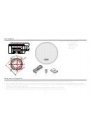
Инструкция для HYUNDAI H-CSH402

(скачивание инструкции бесплатно)
Формат файла: PDF
Доступность: Бесплатно как и все руководства на сайте. Без регистрации и SMS.
Дополнительно: Чтение инструкции онлайн
background image

4

· After cutting and drilling all holes, inspect the mounting areas for any metal burrs or rough edges. File any area that may interfere with the mounting of

the speaker.

· Clean any metal shavings from the mounting area and check for areas in which water may enter the speaker cavity.  Treat the area for water protection

when necessary.

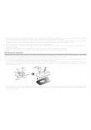
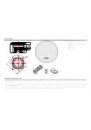
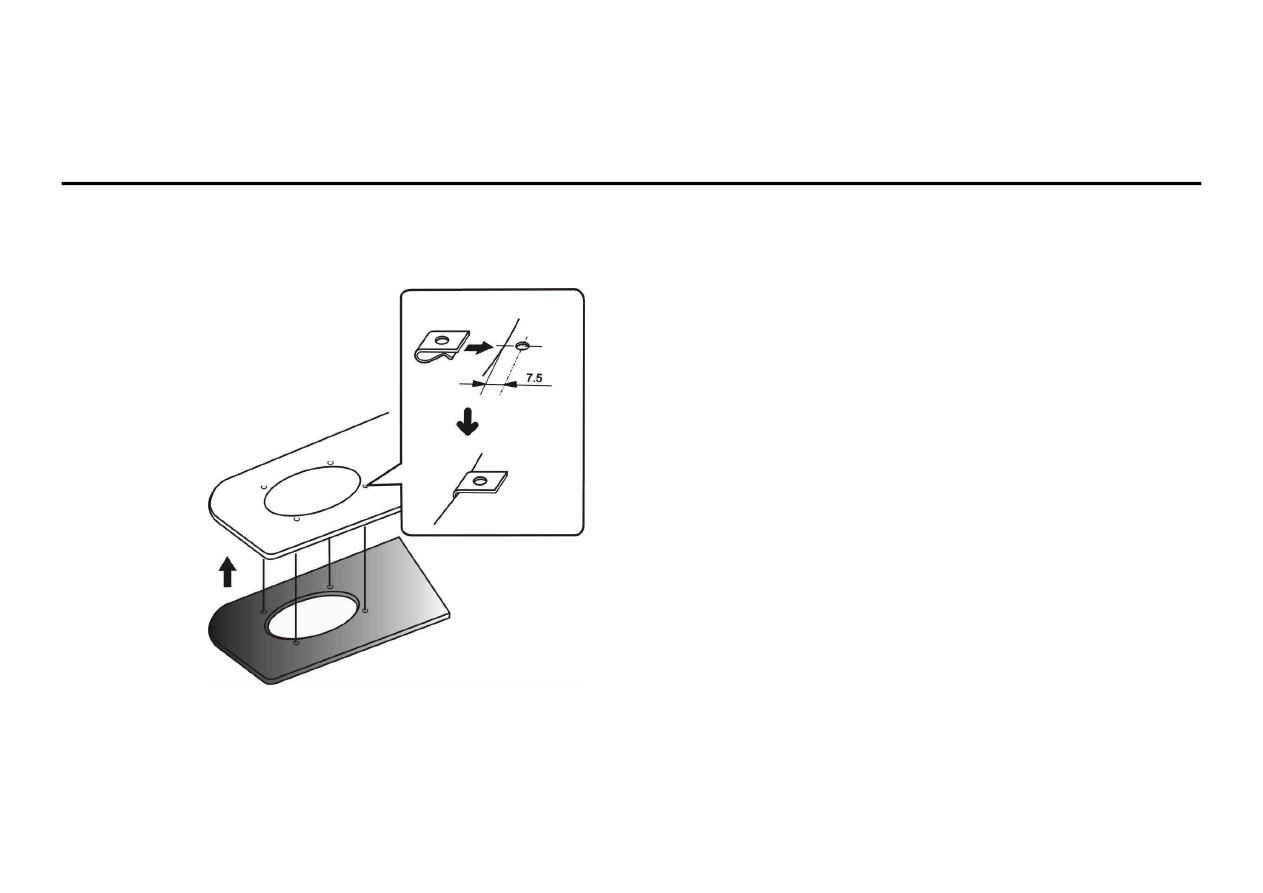
Securing the speakers

· Position the speaker into the mounting hole and re-confirm the correct mounting location and hole placement.

· Screw clips are provided to ensure a snug fit. These should be placed over the metal surface and line up the hole you have previously drilled with the

screw clip. Place the speaker into the hole, align the holes and proceed to insert the screws. Be sure to tighten the screws evenly so that it will not warp
the speaker frame.

· Turn your system back on and confirm the speakers operation first at a low volume and then you may increase the volume as you desire.

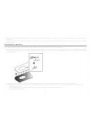
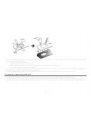
· After installation acoustic system and having tested it the speaker grill will have to be inserted. Turn on you system and follow these steps carefully:

-  locate the speaker grill;
-  now carefully inspect the place where the speaker grill will be mounted   there should be no blowholes;
-  fix the speaker grill by screws.

1
2
3
4
5
6
7
8
9
10
11
Оглавление инструкции
  • Страница 1 из 12
    H-CSH402 10 CM 2-WAY COAXIAL CAR SPEAKERS Instruction manual 10 2-
  • Страница 2 из 12
    Description The set of acoustic system includes: - acoustic system - metal grill 2 pcs - speaker wire 2 m - screw 8 pcs - clip 8 pcs 2m (x 8) (x 8) Important safeguards · · · · · The owner s manual contains important operating and maintenance instructions for your safety. It is necessary to refer
  • Страница 3 из 12
    · Never run the wiring on the outside of the vehicle or under it where it can be damaged by road hazards or the moving parts of the vehicle. Use existing wire channels, sills, panels and molding strips inside the vehicle to hide the wiring for safety and a neat appliance. · Make sure the wire of
  • Страница 4 из 12
    · · After cutting and drilling all holes, inspect the mounting areas for any metal burrs or rough edges. File any area that may interfere with the mounting of the speaker. Clean any metal shavings from the mounting area and check for areas in which water may enter the speaker cavity. Treat the area
  • Страница 5 из 12
    If unit fails to operate properly · Carefully read the instruction to make sure the unit is being operated properly. Check the following before you take your unit to the local dealer for repair. SYMPTOM POSSIBLE CAUSE SOLUTION No sound The volume control regulator set in the Adjust sound level
  • Страница 6 из 12
    Specification Loudspeaker one Magnet Peak output power woofer: 10 cm (4 ) Al-Plate injection cone midrange: 3 cm (1.2 ) TI-plated mylar main: ferrite 5.3 Oz magnet tweeter: neodymium 100 W Rated output power 35 W Impedance 4 hm Sensitivity 91 dB Frequency response 80-20000 Hz Dimensions 133.5 x
  • Страница 7 из 12
    : 2 - 2 (x 8) . 2 8 . 8 . ( 8) · . . · · , , , , . , (-) . 7 .
  • Страница 8 из 12
    · , ( ) · · , . , . , . , · , , . , (-) . , . · · , , · . , . , . : , , . . . · . . . · , , . . , , ). ( , ( 8 =94 , Ø =5 ).
  • Страница 9 из 12
    · , : - · ; ; ; . , , . , . · , · · , . . , . , 9 .
  • Страница 10 из 12
    · , . . · . : - ; ; . · , . , , 10 .
  • Страница 11 из 12
    (+ -) : . , , : 10 . (4 ) : 3 c (1,2 ) : 5.3 : 100 35 4 91 80-20000 133,5 63,5 0,6 / ( x x ) / 1,4 158 78 11 306 (164 ) ,
  • Страница 12 из 12