33
0-255
LED8 R 0-100%
34
0-255
LED8 G 0-100%
35
0-255
LED8 B 0-100%
36
0-255
LED8 W 0-100%
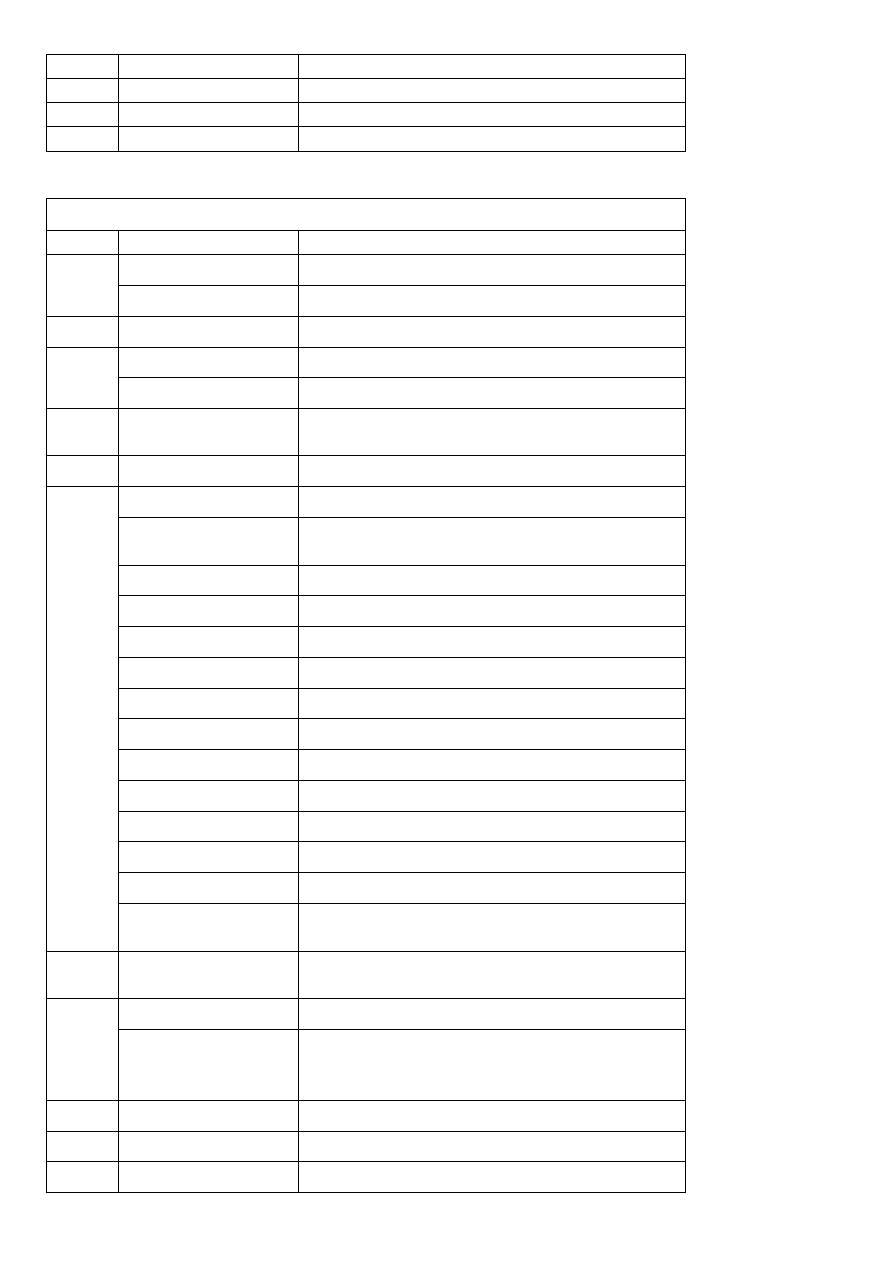
DMX Mode 3: 40-ch
40channel mode
Channel
Value
Function
1
0--180
Left BAR 0-180°(90°horizontal)
180-255
Left BAR 180°
2
0-255
Left BAR speed, the speed is faster when the No. is larger.
3
0-180
Right BAR 0-180°(90°horizontal)
180-255
Right BAR 180°
4
0-255
Right BAR speed, the speed is faster when the No. is
larger.
5
0-255
Master dimming
6
0-9
No function
10-19
LED auto running, motor position controlled by
CH1-CH4
20-29
Built-in program Show1
30-39
Built-in program Show2
40-49
Built-in program Show3
50-59
Built-in program Show4
60-69
Built-in program Show5
70-79
Built-in program Show6
80-89
Built-in program Show7
90-99
Built-in program Show8
100-109
Built-in program Show9
110-119
Built-in program Show10
120-139
No function
140-255
Sound active, the sensitivity will be higher when the value
is larger.
7
0-255
Led speed
(
only for the LED auto running mode
)
8
0-14
LED no strobe
15-255
LED strobe
,
it will be faster with larger value (It has no
use under built-in program mode)
9
0-255
LED1 R 0-100%
10
0-255
LED1 G0-100%
11
0-255
LED1 B 0-100%