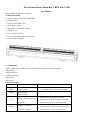
12
0-255
LED1 W 0-100%
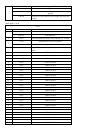
13
0-255
LED2 R 0-100%
14
0-255
LED2 G 0-100%
15
0-255
LED2 B 0-100%
16
0-255
LED2 W 0-100%
17
0-255
LED3 R 0-100%
18
0-255
LED3 G 0-100%
19
0-255
LED3 B 0-100%
20
0-255
LED3 W 0-100%
21
0-255
LED4 R 0-100%
22
0-255
LED4 G 0-100%
23
0-255
LED4 B 0-100%
24
0-255
LED4 W 0-100%
25
0-255
LED5 R 0-100%
26
0-255
LED5 G 0-100%
27
0-255
LED5 B 0-100%
28
0-255
LED5 W 0-100%
29
0-255
LED6 R 0-100%
30
0-255
LED6 G 0-100%
31
0-255
LED6 B 0-100%
32
0-255
LED6 W 0-100%
33
0-255
LED7 R 0-100%
34
0-255
LED7 G 0-100%
35
0-255
LED7 B 0-100%
36
0-255
LED7 W 0-100%
37
0-255
LED8 R 0-100%
38
0-255
LED8 G 0-100%
39
0-255
LED8 B 0-100%
40
0-255
LED8 W 0-100%
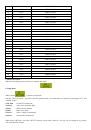
5. Master/slave Mode
When the LCD displays shows as below, it enter the M/S mode.
F. Setup Menu
When it shows
, it enter the setup mode
.
Press the “SETUP” button, the fixture enter the optional menu. You could choose six options by pressing the “UP” and
“DOWN” button.
1) BL Time
Set the LCD closed time
2) Adjust
motor reset correction adjust
3) Reset
Restore factory settings
4) Moto
Motor reset mode
5) Power
Service voltage of main board
6) About
About product information
When choose “BL Time”, press the “SETUP” button to set the time. Choose 5s, 10s, 20s, 30s or keeping on by pressing
“UP” and “DOWN” buttons.