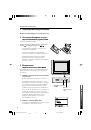
Инструкция для JVC HV-L29PRO

(скачивание инструкции бесплатно)
Формат файла: PDF
Доступность: Бесплатно как и все руководства на сайте. Без регистрации и SMS.
Дополнительно: Чтение инструкции онлайн
background image

27

5

ID NO.:

5

Using the TV’s menu

2 Set the ID number you want.

To choose a number:

Press the 

/

 buttons.

To move a cursor:

Press the 

/

 buttons.

3 Press the MENU/OK button.

4 Press the 

/

 buttons to

choose a TV channel.

• The TV shows the TV programme which

the chosen TV channel is now
broadcasting.

5 Press the blue button to set this

function to the TV channel.

 (CHANNEL GUARD) appears and the

TV channel is locked.

To cancel this function:

Press the blue button again.

 (CHANNEL GUARD) disappears and

the lock is released.

6 Press the MENU/OK button to

complete the setting.

The menu disappears.

To view a locked TV
channel

1 Choose a programme number in

which a TV channel locked with
the number buttons or PR LIST.

The screen changes to blue and the

 (CHANNEL GUARD) appears.

• You cannot choose a locked TV channel

with the 

/

 buttons.

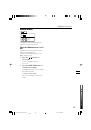
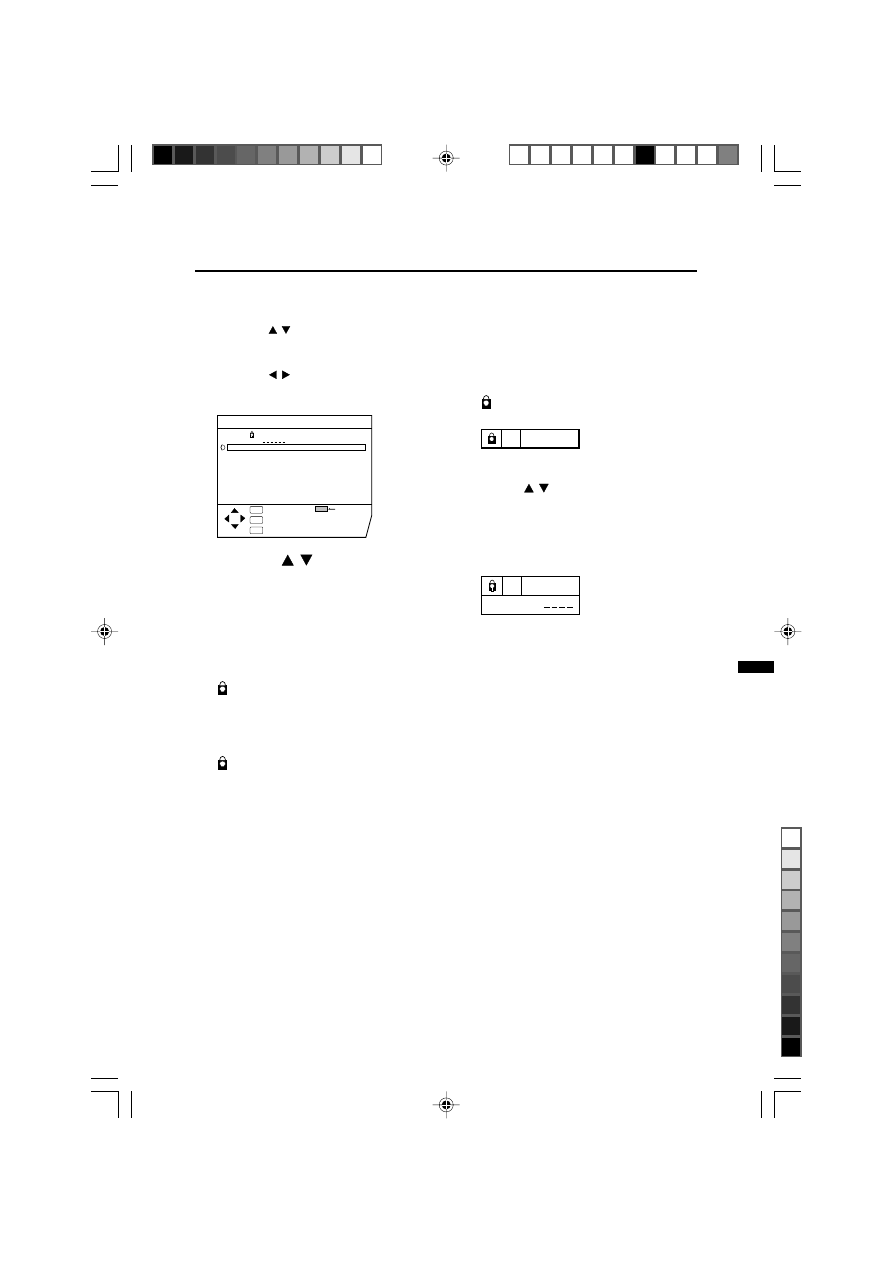
2 Press the DISPLAY button to

display " ID NO. " (ID unmber
input screen).

3 Press the number buttons to

enter the ID number.

The lock is temporarily released so you
can view the TV channel.

If you have forgotten the ID number:

Perform step 1 of "To set this function".
After confirming the ID number, press the
TV/VIDEO button to exit the menu.

• When you would like to cancel the

CHANNEL GUARD function, you must
perform the operation " To set this
function" again.

CHANNEL GUARD

CH / CC

PR

ID

AV
01
02
03
04
05
06
07
08
09

CH
CH
CH
CH
CH
CH
CC
CC
CC

21
22
23
24
25
26
01
02
03

GUARD

:EXIT

:OK

OK

TV

:BACK

DISP

 LCT0959-001B-H_p22-44

7/3/1, 8:17 PM

27

Black

1
2
3
4
5
6
7
8
9
10
11
12
13
14
15
16
17
18
19
20
21
22
23
24
25
26
27
28
29
30
31
32
33
34
35
36
37
38
39
40
41
42
43
44
45
46
47
48
49
50
51
52
53
54
55
56
57
58
59
60
61
62
63
64
65
66
67
68
69
70
71
72
73
74
75
76
77
78
79
80
81
82
83
84
85
86
87
88
Оглавление инструкции
  • Страница 1 из 89
    COLOUR TELEVISION HV-L34PRO HV-L29PRO Contents Setting up your TV . . . . . . . . . . . . . 3 TV buttons and functions . . . . . . . . 6 Remote control buttons and functions . . . 8 Using the TV's menu . . . . . . . . . . . . 18 Basic operation . . . . . . . . . . . . . . 18 PICTURE SETTING menu .
  • Страница 2 из 89
    Thank you for buying this JVC colour television. To make sure you understand how to use your new TV, please read this manual thoroughly before you begin. WARNING: TO PREVENT FIRE OR SHOCK HAZARD, DO NOT EXPOSE THIS APPLIANCE TO RAIN OR MOISTURE. CAUTION: TO ENSURE PERSONAL SAFETY, OBSERVE THE
  • Страница 3 из 89
    Setting up your TV CAUTION • Turn off all the epuipment including the TV before connecting anything. 1 Connecting the aerial and VCR • Aerial cable is not supplied. Use a good quality 75-ohm coaxial cable. Fig.A • Read the manual that came with the VCR before connecting. If not connecting a VCR
  • Страница 4 из 89
    Setting up your TV 2 Connecting the power cord Connect the mains plug to the AC outlet. 3 Putting the batteries into the Remote control Use two AA/R6 batteries. Insert the batteries from the end, making sure the and polaritiles are correct. • Follow the warnings printed on the batteries. • If the
  • Страница 5 из 89
    Setting up your TV 3 Press the / buttons to choose ENGLISH. Then press the MENU/OK button. ZOOM SPATIALIZER BASS The AUTO PROGRAM function starts. The TV channels you receive are automaticlly stored in the programme numbers list. AUTO PROGRAM CH POWER TV/VIDEO 10 PICTURE MODE 1 2 3 4 5 6 7 8 9 20%
  • Страница 6 из 89
    TV buttons and functions Turn the main power on Press the main power button 1 . The POWER lamp 2 lights red and your TV is in the standby mode. To turn the main power off : press the main power button again. The POWER lamp 2 goes off. Turn the TV on from standby mode Press the CHANNEL-/+ buttons 5
  • Страница 7 из 89
    TV buttons and functions Headphone jack 0 Connect the headphones with a stereo mini-jack (3.5mm in diameter). When using the headphones, follow the operation procedure "HEADPHONE" on page 25. VIDEO-1 terminal = • See page 3 and 36. AUDIO R S L/MONO VIDEO OVER VIDEO-1 VIDEO-2 CB CR Y/VIDEO VIDEO-3
  • Страница 8 из 89
    Remote control buttons and functions Turn the TV on from standby mode Press the POWER button. The POWER lamp lights red to green and your TV will be turned on. POWER TV/VIDEO ZOOM SPATIALIZER BASS • You can turn on the TV from the standby mode by pressing the TV/VIDEO button, the CHANNEL -/+
  • Страница 9 из 89
    Remote control buttons and functions MUTING button 16:9 Press the MUTING button to turn off the volume. Pressing the MUTING button again resumes the previous volume level. This mode converts a normal picture (4:3 aspect ratio) into a Wide picture (16:9 aspect ratio). ZOOM button You can change the
  • Страница 10 из 89
    Remote control buttons and functions BASS button You can enjoy a powerful bass sound by using the SUPER BASS(Super Bass Reflex) function. Press the BASS button to turn the SUPER BASS function on or off. ON : This function is turned on. OFF : This function is turned off. PICTURE MODE button You can
  • Страница 11 из 89
    Remote control buttons and functions / button When you are viewing a bilingual broadcast programme, you can choose the sound from Bilingual I (Sub I) or Bilingual II (Sub II). When the stereo broadcasting is received poorly, you can change from stereo to mono sound so that you can hear the
  • Страница 12 из 89
    Remote control buttons and functions • You can only use the AUTO mode when you are viewing a picture from the programme number PR 0 (AV), or a VIDEO terminal. BROADCASTING SYSTEMS • You cannot choose NTSC 3.58 or NTSC 4.43 for programme numbers PR 0 (AV) to PR 99. COLOUR SYSTEM • For the colour
  • Страница 13 из 89
    Remote control buttons and functions FREEZE button You can view the Main picture's forzen image as the SUB-picture. Press the FREEZE button. Still pictures MAIN To cancel the FREEZE function : Press the FREEZE button again. • If you press the STROBE button when receiving the Progressive Video
  • Страница 14 из 89
    Remote control buttons and functions 2 Choose the desired picture with the / and / buttons, and then press the MENU/OK button. The screen switches to the TV channel or VIDEO mode of your choice. • Any programme numbers to which no TV channel has been registered, or programme numbers to which
  • Страница 15 из 89
    Remote control buttons and functions Choose a TV channel for the SUB-picture POSITION button Press the SUB-P -/+ button. You can adjust the position of the SUBPicture when using the Picture in picture mode. Listen to the sound of SUBpicture Press the POSITION button repeatedly. You can listen to
  • Страница 16 из 89
    Remote control buttons and functions Viewing a teletext programme 1 Choose a TV channel with a teletext broadcast. 2 Press the TV/TEXT button. Press the TV/TEXT button changes the mode as follows: HOLD button You can hold a teletext page on the screen for as long as you want, even while several
  • Страница 17 из 89
    Remote control buttons and functions 2 Press the CANCEL button. The TV programme appears. When the TV finds the teletext page, its page number appears in the upper left of the screen. 3 Press the CANCEL button to return to a teletext page when the page number is on the screen. • You cannot return
  • Страница 18 из 89
    Using the TV's menu This TV has a number of functions you can operate using menus. To fully utilize all your TV's functions, you need to understand the basic menu operating techniques fully. Basic operation POWER TV/VIDEO ZOOM SPATIALIZER BASS PICTURE MODE 1 2 3 4 5 6 7 8 1 Press the MENU/OK button
  • Страница 19 из 89
    Using the TV's menu 4 Press the / buttons to choose the setting of that function. • If you want to operate a function which appears only with its name, follow the descriptions of that function on the following pages. • The display appearing at the bottom of a menu shows you a button on the remote
  • Страница 20 из 89
    Using the TV's menu PICTURE SETTING menu PICTURE SETTING PICTURE MODE CONTRAST BRIGHT SHARP COLOUR TINT WHITE BALANCE DIGITAL ECO SENSOR OK :OK TV :EXIT DISP :BACK STANDARD MID ON RESET SHARP You can adjust the picture sharpness. : softer : sharper • You cannot select the SHARP function when
  • Страница 21 из 89
    Using the TV's menu PICTURE FEATURES menu MID: The normal white colour. PICTURE FEATURES WARM: A raddish white. Using this mode when watching films allows you to enjoy colours that are characteristic of films. • You cannot select the WHITE BALANCE function in the Twin pictures mode or the 16:9 mode
  • Страница 22 из 89
    Using the TV's menu DigiPure MIN: The Digipure function uses the latest in digital technology to give you a natural looking picture. The Digipure function includes the following two functions. Digipure function: This function helps to create a natural looking picture by eliminating unnecessary
  • Страница 23 из 89
    Using the TV's menu COLOUR SYSTEM The colour system is chosen automatically. However, if the picture is not clear or no colour appears, choose the colour system manually. 1 Choose COLOUR SYSTEM, then press the MENU/OK button. ZOOM You can change the screen size according to the picture aspect
  • Страница 24 из 89
    Using the TV's menu SOUND SETTING menu SOUND SETTING STEREO/ BASS TREBLE BALANCE AI VOLUME BBE SPATIALIZER SUPER BASS HEADPHONE OK :OK TV :EXIT DISP :BACK MONO ON ON LIVE ON STEREO / I•II When you are viewing a bilingual broadcast programme, you can choose the sound from Bilingual I (sub I) or
  • Страница 25 из 89
    Using the TV's Menu SPATIALIZER TV SPEAKER: You can enjoy Surround sound with a "live" effect by using the SPATIALIZER function. You can choose one of two SPATIALIZER modes. • You can choose a SPATIALIZER mode from LIVE, MONO or OFF modes. For details, see " SPATIALIZER button " on page 9. The
  • Страница 26 из 89
    Using the TV's menu FEATURES menu BLUE BACK FEATURES SLEEP TIMER BLUE BACK CHILD LOCK CHANNEL GUARD AUTO SHUTOFF VIDEO-3 SETTING OK :OK TV :EXIT DISP :BACK ON OFF OFF COMPONENT You can set the TV to automatically change to a blue screen and mute the sound if the signal is weak or absent, or when
  • Страница 27 из 89
    Using the TV’s menu 2 Set the ID number you want. To choose a number: Press the / buttons. To view a locked TV channel 1 Choose a programme number in which a TV channel locked with the number buttons or PR LIST. To move a cursor: Press the / buttons. 3 Press the MENU/OK button. The screen changes
  • Страница 28 из 89
    Using the TV's menu AUTO SHUTOFF You can set your TV to turn off if no signal are received for about 15 minutes or longer after the end of a broadcast. ON : This function is turned on. OFF : This function is turned off. • The AUTO SHUTOFF function does not turn off the TV's main power. • The AUTO
  • Страница 29 из 89
    Using the TV’s menu INSTALL menu AUTO PROGRAM CH INSTALL LANGUAGE AUTO PROGRAM EDIT/MANUAL TELETEXT LANGUAGE OK :OK TV :EXIT DISP :BACK OK DISP 1 Choose LANGUAGE, then press the MENU/OK button. :OK TV :EXIT :BACK :BACK 2 After the TV channels have been stored in the programme number list, the EDIT
  • Страница 30 из 89
    Using the TV's menu EDIT/MANUAL The EDIT/MANUAL functions are divided into two types: editing of the current programme numbers (EDIT functions) and manual registration of a TV channel you want to view to the programme number (MANUAL function). This function adds a new TV channel in the current
  • Страница 31 из 89
    Using the TV’s menu ID 1 Press the / buttons to choose a TV channel. 2 Press the red button to start the ID function. 3 Enter a channel name (ID). Press the / buttons to choose a character. press the / buttons to move the cursor. EDIT PR AV 01 02 03 04 05 06 07 08 09 ID M OK :OK TV :EXIT DISP :BACK
  • Страница 32 из 89
    Using the TV's menu INSERT PREPARATION • Find the CH/CC number corresponding to the channel number of the TV channel from the on page 33. 1 Press the / buttons to choose a programme number for which you will register a new TV channel. 2 Press the green button to start the INSERT function. EDIT PR
  • Страница 33 из 89
    Using the TV’s menu CH/CC number When you want to use the INSERT function on page 32, find the CH/CC number corresponding to the Channel number of the TV channel from this table. US : The US channel numbers are the channel numbers used in the United States, Philippines, etc. CCIR: The CCIR channel
  • Страница 34 из 89
    Using the TV's menu TELETEXT LANGUAGE There are 4 types of teletext language groups. Set the teletext language group that corresponds to the language of the teletext program that you want to watch. • Languages that are not included in the teletext language group that you select, the sub-titles of
  • Страница 35 из 89
    Using the TV's menu DEMO menu DEMO ON OFF OK :OK TV :EXIT DISP :BACK The DEMO function automatically demostrations some of the TV function. When the DEMO function is set to ON: Each time the TV is turned on, the demonstration starts automatically. If you do not want that to happen, set the DEMO
  • Страница 36 из 89
    Additional preparation Connecting the external devices Connect the devices to the TV, paying attention to the following connection diagram. Before connecting anything: • Read the manuals provided with the devices. Depending on the devices, the connection method may differ from the figure. In
  • Страница 37 из 89
    Additional preparation Connecting methods 1 Connect the TV's VIDEO jack and the device's VIDEO OUT (video output) jack with a video cable. If connecting a device to the TV with an S-VIDEO cabel : Connect the VCR's S-VIDEO OUT (S-VIDEO output) connector and the TV's S connector with an S-VIDEO
  • Страница 38 из 89
    Additional preparation Connecting AV COMPU LINK Supported Devices AV COMPU LINK remote control system is a system in which related devices are automatically controlled when you operate one device. If you apply this system to the TV, you can have the TV automatically perform the required operations
  • Страница 39 из 89
    Additional Preparation 2 Connect the TV’s AV COMPU LINK terminal and the device’s AV COMPU LINK terminal with an AV COMPU LINK cable. 3 Change the device’s setting according to the VIDEO terminal it is connected to. If a VCR is connected to the VIDEO-1 terminal : Set the VCR’s remote control code
  • Страница 40 из 89
    Troubleshooting If a problem arises while you are using the TV, please read this "Troubleshooting" well before you request having the TV repaired. You may be able to fix it easily by yourself. For example, if the AC plug is disconnected from the AC outlet, or the TV aerial has problems, you may
  • Страница 41 из 89
    Troubleshooting • When a white and bright still image (such as a white dress) is displayed on the screen, the white part may look as if it were coloured. It is a phenomenon unavoidable due to the nature of the picture tube itself, and not due to a TV failure. When the picture disappears from the
  • Страница 42 из 89
    Troubleshooting • It takes a short period of time from the time an operation such as changing channels is performed until an image is displayed. This is not a malfunction. This is the time required for the image to stabilize before it can be displayed. • The TV may emit a crackling sound due to a
  • Страница 43 из 89
    Specifications Broadcasting systems Colour systems Channels and frequencies B, G, I, D, K, K1, M PAL, SECAM, NTSC3.58/4.43MHz VHF low channel (VL) =46.25 to 168.25 MHz VHF high channel (VH) =175.25 to 463.25 MHz UHF channel (U) =471.25 to 863.25 MHz Receives cable channels in mid band (X to Z+2, S1
  • Страница 44 из 89
    VICTOR COMPANY OF JAPAN, LIMITED LCT0959-001B-H_p22-44 44 Black 7/3/1, 8:17 PM
  • Страница 45 из 89
    © 2001 VICTOR COMPANY OF JAPAN, LIMITED LCT0959-001B-H_R/01-21 1 Black LCT0959-001B-H 0601-T-AB-NV-JMT 7/3/1, 8:12 PM
  • Страница 46 из 89
    Благодарим за покупку цветного телевизора JVC. Перед началом использования, пожалуйста, внимательно прочтите это руководство, чтобы понять как пользоваться Вашим новым телевизором. ОСТОРОЖНО: ВО ИЗБЕЖАНИЕ ПОЖАРА И ПОРАЖЕНИЯ ЭЛЕКТРОТОКОМ, НЕ ДОПУСКАЙТЕ ДЕЙСТВИЯ НА ТЕЛЕВИЗОР ДОЖДЯ ИЛИ ВЛАГИ.
  • Страница 47 из 89
    Настройка телевизора ВНИМАНИЕ • èÂ‰ ͇ÍËÏ-ÎË·Ó ÔÓ‰ÒÓ‰ËÌÂÌËÂÏ ‚˚Íβ˜ËÚ ‚Ò˛ ‡ÔÔ‡‡ÚÛÛ, ‚ ÚÓÏ ˜ËÒΠÚÂ΂ËÁÓ. 1 Подсоединение антенны и ВМ • ÄÌÚÂÌÌ˚È Í‡·Âθ ‚ ÍÓÏÔÎÂÍÚ ÔÓÒÚ‡‚ÍË Ì ‚ıÓ‰ËÚ. àÒÔÓθÁÛÈÚ ͇˜ÂÒÚ‚ÂÌÌ˚È 75-éÏ ÍÓ‡ÍÒˇθÌ˚È Í‡·Âθ. рис. A • èÂ‰ ÔÓ‰ÒÓ‰ËÌÂÌËÂÏ ÔÓ˜ÚËÚ ÛÍÓ‚Ó‰ÒÚ‚Ó ÔÓ
  • Страница 48 из 89
    ç‡ÒÚÓÈ͇ ÚÂ΂ËÁÓ‡ 2 Подсоединение шнура питания Вставьте вилку шнура в сетевую розетку. 3 Установка батареек в пульт дистанционного управления ÇÓÁ¸ÏËÚ 2 ·‡Ú‡ÂÈÍË AA/R6. Встаьте батареи, начиная с кнопца, помеченного знаком и соблюдая полярности и . • ëӷ≇ÈÚ ËÌÒÚÛ͈ËË ÔÓ ·ÂÁÓÔ‡ÒÌÓÒÚË,
  • Страница 49 из 89
    ç‡ÒÚÓÈ͇ ÚÂ΂ËÁÓ‡ 3 Нажимая кнопки / , выберите РУССКИЙ. После этого нажмите кнопку MENU/OK. POWER TV/VIDEO ZOOM SPATIALIZER BASS ÇÍβ˜ËÚÒfl ÙÛÌ͈Ëfl ÄÇíé èêéÉ. èËÌËχÂÏ˚ ÚÂ΂ËÁËÓÌÌ˚ ÚÂÎÂ͇̇Î˚ ·Û‰ÛÚ ‡‚ÚÓχÚ˘ÂÒÍË ÒÓı‡ÌflÚ¸Òfl ‚ Ô‡ÏflÚË ÚÂ΂ËÁÓ‡ ‚ ‚ˉ ÒÔËÒ͇ ÌÓÏÂÓ‚ ÔÓ„‡ÏÏ. PICTURE MODE 1 2
  • Страница 50 из 89
    Кнопки и функции телевизора Включение питания Нажмите кнопку питания 1 . à̉Ë͇ÚÓ ÔËÚ‡ÌËfl POWER 2 Á‡„ÓËÚÒfl Í‡ÒÌ˚Ï Ë ÚÂ΂ËÁÓ ‚ÓȉÂÚ ‚ ÂÊËÏ ÓÊˉ‡ÌËfl. ÑÎfl ‚˚Íβ˜ÂÌËfl ÔËÚ‡ÌËfl : ÒÌÓ‚‡ ̇ÊÏËÚ ÍÌÓÔÍÛ ÔËÚ‡ÌËfl. à̉Ë͇ÚÓ ÔËÚ‡ÌËfl POWER 2 ÔÓ„‡ÒÌÂÚ. Включение телевизора, находящегося в режиме ожидания
  • Страница 51 из 89
    äÌÓÔÍË Ë ÙÛÌ͈ËË ÚÂ΂ËÁÓ‡ Индикатор SPATIALIZER 8 ùÚÓÚ Ë̉Ë͇ÚÓ Á‡„Ó‡ÂÚÒfl, ÂÒÎË ÛÒÚ‡ÌÓ‚ËÚ¸ ÙÛÌÍˆË˛ SPATIALIZER ̇ åéçé ËÎË LIVE. Гнездо головного телефона 0 AUDIO R ÑÎfl ÔÓ‰Íβ˜ÂÌËfl „ÓÎÓ‚Ì˚ı ÚÂÎÂÙÓÌÓ‚ ËÒÔÓθÁÛÈÚ ÒÚÂÂÓ ÏËÌË„ÌÂÁ‰Ó (‰Ë‡ÏÂÚ 3,5 ÏÏ). èË ËÒÔÓθÁÓ‚‡ÌËË „ÓÎÓ‚Ì˚ı ÚÂÎÂÙÓÌÓ‚ ÒΉÛÈÚÂ
  • Страница 52 из 89
    Кнопки и функции пульта дистанционного управления Включение телевизора, находящегося в режиме ожидания Нажмите кнопку POWER. POWER TV/VIDEO ZOOM SPATIALIZER BASS ñ‚ÂÚ Ë̉Ë͇ÚÓ‡ ÔËÚ‡ÌËfl POWER ËÁÏÂÌËÚÒfl Ò Í‡ÒÌÓ„Ó Ì‡ ÁÂÎÂÌ˚È Ë ÚÂ΂ËÁÓ ‚Íβ˜ËÚÒfl. PICTURE MODE 1 2 3 4 5 6 7 8 9 • íÂ΂ËÁÓ,
  • Страница 53 из 89
    äÌÓÔÍË Ë ÙÛÌ͈ËË ÔÛθڇ ‰ËÒڇ̈ËÓÌÌÓ„Ó ÛÔ‡‚ÎÂÌËfl Кнопка MUTING 16:9 Кнопка MUTING используется для выключения звука. Повторный нажим кнопки MUTING приводит к включению звука на той же громкости, которая была до выключения звука. ùÚÓÚ ÂÊËÏ Ó·ÂÒÔ˜˂‡ÂÚ ÔÂÓ·‡ÁÓ‚‡ÌË ÌÓχθÌÓ„Ó ËÁÓ·‡ÊÂÌËfl
  • Страница 54 из 89
    äÌÓÔÍË Ë ÙÛÌ͈ËË ÔÛθڇ ‰ËÒڇ̈ËÓÌÌÓ„Ó ÛÔ‡‚ÎÂÌËfl Кнопка BASS ÑÎfl ‚Íβ˜ÂÌËfl ÏÓ˘Ì˚ı ·‡ÒÓ‚ ÏÓÊÌÓ ËÒÔÓθÁÓ‚‡Ú¸ ÙÛÌÍˆË˛ ëìèÖê ÅÄë. Для включения и выключения функции СУПЕР БАС нажимайте кнопку BASS. ВКЛ : îÛÌ͈Ëfl ‚Íβ˜‡ÂÚÒfl. ВЫКЛ : îÛÌ͈Ëfl ‚˚Íβ˜‡ÂÚÒfl. Кнопка PICTURE MODE åÓÊÌÓ ‚˚·‡Ú¸ Ó‰ËÌ ËÁ ÚÂı
  • Страница 55 из 89
    äÌÓÔÍË Ë ÙÛÌ͈ËË ÔÛθڇ ‰ËÒڇ̈ËÓÌÌÓ„Ó ÛÔ‡‚ÎÂÌËfl Кнопка / èË ÔÓÒÏÓÚ ‰‚ÛflÁ˚˜Ì˚ı ÔÓ„‡ÏÏ ÏÓÊÌÓ ‚˚·Ë‡Ú¸ Á‚ÛÍÓ‚Ó ÒÓÔÓ‚ÓʉÂÌË üÁ˚Í 1 (Bilingual I (Sub I)) ËÎË üÁ˚Í 2 (Bilingual II (Sub II)). èË ÔÎÓıÓÏ ÔËÂÏ ÒÚÂÂÓÚ‡ÌÒÎflˆËË ÏÓÊÌÓ ÔÂÂÍβ˜ËÚ¸Òfl ÒÓ ÒÚÂÂÓ Ì‡ ÏÓÌÓ ‰Îfl ÛÎÛ˜¯ÂÌËfl ˜ÂÚÍÓÒÚË Á‚Û͇.
  • Страница 56 из 89
    äÌÓÔÍË Ë ÙÛÌ͈ËË ÔÛθڇ ‰ËÒڇ̈ËÓÌÌÓ„Ó ÛÔ‡‚ÎÂÌËfl • Ç ÒÎÛ˜‡Â ÔÓÒÏÓÚ‡ ËÁÓ·‡ÊÂÌËfl ˜ÂÂÁ ÔÓ„‡ÏÏÛ èP 0 (AV) ËÎË Ô‡ÌÂθ ÇàÑÖé ÏÓÊÌÓ ËÒÔÓθÁÓ‚‡Ú¸ ÚÓθÍÓ ÂÊËÏ ÄÇíé. • ÑÎfl ÔÓ„‡ÏÏ Ò ÌÓÏÂ‡ÏË ÓÚ èP 0 (AV) ‰Ó èP 99 ÌÂθÁfl ËÒÔÓθÁÓ‚‡Ú¸ ÒËÒÚÂÏÛ NTSC 3.58 ËÎË NTSC 4.43. ТЕЛЕВЕЩАТЕЛЬНЫЕ СИСТЕМЫ èÓ
  • Страница 57 из 89
    äÌÓÔÍË Ë ÙÛÌ͈ËË ÔÛθڇ ‰ËÒڇ̈ËÓÌÌÓ„Ó ÛÔ‡‚ÎÂÌËfl Кнопка FREEZE àÏÂÂÚÒfl ‚ÓÁÏÓÊÌÓÒÚ¸ Ô‰ÒÚ‡‚ÎÂÌËfl ÒÚÓÔ͇‰‡ ÉãÄÇçéÉé ËÁÓ·‡ÊÂÌËfl ‚ ‚ˉ ÇíéêéëíÖèÖççéÉé ËÁÓ·‡ÊÂÌËfl. Нажмите кнопку FREEZE. Для отмены функции ЗАМОРОЗИТЬ : ëÌÓ‚‡ ̇ÊÏËÚ ÍÌÓÔÍÛ FREEZE. • äÓ„‰‡ ̇ ˝Í‡Ì ËÏÂÂÚÒfl ÇíéêéëíÖèÖççéÖ
  • Страница 58 из 89
    äÌÓÔÍË Ë ÙÛÌ͈ËË ÔÛθڇ ‰ËÒڇ̈ËÓÌÌÓ„Ó ÛÔ‡‚ÎÂÌËfl Для вызова на экран следующего изображения Multi : ̇ÊÏËÚ ÍÌÓÔÍÛ NEXT. 2 Выберите изображение с помощью кнопок / и / , а затем нажмите кнопку MENU/ OK. ùÍ‡Ì ÔÂÂÍβ˜ËÚÒfl ̇ ‚˚·‡ÌÌ˚È ÚÂÎÂ͇̇ΠËÎË ÂÊËÏ ÇàÑÖé. àÒÔÓθÁÓ‚‡ÌË ÙÛÌ͈ËË PIP àÏÂÂÚÒfl
  • Страница 59 из 89
    äÌÓÔÍË Ë ÙÛÌ͈ËË ÔÛθڇ ‰ËÒڇ̈ËÓÌÌÓ„Ó ÛÔ‡‚ÎÂÌËfl Выбор телеканала для ВТОРОСТЕПЕННОГО изображения Нажмите кнопку SUB-P m. Прослушивание звукового сопровождения ВТОРОСТЕПЕННОГО изображения á‚ÛÍÓ‚Ó ÒÓÔÓ‚ÓʉÂÌË ÑéèéãçàíÖãúçéÉé ËÁÓ·‡ÊÂÌËfl ÏÓÊÌÓ ÔÓÒÎۯ˂‡Ú¸ ˜ÂÂÁ „ÓÎÓ‚Ì˚ ÚÂÎÂÙÓÌ˚, ÔË ˝ÚÓÏ
  • Страница 60 из 89
    äÌÓÔÍË Ë ÙÛÌ͈ËË ÔÛθڇ ‰ËÒڇ̈ËÓÌÌÓ„Ó ÛÔ‡‚ÎÂÌËfl èÓÒÏÓÚ ÔÓ„‡ÏÏ˚ Ò ÚÂÎÂÚÂÍÒÚÓÏ 1 Выберите телеканал с телетекстом. 2 Нажмите кнопку TV/TEXT. ç‡ÊËÏ ÍÌÓÔÍË TV/TEXT ËÁÏÂÌflÂÚ ÂÊËÏ ÒÎÂ‰Û˛˘ËÏ Ó·‡ÁÓÏ: Кнопка HOLD àÏÂÂÚÒfl ‚ÓÁÏÓÊÌÓÒÚ¸ ÒÓı‡ÌÂÌËfl (HOLD) ÒÚ‡Ìˈ˚ ÚÂÎÂÚÂÍÒÚ‡ ̇ ˝Í‡Ì ÒÍÓθ Û„Ó‰ÌÓ ‰Ó΄Ó,
  • Страница 61 из 89
    äÌÓÔÍË Ë ÙÛÌ͈ËË ÔÛθڇ ‰ËÒڇ̈ËÓÌÌÓ„Ó ÛÔ‡‚ÎÂÌËfl 2 Нажмите кнопку CANCEL. èÓfl‚ËÚÒfl ÚÂÎÂÔÓ„‡Ïχ. äÓ„‰‡ ÚÂ΂ËÁÓ ̇ȉÂÚ ÒÚ‡ÌËˆÛ ÚÂÎÂÚÂÍÒÚ‡,  ÌÓÏÂ ÔÓfl‚ËÚÒfl ‚ ΂ÓÏ ‚ÂıÌÂÏ Û„ÎÛ ˝Í‡Ì‡. 3 Нажмите кнопку CANCEL для возврата к странице телетекста, когда ее номер появится на экране. • ë ÔÓÏÓ˘¸˛
  • Страница 62 из 89
    Как пользоваться меню телевизора êfl‰ÓÏ ÙÛÌ͈ËÈ ÚÂ΂ËÁÓ‡ ÏÓÊÌÓ ÛÔ‡‚ÎflÚ¸ Ò ÔÓÏÓ˘¸˛ ÏÂÌ˛. óÚÓ·˚ ËÏÂÚ¸ ‚ÓÁÏÓÊÌÓÒÚ¸ ËÒÔÓθÁÓ‚‡ÌËfl ‚ÒÂı ÙÛÌ͈ËÈ ÚÂ΂ËÁÓ‡, ÌÂÓ·ıÓ‰ËÏÓ ıÓÓ¯Ó Á̇ڸ ÔË̈ËÔ˚ ‡·ÓÚ˚ ÏÂÌ˛. Основные операции POWER TV/VIDEO ZOOM SPATIALIZER BASS PICTURE MODE 1 2 3 4 5 6 7 8 9 1 Нажмите
  • Страница 63 из 89
    ä‡Í ÔÓθÁÓ‚‡Ú¸Òfl ÏÂÌ˛ ÚÂ΂ËÁÓ‡ 4 Для выбора настройки этой функции используйте кнопки / . • ÑÎfl ËÒÔÓθÁÓ‚‡ÌËfl ÙÛÌ͈ËË, Ô‰ÒÚ‡‚ÎÂÌÌÓÈ ÚÓθÍÓ Ì‡Á‚‡ÌËÂÏ, ÔÓ˜ÚËÚ ÓÔËÒ‡ÌË ˝ÚÓÈ ÙÛÌ͈ËË Ì‡ ÔÓÒÎÂ‰Û˛˘Ëı ÒÚ‡Ìˈ‡ı. • ç‡ ‰ËÒÔΠÒÌËÁÛ ÓÚ ÏÂÌ˛ ÔÓ͇Á‡Ì‡ ÍÌÓÔ͇ ÔÛθڇ ‰ËÒڇ̈ËÓÌÌÓ„Ó ÛÔ‡‚ÎÂÌËfl, ÍÓÚÓÓÈ
  • Страница 64 из 89
    ä‡Í ÔÓθÁÓ‚‡Ú¸Òfl ÏÂÌ˛ ÚÂ΂ËÁÓ‡ åÂÌ˛ èÄêÄåÖíêõ àáéÅêÄÜÖçàü ЯРКО üÍÓÒÚ¸ ËÁÓ·‡ÊÂÌËfl ÏÓÊÌÓ „ÛÎËÓ‚‡Ú¸. : ÚÂÏÌ : Ò‚ÂÚΠЧЕТКО óÂÚÍÓÒÚ¸ ËÁÓ·‡ÊÂÌËfl ÏÓÊÌÓ „ÛÎËÓ‚‡Ú¸. : ÏÂ̸¯Â : ·Óθ¯Â èêÖÑìëíÄçéÇäà ÑÎfl ‡‚ÚÓχÚ˘ÂÒÍÓ„Ó „ÛÎËÓ‚‡ÌËfl Ô‡‡ÏÂÚÓ‚ ËÁÓ·‡ÊÂÌËfl ÏÓÊÌÓ ‚˚·‡Ú¸ Ó‰ÌÛ ËÁ ÚÂı
  • Страница 65 из 89
    ä‡Í ÔÓθÁÓ‚‡Ú¸Òfl ÏÂÌ˛ ÚÂ΂ËÁÓ‡ ХОЛОД : ÅÂÎ˚È Ò „ÓÎÛ·ËÁÌÓÈ. àÒÔÓθÁÓ‚‡ÌË ˝ÚÓ„Ó ÂÊËχ ÔË ÔÓÒÏÓÚ flÍËı ËÁÓ·‡ÊÂÌËÈ ‰‡ÂÚ ‚ÓÁÏÓÊÌÓÒÚ¸ ÔÓÎÛ˜ÂÌËfl ·ÓΠÊË‚˚ı Ë flÍËı ËÁÓ·‡ÊÂÌËÈ. åÂÌ˛ ëÇéâëíÇÄ àáéÅêÄÜÖçàü СРЕДНИЙ : çÓχθÌ˚È ·ÂÎ˚È ˆ‚ÂÚ. ТЕПЛЫЙ : ÅÂÎ˚È Ò Í‡ÒÌÓ‚‡Ú˚Ï ÓÚÚÂÌÍÓÏ. àÒÔÓθÁÓ‚‡ÌË ˝ÚÓ„Ó
  • Страница 66 из 89
    ä‡Í ÔÓθÁÓ‚‡Ú¸Òfl ÏÂÌ˛ ÚÂ΂ËÁÓ‡ DigiPure МИН : îÛÌ͈Ëfl Digipure ËÒÔÓθÁÛÂÚ ÌÓ‚ÂÈ¯Û˛ ˆËÙÓ‚Û˛ ÚÂıÌÓÎӄ˲ ‰Îfl ÔÓÎÛ˜ÂÌËfl ÂÒÚÂÒÚ‚ÂÌÌÓ„Ó ËÁÓ·‡ÊÂÌËfl. îÛÌ͈Ëfl Digipure ‚Íβ˜‡ÂÚ ‰‚ ÒÎÂ‰Û˛˘Ë ÙÛÌ͈ËË. Функция Digipure : ùÚ‡ ÙÛÌ͈Ëfl ÒÔÓÒÓ·ÒÚ‚ÛÂÚ ÒÓÁ‰‡Ì˲ ÂÒÚÂÒÚ‚ÂÌÌÓ„Ó ËÁÓ·‡ÊÂÌËfl ÔÛÚÂÏ Û‰‡ÎÂÌËfl Î˯ÌËı
  • Страница 67 из 89
    ä‡Í ÔÓθÁÓ‚‡Ú¸Òfl ÏÂÌ˛ ÚÂ΂ËÁÓ‡ ëàëíÖåÄ ñÇÖíçéëíà ëËÒÚÂχ ˆ‚ÂÚÌÓÒÚË ‚˚·Ë‡ÂÚÒfl ‡‚ÚÓχÚ˘ÂÒÍË. é‰Ì‡ÍÓ ÂÒÎË ËÁÓ·‡ÊÂÌË ÌÂflÒÌÓ ËÎË Ìˆ‚ÂÚÌÓÂ, ‚˚·ÂËÚ ÒËÒÚÂÏÛ ˆ‚ÂÚÌÓÒÚË ‚Û˜ÌÛ˛. 1 Выберите СИСТЕМА ЦВЕТНОСТИ и нажмите кнопку MENU/OK. 2 Нажимайте кнопки / для выбора режима ZOOM. Затем нажмите кнопку
  • Страница 68 из 89
    ä‡Í ÔÓθÁÓ‚‡Ú¸Òfl ÏÂÌ˛ ÚÂ΂ËÁÓ‡ åÂÌ˛ èêÖÑìëíÄçéÇäà áÇìäÄ БАЛАНС åÓÊÌÓ „ÛÎËÓ‚‡Ú¸ ·‡Î‡ÌÒ ÏÂÊ‰Û Î‚˚Ï Ë Ô‡‚˚Ï „ÓÏÍÓ„Ó‚ÓËÚÂÎflÏË. : Û‚Â΢ÂÌË „ÓÏÍÓÒÚË ÎÂ‚Ó„Ó „ÓÏÍÓ„Ó‚ÓËÚÂÎfl. : Û‚Â΢ÂÌË „ÓÏÍÓÒÚË Ô‡‚Ó„Ó „ÓÏÍÓ„Ó‚ÓËÚÂÎfl. AI ìêéÇÖçú ëíÖêÖé / I•II èË ÔÓÒÏÓÚ ‰‚ÛflÁ˚˜Ì˚ı ÔÓ„‡ÏÏ ÏÓÊÌÓ
  • Страница 69 из 89
    ä‡Í ÔÓθÁÓ‚‡Ú¸Òfl ÏÂÌ˛ ÚÂ΂ËÁÓ‡ 1 Выберите НА УЩН ИКИ и нажмите кнопку MENU/OK. ВКЛ : îÛÌ͈Ëfl ‚Íβ˜‡ÂÚÒfl. ВЫКЛ : îÛÌ͈Ëfl ‚˚Íβ˜‡ÂÚÒfl. Система BBE используется по лицензии компании ВВE Sound, Inc. ВВЕ является зарегистрированной торговой маркой компании BBE Sound, inc. SPATIALIZER ë ÔÓÏÓ˘¸˛ ÙÛÌ͈ËË
  • Страница 70 из 89
    ä‡Í ÔÓθÁÓ‚‡Ú¸Òfl ÏÂÌ˛ ÚÂ΂ËÁÓ‡ åÂÌ˛ ëÇéâëíÇÄ • ë ÔÓÏÓ˘¸˛ ˝ÚÓÈ ÙÛÌ͈ËË ÌÂθÁfl ÓÚÍβ˜ËÚ¸ ÒÂÚ‚Ó ÔËÚ‡ÌË ÚÂ΂ËÁÓ‡. • äÓ„‰‡ ˝Ú‡ ÙÛÌ͈Ëfl ‚Íβ˜Â̇, ÏÓÊÌÓ ‚˚Á‚‡Ú¸ ÏÂÌ˛ íÄâåÖê ÇõäãûóÖçàü ‰Îfl ÔÓ‰Ú‚ÂʉÂÌËfl ËÎË ËÁÏÂÌÂÌËfl ÓÒÚ‡‚¯Â„ÓÒfl ÔÂËÓ‰‡ ‚ÂÏÂÌË. ëàçàâ îéç íÄâåÖê ÇõäãûóÖçàü åÓÊÌÓ Á‡‰‡Ú¸
  • Страница 71 из 89
    ä‡Í ÔÓθÁÓ‚‡Ú¸Òfl ÏÂÌ˛ ÚÂ΂ËÁÓ‡ Как включить эту функцию 1 Выберите ИД НОМЕР затем нажмите кнопку 0 (AV). Для просмотра заблокированного телеканала 1 Выберите номер программы с заблокированным телеканалом с помощью кнопок с цифрами или списка ПРОГ. ЛИСТ. ùÍ‡Ì ÒÚ‡ÌÂÚ ÒËÌËÏ Ë ÔÓfl‚ËÚÒfl çéåÖê). (àÑ 2
  • Страница 72 из 89
    ä‡Í ÔÓθÁÓ‚‡Ú¸Òfl ÏÂÌ˛ ÚÂ΂ËÁÓ‡ ÄÇíé ÇõäãûóÖçàÖ àÏÂÂÚÒfl ‚ÓÁÏÓÊÌÓÒÚ¸ ‡‚ÚÓχÚ˘ÂÒÍÓ„Ó ‚˚Íβ˜ÂÌËfl ÚÂ΂ËÁÓ‡ ÔÓ Á‡‚Â¯ÂÌËË ‚¢‡ÌËfl, Ú.Â. ÂÒÎË ÓÌ Ì ÔËÌËχÂÚ Ò˄̇· ‚ Ú˜ÂÌË ÓÍÓÎÓ 15 ÏËÌÛÚ. ВКЛ : îÛÌ͈Ëfl ‚Íβ˜‡ÂÚÒfl. ВЫКЛ : îÛÌ͈Ëfl ‚˚Íβ˜‡ÂÚÒfl. • îÛÌ͈Ëfl ÄÇíé ÇõäãûóÖçàÖ Ì ӷÂÒÔ˜˂‡ÂÚ ÓÚÍβ˜ÂÌËfl
  • Страница 73 из 89
    ä‡Í ÔÓθÁÓ‚‡Ú¸Òfl ÏÂÌ˛ ÚÂ΂ËÁÓ‡ åÂÌ˛ HÄCTPéâäà • ÑÎfl ÓÚÏÂÌ˚ ÙÛÌ͈ËË ÄÇíé èêéÉ. ̇ÊÏËÚ ÍÌÓÔÍÛ DISPLAY. üáõä åÓÊÌÓ ‚˚·‡Ú¸ flÁ˚Í ÏÂÌ˛ ËÁ ÒÔËÒ͇ flÁ˚ÍÓ‚. 2 После сохранения телеканалов в списке номеров программ появится меню НАСТРОЙКА. 1 Выберите ЯЗЫК и нажмите кнопку MENU/OK. OK TV DISP 2 Нажимайте
  • Страница 74 из 89
    ä‡Í ÔÓθÁÓ‚‡Ú¸Òfl ÏÂÌ˛ ÚÂ΂ËÁÓ‡ çÄëíêéâäÄ/ Çêìóçìû îÛÌ͈ËË çÄëíêéâäÄ/Çêìóçìû ‰ÂÎflÚÒfl ̇ ‰‚‡ ÚËÔ‡: ‰‡ÍÚËÓ‚‡ÌË ÚÂÍÛ˘Ëı ÌÓÏÂÓ‚ ÔÓ„‡ÏÏ (ÙÛÌ͈Ëfl çÄëíêéâäÄ) Ë ۘ̇fl „ËÒÚ‡ˆËfl ÚÂÎÂ͇̇ÎÓ‚ ‚ ÒÔËÒÓÍ ÌÓÏÂÓ‚ ÔÓ„‡ÏÏ (ÙÛÌ͈Ëfl êìóçÄü). ВНИМАНИЕ ИД : ùÚ‡ ÙÛÌ͈Ëfl „ËÒÚËÛÂÚ Ì‡Á‚‡ÌË ÚÂÎÂ͇̇·
  • Страница 75 из 89
    ä‡Í ÔÓθÁÓ‚‡Ú¸Òfl ÏÂÌ˛ ÚÂ΂ËÁÓ‡ 4 Нажмите кнопку для изменения номера программы телеканала. ИД 1 Нажимайте кнопки / для выбора телеканала. 2 Нажмите красную кнопку для включения функции ИД. 3 Введите название телеканала (ИД). Пользуйтесь кнопками / для выбора знаков. Пользуйтесь кнопками / для
  • Страница 76 из 89
    ä‡Í ÔÓθÁÓ‚‡Ú¸Òfl ÏÂÌ˛ ÚÂ΂ËÁÓ‡ 5 Нажимайте зеленую или красную кнопку до тех пор, пока не появится нужный телеканал. При плохом приеме телеканала : ë ÔÓÏÓ˘¸˛ ÒËÌÂÈ ËÎË ÊÂÎÚÓÈ ÍÌÓÔÍË ‚˚ÔÓÎÌËÚ ÚÓÌÍÛ˛ ̇ÒÚÓÈÍÛ Ì‡ ˝ÚÓÚ ÚÂÎÂ͇̇Î. Если не удается получить нормальное звуковое сопровождение даже при
  • Страница 77 из 89
    ä‡Í ÔÓθÁÓ‚‡Ú¸Òfl ÏÂÌ˛ ÚÂ΂ËÁÓ‡ Номер CH/CC ÖÒÎË Ú·ÛÂÚÒfl ÙÛÌ͈Ëfl ÇëíÄÇäÄ, ÓÔËÒ‡Ì̇fl ̇ ÒÚ. 32, ̇ȉËÚ ÌÓÏÂ CH/CC, ÒÓÓÚ‚ÂÚÒÚ‚Û˛˘ËÈ ÚÂÎÂ͇̇ÎÛ, ÔÓ ‰‡ÌÌÓÈ Ú‡·ÎˈÂ. US: çÓÏÂ‡ ÚÂÎÂ͇̇ÎÓ‚, ËÒÔÓθÁÛÂÏ˚ı ‚ ëòÄ, ̇ îËÎËÔÔË̇ı Ë Ú.‰. CCIR: çÓÏÂ‡ ÚÂÎÂ͇̇ÎÓ‚, ËÒÔÓθÁÛÂÏ˚ı ̇ ÅÎËÊÌÂÏ ÇÓÒÚÓÍÂ, ‚
  • Страница 78 из 89
    ä‡Í ÔÓθÁÓ‚‡Ú¸Òfl ÏÂÌ˛ ÚÂ΂ËÁÓ‡ üáõä íÖãÖíÖäëíÄ àÏÂÂÚÒfl 4 „ÛÔÔ˚ flÁ˚ÍÓ‚ ÚÂÎÂÚÂÍÒÚ‡. Ç˚·ÂËÚ „ÛÔÔÛ, ÍÓÚÓ‡fl ÒÓÓÚ‚ÂÚÒÚ‚ÛÂÚ flÁ˚ÍÛ ÔÓ„‡ÏÏ˚ ÚÂÎÂÚÂÍÒÚ‡, ÍÓÚÓÛ˛ ‚˚ ıÓÚËÚ ÒÏÓÚÂÚ¸. 1 Выберите ЯЗЫК ТЕЛЕТЕКСТА и нажмите кнопку MENU/OK. 2 Нажмите кнопки выбора группы. Группа / 3 Нажмите кнопку MENU/OK
  • Страница 79 из 89
    ä‡Í ÔÓθÁÓ‚‡Ú¸Òfl ÏÂÌ˛ ÚÂ΂ËÁÓ‡ åÂÌ˛ ÑÖåé îÛÌ͈Ëfl ÑÖåé Ó·ÂÒÔ˜˂‡ÂÚ ‡‚ÚÓχÚ˘ÂÒÍÛ˛ ‰ÂÏÓÌÒÚ‡ˆË˛ ÌÂÍÓÚÓ˚ı ÙÛÌ͈ËÈ ÚÂ΂ËÁÓ‡. Когда функция ДЕМО установлена на ВКЛ : ÔË Í‡Ê‰ÓÏ ‚Íβ˜ÂÌËË ÚÂ΂ËÁÓ‡ ̇˜Ë̇ÂÚÒfl ‡‚ÚÓχÚ˘ÂÒ͇fl ‰ÂÏÓÌÒÚ‡ˆËfl. ÖÒÎË ‰ÂÏÓÌÒÚ‡ˆËfl Ì Ú·ÛÂÚÒfl, ÛÒÚ‡ÌÓ‚ËÚ ÙÛÌÍˆË˛ ÑÖåé ̇
  • Страница 80 из 89
    ДОПОЛНИТЕЛЬНАЯ ПОДГОТОВКА èÓ‰ÒÓ‰ËÌÂÌË ‚̯ÌËı ÛÒÚÓÈÒÚ‚ èÓ‰ÒÓ‰ËÌflÈÚÂ Í ÚÂ΂ËÁÓÛ ‚̯ÌË ÛÒÚÓÈÒÚ‚‡ Ò ËÒÔÓθÁÓ‚‡ÌËÂÏ ÒÎÂ‰Û˛˘ÂÈ ÒıÂÏ˚ ÔÓ‰ÒÓ‰ËÌÂÌËfl. Перед выполнением любого подсоединения : • èÓ˜ÚËÚ ÛÍÓ‚Ó‰ÒÚ‚Ó Í ÔÓ‰ÒÓ‰ËÌflÂÏ˚Ï ÛÒÚÓÈÒÚ‚‡Ï. ëÔÓÒÓ· ÔÓ‰ÒÓ‰ËÌÂÌËfl Á‡‚ËÒËÚ ÓÚ ÍÓÌÍÂÚÌ˚ı ÛÒÚÓÈÒÚ‚
  • Страница 81 из 89
    ÑéèéãçàíÖãúçÄü èéÑÉéíéÇäÄ Способы подсоединения 1 Соедините гнездо VIDEO телевизора с гнездом VIDEO OUT (видеовыход) устройства с помощью видеокабеля. Подсоединение устройства к телевизору с помощью кабеля S-VIDEO : ëÓ‰ËÌËÚ ‡Á˙ÂÏ S-VIDEO OUT (‚˚ıÓ‰ SVIDEO) ‚ˉÂÓχ„ÌËÚÓÙÓ̇ Ò ‡Á˙ÂÏÓÏ S
  • Страница 82 из 89
    ÑéèéãçàíÖãúçÄü èéÑÉéíéÇäÄ 2 Соедините гнезда AUDIO (L и R) панели OUTPUT с гнездами AUDIO IN (аудиовход L/R) видеомагнитофона при помощи аудиокабеля. • èË ‚˚Íβ˜ÂÌËË ÚÂ΂ËÁÓ‡ ÔÂÍ‡˘‡˛ÚÒfl Ò˄̇Î˚ ˜ÂÂÁ Ô‡ÌÂθ OUTPUT. • äÓÏÔÓÌÂÌÚÌ˚ Ò˄̇Î˚, ÔÓÒÚÛÔ‡˛˘Ë ˜ÂÂÁ Ô‡ÌÂθ VIDEO-3/ CéåPéNENT, ÌÂθÁfl
  • Страница 83 из 89
    ÑéèéãçàíÖãúçÄü èéÑÉéíéÇäÄ • çÂÓ·ıÓ‰ËÏÓ ÒÓ‰ËÌËÚ¸ ÚÂ΂ËÁÓ Ë ÛÒÚÓÈÒÚ‚Ó Ò ÔÓÏÓ˘¸˛ ͇·ÂÎfl AV COMPU LINK. 䇷Âθ AV COMPU LINK Ì ‚ıÓ‰ËÚ ‚ ÍÓÏÔÎÂÍÚ ÔÓÒÚ‡‚ÍË ÚÂ΂ËÁÓ‡. ÖÒÎË Í‡·ÂÎfl AV COMPU LINK ÌÂÚ, ÒÓ‰ËÌËÚ ÚÂ΂ËÁÓ Ë ÛÒÚÓÈÒÚ‚Ó Ò ÔÓÏÓ˘¸˛ ͇·ÂÎfl, ̇ Ó·ÓËı ÍÓ̈‡ı ÍÓÚÓÓ„Ó ËϲÚÒfl 3,5 ÏÏ (ÏÓÌÓ)
  • Страница 84 из 89
    Устранение неисправностей ÖÒÎË ÔË ÔÓθÁÓ‚‡ÌËË ÚÂ΂ËÁÓÓÏ ‚ÓÁÌË͇ÂÚ ÔÓ·ÎÂχ, ÔÓ˜ÚËÚ ‡Á‰ÂÎ “ìÒÚ‡ÌÂÌË ÌÂËÒÔ‡‚ÌÓÒÚÂÈ” ÔÂ‰ ÚÂÏ Í‡Í Ó·‡˘‡Ú¸Òfl Í Ï‡ÒÚÂÛ. ùÚ‡ ËÌÙÓχˆËfl ÏÓÊÂÚ ÔÓÏÓ˜¸ Ç‡Ï ‚ ÛÒÚ‡ÌÂÌËË ÔÓ·ÎÂÏ˚ ·ÂÁ ÔÓÒÚÓÓÌÌÂÈ ÔÓÏÓ˘Ë. ÖÒÎË, ̇ÔËÏÂ, ‚ËÎ͇ ¯ÌÛ‡ ÔËÚ‡ÌËfl ‚˚ÒÍӘ˷ ËÁ ÓÁÂÚÍË ËÎË
  • Страница 85 из 89
    ìÒÚ‡ÌÂÌË ÌÂËÒÔ‡‚ÌÓÒÚÂÈ • Ñ·ÈÚ ÎË ‚˚ ÔÓÒÚ‡ÌÓ‚ÍÛ ëàëíÖåÄ ñÇÖíçéëíà ‰Îfl ÚÂÎÂ͇̇· Ô‡‚ËθÌÓ?ÑÎfl ÛÒÚ‡ÌÂÌËfl ˝ÚÓÈ ÔÓ·ÎÂÏ˚ ËÒÔÓθÁÛÈÚ ËÌÙÓχˆË˛ ‚ ‡Á‰ÂΠ“äÌÓÔ͇ COLOUR SYSTEM” ̇ ÒÚ. 11. • è‡‚ËθÌÓ ÎË ÓÚ„ÛÎËÓ‚‡Ì˚ ñÇÖí Ë üêäé? ÑÎfl „ÛÎËÓ‚‡ÌËfl ËÒÔÓθÁÛÈÚ ËÌÙÓχˆË˛ ‚ ‡Á‰ÂÎÂ
  • Страница 86 из 89
    ìÒÚ‡ÌÂÌË ÌÂËÒÔ‡‚ÌÓÒÚÂÈ ÑÛ„Ë ÔÓ·ÎÂÏ˚ • èË ‚Íβ˜ÂÌÌÓÈ ÙÛÌ͈ËË íÄâåÖê ÇõäãûóÖçàü ËÎË ÄÇíé ÇõäãûóÖçàÖ ÔÓËÒıÓ‰ËÚ ‡‚ÚÓχÚ˘ÂÒÍÓ ‚˚Íβ˜ÂÌË ÚÂ΂ËÁÓ‡. ÖÒÎË ÚÂ΂ËÁÓ ‚ÌÂÁ‡ÔÌÓ ‚˚Íβ˜ËÎÒfl, ̇ÊÏËÚ ÍÌÓÔÍÛ ÔËÚ‡ÌËfl POWER ‰Îfl Â„Ó ‚Íβ˜ÂÌËfl. ÖÒÎË ÚÂ΂ËÁÓ ̇˜Ë̇ÂÚ ÌÓχθÌÓ ‡·ÓÚ‡Ú¸, ÓÌ ËÒÔ‡‚ÂÌ. •
  • Страница 87 из 89
    Технические данные íÂ΂¢‡ÚÂθÌ˚ ÒËÒÚÂÏ˚: ëËÒÚÂÏ˚ ˆ‚ÂÚÌÓÒÚË: ä‡Ì‡Î˚ Ë ˜‡ÒÚÓÚ˚ B, G, I, D, K, K1, M PAL, SECAM, NTSC3.58/4,43 MHz ä‡Ì‡Î ÌËÁÍÓÈ VHF (VL) = 46,25 - 168,25 Ɉ ä‡Ì‡Î ‚˚ÒÓÍÓÈ VHF (VH) = 175,25 - 463,25 Ɉ ä‡Ì‡Î UHF (U) = 471,25 - 863,25 Ɉ èËÌËχÂÚ Í‡·ÂθÌ˚ ÚÂÎÂ͇̇Î˚ ‚ Ò‰ÌÂÏ
  • Страница 88 из 89
    VICTOR COMPANY OF JAPAN, LIMITED LCT0959-001B-H_R/22-44 44 Black 7/3/1, 8:31 PM
  • Страница 89 из 89