-
7
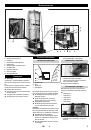
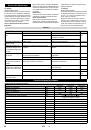
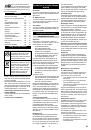
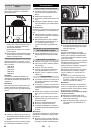
1 Brush bearing
2 Incline crank
3 Storage of the inclining spindle
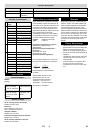
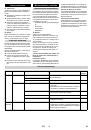
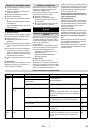
1 Steering roller
2 Chain
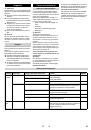
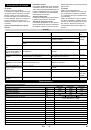
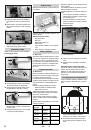
1 Terminal clip
2 Brush semi-bowl
Danger
Risk of accident while working on the unit!
Before starting any work on the plant,
wwitch off the main switch and ensure that
it will not be put on accidentally.
Loosen the screws on the end clip and
remove the end clip.
Slide the brush semi-bowls away from
each other and remove them from the
brush shaft.
Install the new semi-bowls as follows.
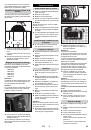
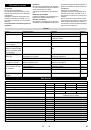
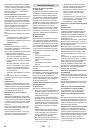
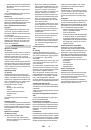
Brush semi-bowls type 1
Brush semi-bowls type 2
몇
Warning
Danger of accident! With semi-bowls, two
different styles are used, which must never
be mixed. Otherwise, the semi-bowls could
come loose from the shaft during system
operation. The two styles differ based on
the location of the bushels at the end or
start of the semi-bowl. In order to prevent
imbalance and damages caused by this,
the following points must be observed: The
semi-bowls must always be replaced as
sets, i.e. always as a whole segment. The
bristle bushels must be offset to the oppo-
site semi-bowls along the the butt joint.
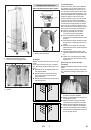
Place the first pair of semi-bowls on top
of the shaft and slide them together.
Place the second pair of semi-bowls on
top of the shaft rotated by 90° and slide
them together.
Install the other semi-bowl pairs on the
shaft offset by 90° each.
After installing the last semi-bowl pair,
install the end clip.
Slide the end clip against the last semi-
bowl pair and tighten screws.
Finally, recheck the proper installation
of the semi-bowls and tight seating of
the screws.
Danger
Risk of accident while working on the unit!
Before starting any work on the plant,
wwitch off the main switch and ensure that
it will not be put on accidentally.
Loosen the screw of one mat segment
and remove the mat segment.
Remove the other mat segments con-
secutively.
Install the first new mat segment in the
appropriate bores.
Install every subsequent mat segment
rotated by 180° compared to the previ-
ous one.
After installation, recheck the proper
seating of the mat segments and the
tight fit of the screws.
Brush replacement
Square shaft with semi-bowls
Round shaft with mat brushes
18
EN