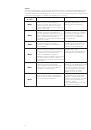
reiniging en onderhoud
onderhoud en reiniging
●
Schakel het apparaat altijd uit en haal de stekker uit het stopcontact voor
u het gaat reinigen.
●
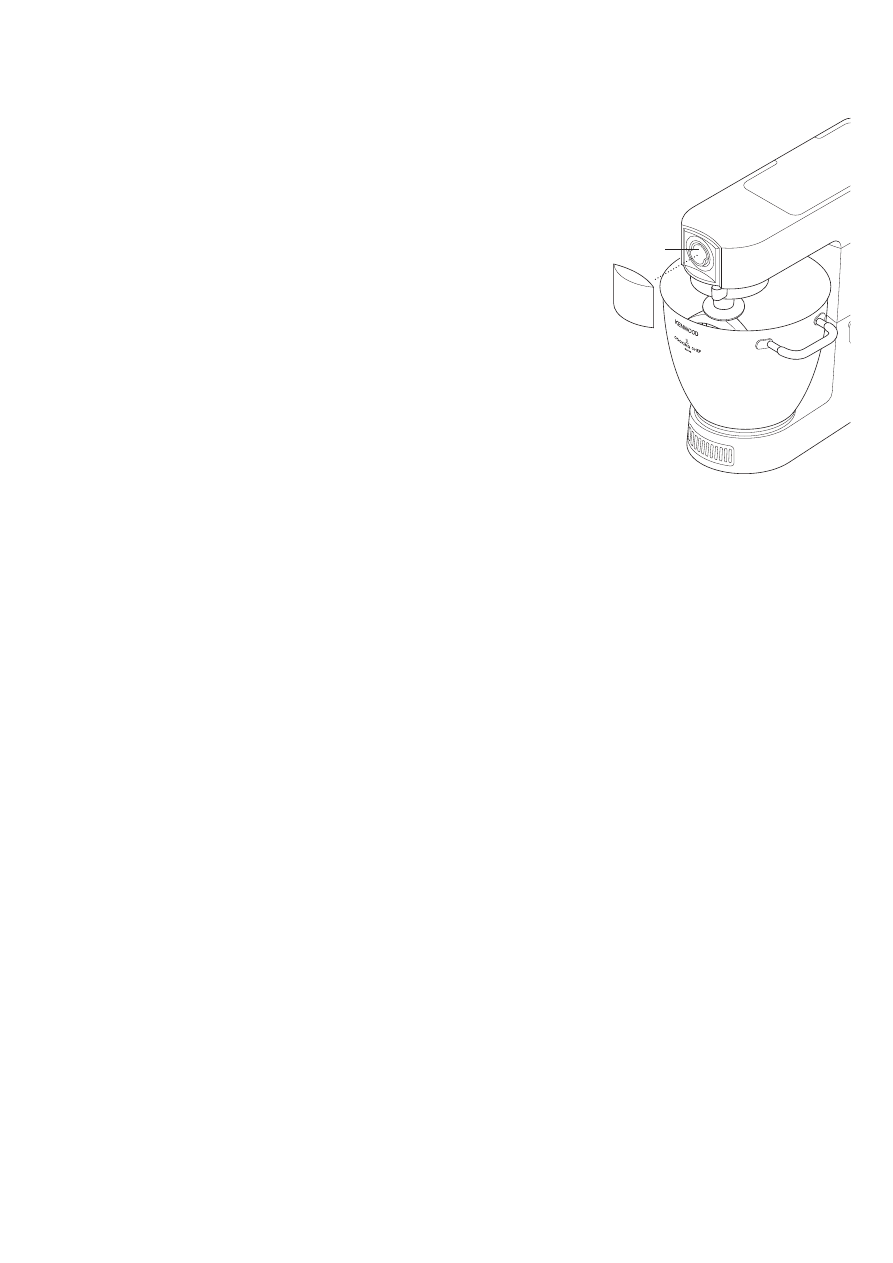
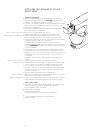
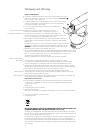
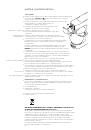
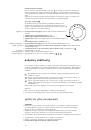
Bij het eerste gebruik kan een beetje vet bij het
aansluitpunt
zitten.
Dit is normaal. U kunt het gewoon wegvegen.
●
De metalen oppervlakken van de temperatuursensors kunnen tijdens
normaal gebruik tekenen van slijtage vertonen. Dit heeft geen invloed
op de prestaties van het product.
●
Laat de flexibele klopper voor hoge temperatuur niet op de mixer
zitten als het apparaat niet in gebruik is.
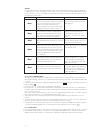
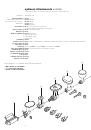
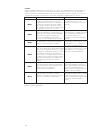
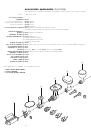
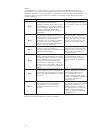
apparaat, afdekkingen
aansluitpunten
●
Met een vochtige doek afvegen en vervolgens afdrogen.
●
Nooit in water onderdompelen of schuurmiddelen gebruiken.
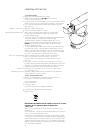
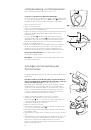
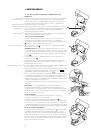
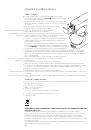
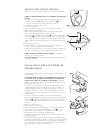
flexibele klopper voor
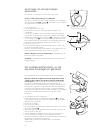
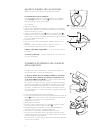
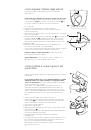
●
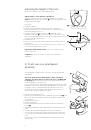
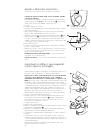
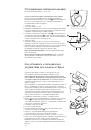
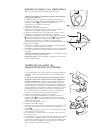
Verwijder de flexibele vegers altijd na gebruik voordat u het apparaat
hoge temperatuur
reinigt en opbergt: trek en draai iedere veger tot deze van de roestvrij
stalen klopperarm schuift.
●
Om de roestvrijstalen klopperarm te reinigen, verwijdert u de flexibele
vegers, waarna u hem in een heet sopje afwast en grondig afdroogt. De
flexibele vegers moeten onmiddellijk na gebruik worden gereinigd in een
heet sopje. Gebruik de meegeleverde reinigingsborstel om de
BINNENKANT
van iedere veger te reinigen. Spoel de flexibele vegers
onder heet kraanwater af en droog ze grondig af.
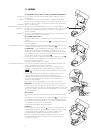
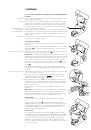
●
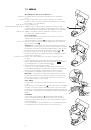
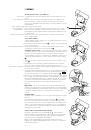
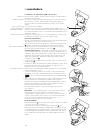
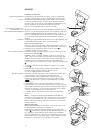
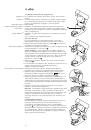
Om de flexibele vegers weer te installeren, bevochtigt u de roestvrij stalen
klopperarmen met een kleine hoeveelheid verse kookolie. Schuif de
flexibele vegers op de roestvrij stalen arm. Zorg dat iedere veger de
volledige lengte van de arm bedekt en tot voorbij het uiteinde uitsteekt.
Herhaal dit proces voor de tweede veger.
NB: Dit hulpstuk kan alleen worden gebruikt als beide vegers geïnstalleerd
zijn.
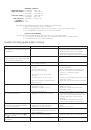
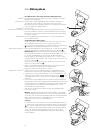
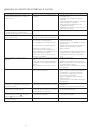
kom, hulpstukken, spatdeksel
●
Met de hand afwassen en goed afdrogen, of in de afwasmachine wassen.
●
Gebruik nooit een staalborstel, staalwol of bleekmiddel om uw roestvrij
stalen kom te reinigen. Gebruik azijn of een geschikt ontkalkingsmiddel om
kalkaanslag te verwijderen.
●
Als voedsel aan de binnenkant van de kom aankoekt of aanbrandt,
verwijdert u zo veel mogelijk met de meegeleverde spatel. Vul de kom met
warm zeepsop en laat hem weken. Verwijder hardnekkige resten met een
nylon borstel.
●
Verkleuring van de kom heeft geen invloed op de prestaties ervan.
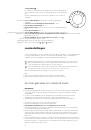
drainopening
●
Zorg dat zich geen voedsel in de buurt van deze opening bevindt. gebruik
zo nodig een pijpenrager of wattenstaafje om de opening te reinigen.
temperatuursensors
●
Met een vochtige doek afvegen en vervolgens goed afdrogen. Gebruik
nooit schuurmiddelen of scherpe instrumenten om de sensors te reinigen.
onderhoud en klantenservice
●
Als het snoer beschadigd is, moet het om veiligheidsredenen door
Kenwood of een door Kenwood geautoriseerd reparatiebedrijf vervangen
worden.
Als u hulp nodig hebt met:
●
het gebruik van uw apparaat of
●
onderhoud en reparatie
kunt u contact opnemen met de winkel waar u het apparaat gekocht hebt.
●
Ontworpen en ontwikkeld door Kenwood in het VK.
●
Vervaardigd in China.
34
 1
1
 2
2
 3
3
 4
4
 5
5
 6
6
 7
7
 8
8
 9
9
 10
10
 11
11
 12
12
 13
13
 14
14
 15
15
 16
16
 17
17
 18
18
 19
19
 20
20
 21
21
 22
22
 23
23
 24
24
 25
25
 26
26
 27
27
 28
28
 29
29
 30
30
 31
31
 32
32
 33
33
 34
34
 35
35
 36
36
 37
37
 38
38
 39
39
 40
40
 41
41
 42
42
 43
43
 44
44
 45
45
 46
46
 47
47
 48
48
 49
49
 50
50
 51
51
 52
52
 53
53
 54
54
 55
55
 56
56
 57
57
 58
58
 59
59
 60
60
 61
61
 62
62
 63
63
 64
64
 65
65
 66
66
 67
67
 68
68
 69
69
 70
70
 71
71
 72
72
 73
73
 74
74
 75
75
 76
76
 77
77
 78
78
 79
79
 80
80
 81
81
 82
82
 83
83
 84
84
 85
85
 86
86
 87
87
 88
88
 89
89
 90
90
 91
91
 92
92
 93
93
 94
94
 95
95
 96
96
 97
97
 98
98
 99
99
 100
100
 101
101
 102
102
 103
103
 104
104
 105
105
 106
106
 107
107
 108
108
 109
109
 110
110
 111
111
 112
112
 113
113
 114
114
 115
115
 116
116
 117
117
 118
118
 119
119
 120
120
 121
121
 122
122
 123
123
 124
124
 125
125
 126
126
 127
127
 128
128
 129
129
 130
130
 131
131
 132
132
 133
133
 134
134
 135
135
 136
136
 137
137
 138
138
 139
139
 140
140
 141
141
 142
142
 143
143
 144
144
 145
145
 146
146
 147
147
 148
148
 149
149
 150
150
 151
151
 152
152
 153
153
 154
154
 155
155
 156
156
 157
157
 158
158
 159
159
 160
160
 161
161
 162
162
 163
163
 164
164