5
EN – Installation instructions
The radiator may only be installed by a specialist.
Safety instructions
Read these instructions thoroughly prior to
installation/commissioning.
After installation, pass the instructions on
to the end user.
DANGER
Life-threatening situation!
Check the condition of the supply lines
(electricity, gas, water).
Do not drill into any lines.
►
►
WARNING
Risk of injury!
Take the weight of the radiator into
account (see manufacturer's data).
At 5 kg and above work with lifting
equipment or several persons.
►
►
WARNING
Personal injury and material damage!
Check substrate for load-bearing capacity.
Take the filled weight of the radiator and
possible additional loads into account
(see manufacturer's data).
Check fasteners for applicability and
tailor them to the structural situation.
Take special requirements, e.g. for public
buildings (schools or the like), into
account.
►
►
►
Conditions of use
Observe operating conditions for water
heating installations according to local
regulations.
Maintain water quality according to local
regulations.
Observe usage limits in humid spaces ac-
cording to local regulations.
Use radiator only in closed heating sys-
tems.
Store and transport radiator only in the
protective packaging.
Complaint
Please contact the supplier.
►
►
►
►
►
►
►
►
Disposal
Packaging and any parts that are not need-
ed should be recycled or disposed of prop-
erly. Observe local regulations.
Technical features
Operating pressure: max. 10 bar
Test pressure: 1.3 x operating pressure
Flow temperature: hot water up to 100°C
(1°F)
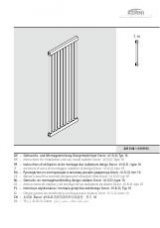
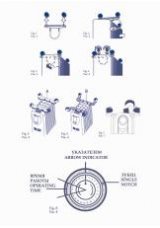
Installation
Preparatory activities
Check fasteners for damage.
Note the number of mounting points (see
Fig. A).
Number determined and checked on
vertical coring lightweight brick T14.
Requirement class according to
VDI 6036 permissible when complying
with Appendix D. If necessary, install
additional shift restraint (refer to manu-
facturer's documentation).
Note the position of mounting points (see
Fig. C).
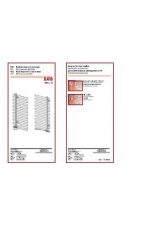
When installing, only remove protective
packaging at the fastening and connection
points.
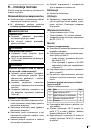
Assemble the radiators delivered in blocks
(see Fig. B)
Accessories per connection:
Item Group
Number
1
Screw-in fitting M 7
2
Screw-in fitting with flange
3
Union nuts SW 30
4
Panel
Set individual blocks on a clean and level
base.
With an Allen key SW 1 screw the screw-in
fittings M 7 (1) on one of the blocks in and
tighten (tightening torque 40 Nm).
Put the screw-in fittings with flange () in
the union nuts SW 30 (3) and screw down
on the second block.
With an Allen key SW 1 tighten the screw-
in fittings with flange () (tightening torque
40 Nm).
►
•
•
•
►
►
–
–
►
►
►
►
►
►