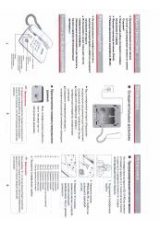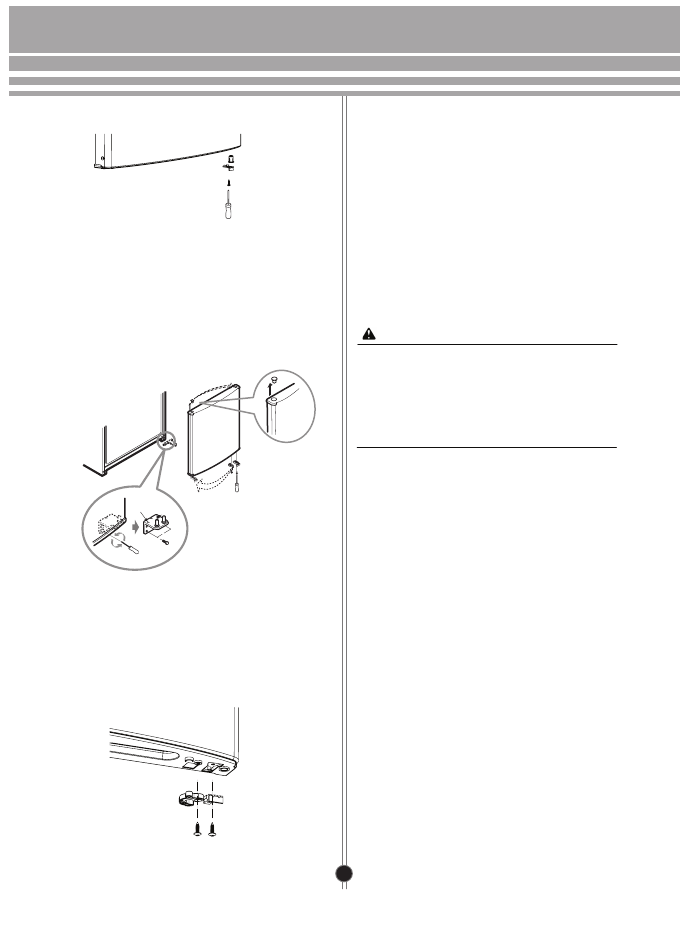
Fig. 8
(25)
(27)
(26)
(30)
(32)
(31)
Fig. 9
(35)
(33)
(34)
Fig. 10
However, when you want to reverse the
doors, you must call to service agent.
Reversing the doors is not covered by the
warranty.
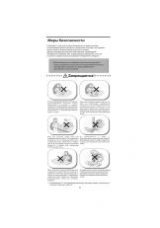
Refrigerator work features
As a result of thermal strain for components of
a refrigerator appliance can be heard crackling
noise that is not a defect and doesn’t affect
efficiency of the appliance. This special sound
when the thermo-regulator and compressor and
turned on is a normal state, which appears
during the working process of appliance’s
electric installation.
The gas refrigerant produces a slight noise even
when the compressor is not running (this is not
a defect.)
While refrigerator appliance working process
can be heard:
- flick of the temperature relay;
- murmur of refrigerant flowing round cycle;
- cracking noise because of the materials
deformation by temperature.
All that is not defect and doesn’t affect efficiency
of the appliance.
54
CAUTION!
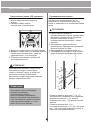
• Remove the door upper hinge fig. 9 (31) by
undoing the screws fig. 9 (30) and the bolts
fig. 9 (32) and secure it on the opposite side
of the hinge fig. 9 (31).
• Remove the blind plug fig. 9 (35) in the upper
part of the refrigerating compartment door and
fix it on the opposite side.
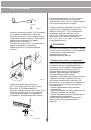
• Remove the door closer fig. 10 (33) in the
lower part of the refrigerating compartment
door by undoing the screws fig. 10 (34) and
secure it on the opposite side.
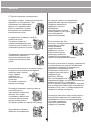
• Remove the limiter fig. 8 (25) in the lower part
of the refrigerating compartment door by
undoing the screws fig. 8 (26) and secure it on
the opposite side. Do the same operation
for the freezing compartment door.
• Remove the sleeve fig. 8 (27) in the lower part
of the refrigerating compartment door and fix it
on the opposite side.
• Assemble the door lower hinge fig. 9 (31)
of the refrigerating compartment, assemble the
door central hinge fig. 7 (23) of the
refrigerating compartment, assemble the door
upper hinge fig. 6 (19) and plug in the
connecting cable fig. 2 (9), mount the cover
fig. 4 (13), fig. 3 (11) and fig. 2 (7) in the
reverse order.
CARE AND MAINTENANCE