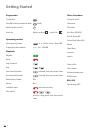
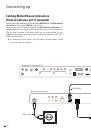
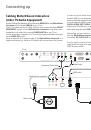
Start-up
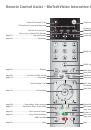
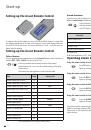
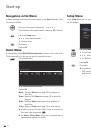
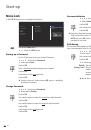
Setting up the Assist Remote Control
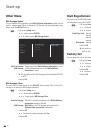
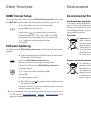
To insert or change the batteries, press on the arrow. While doing so, simply slide
the battery compartment lid down and remove it. Insert alkali manganese bat-
teries LR 03 (AAA) and ensure the correct position of + and –. Slide the cover on
again from the bottom.
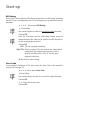
Setting up the Assist Remote Control
Other Devices
You can operate various Loewe devices using the
Assist
Remote Control. The device
buttons
REC
-
DVD
-
AUDIO
can be set up for this.
Press the required device buttons and the Stop button
simultaneously for 5 sec. until the corresponding LED display
flashes twice.
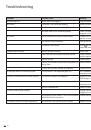
Then select the two-digit device code from the table:
Unit
Code
Factory Set
Loewe ViewVision 8106 H
10
Loewe ViewVision, Centros 21x2
12
Loewe ViewVision DR+ DVB-T
13
REC
Loewe Auro 2216 PS/8116 DT
14
Loewe BlutechVision
15
Loewe Sound Projector
17
Loewe TV Radio digital
19
AUDIO
Loewe Mediacenter
20
Loewe BlutechVision Interactive
21
DVD
HDMI CEC Mode
¾¾
22
Loewe Sound Projector 2
23
Loewe AudioVision
24
Reset to Factory Set
99
The corresponding LED Display flashes twice.
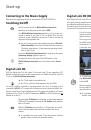
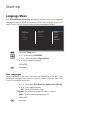
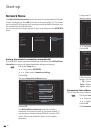
Sound functions
It can be set on which devices the buttons with the sound functions (
V+
/
-
,
sound
off
and
sound mode
) should work.
Press the device button
TV
and at the same time the button
with the single digit function code from the list for 5 sec. until
the LED Display flashes twice.
Function
Code
Figure
Loewe AudioVision
3
Page 11
Loewe Mediacenter
4
Loewe TV
¾
5
Page 10
Loewe Sound Projector
6
¾
Factory Set
¾¾
from mainframe L271x, Software V9.2
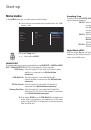
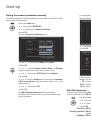
Operating Loewe Equipment
Using the remote control for a Loewe TV set
Press
TV
button; the LED Display above it
lights up for approx. 5 seconds
Using the remote control for a Loewe recorder
Press the
REC
button; the LED Display above it
lights up for approx. 5 seconds
Using the remote control for BluTechVision Interactive
Press the
DVD
button; the LED Display above it
lights up for approx. 5 seconds
Using the remote control for AudioVision
Press the
AUDIO
button; the LED Display above it
lights up for approx. 5 seconds
Every time a button is pressed, the LED display lights up for the selected operating
mode for checking purposes (
TV
–
REC
–
DVD
–
AUDIO
).
Please refer to the respective operating conditions on how to operate the indi-
vidual devices.
- 12