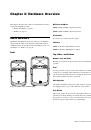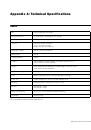
GSR Speakers Guide
12
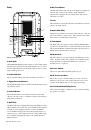
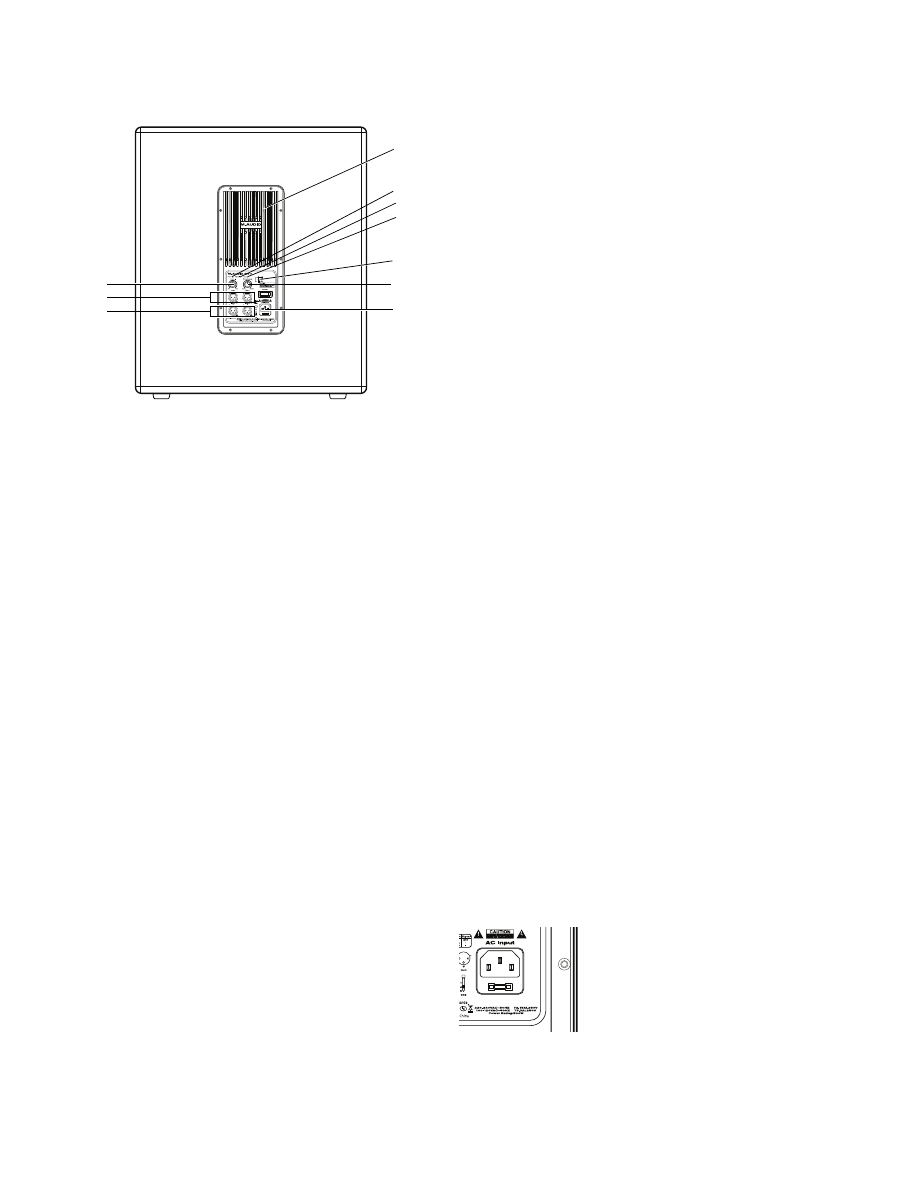
Back
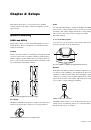
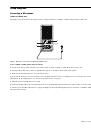
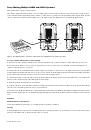
1 Heat Sink
The aluminum amplifier panel doubles as a heat sink, which
dissipates heat generated by the GSR amplifier. Do not block
the heat sink, and make sure nothing comes in direct contact
with it while powered on.
2 Power Indicator LED
The Power LED lights green when the GSR18 is powered on.
3 Signal Present Indicator LED
The Signal LED lights green to indicate when the GSR is receiv-
ing an input signal.
4 Peak Indicator LED
The Peak LED flashes red to indicate that the speaker has
clipped; lower the source, or turn the speaker down using its
Volume control.
5 Left/Right Stereo Inputs
These input jacks are for connecting XLR or 1/4-inch TRS ca-
bles from the left and right outputs of a mixer of other stereo
source. If you are connecting a mono source, use the Left in-
put (XLR, or TRS).
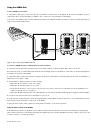
6 Left/Right Stereo XLR Thru Outputs
The Thru jacks provide a stereo pair of XLR outputs to connect
to the inputs of other GSR speakers.
7 Level
The Level knob controls the volume of the GSR18.
8 Phase
The Phase switch lets you alter the polarity of the input signal.
When the Phase switch is in its default “out” setting, phase is
unaffected. When “in” the signal is adjusted 180°. Try en-
abling the Phase switch if the overall sound in the particular
room seems like it’s “collapsing” when turned up. This can
sometimes occur when a sub is positioned off to the side, be-
hind a curtain, or in applications where the subwoofer is not
firing in the same direction as the full-range speakers.
9 Frequency
The variable low-pass Frequency knob lets you dial in the ideal
frequency to crossover to your full-range “tops” such as the
GSR10 or GSR12, to maximize bass output. Since the GSR10
and GSR12 both have a 75 Hz high-pass button, the ideal fre-
quency to crossover to the “tops” would be 75 Hz. However,
all listening environments, “tops” from other manufacturers,
and personal tastes are different. So, depending on the place-
ment of the GSR18 and how much bass is desired, the Fre-
quency knob (along with the Phase button) lets you optimize
the bass response for any room or application.
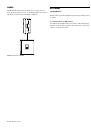
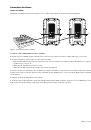
10 AC Power and Fuse
This socket accepts a standard IEC power cable (one is in-
cluded) for AC power to the speaker. The fuse protects the
speakers from possible damage due to power spikes or surges.
If you ever need to replace the fuse, you can do so by removing
the fuse cover, taking out the old fuse and installing a new
one. Always replace the fuse with one of the same rating.
GSR18 back
2
6
7
5
1
3
4
9
10
8
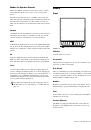
Location of fuse