8
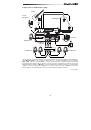
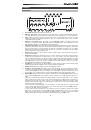
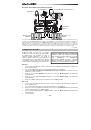
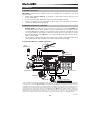
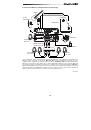
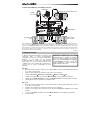
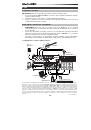
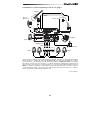
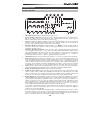
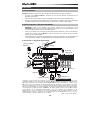
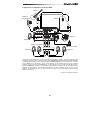
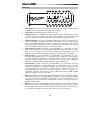
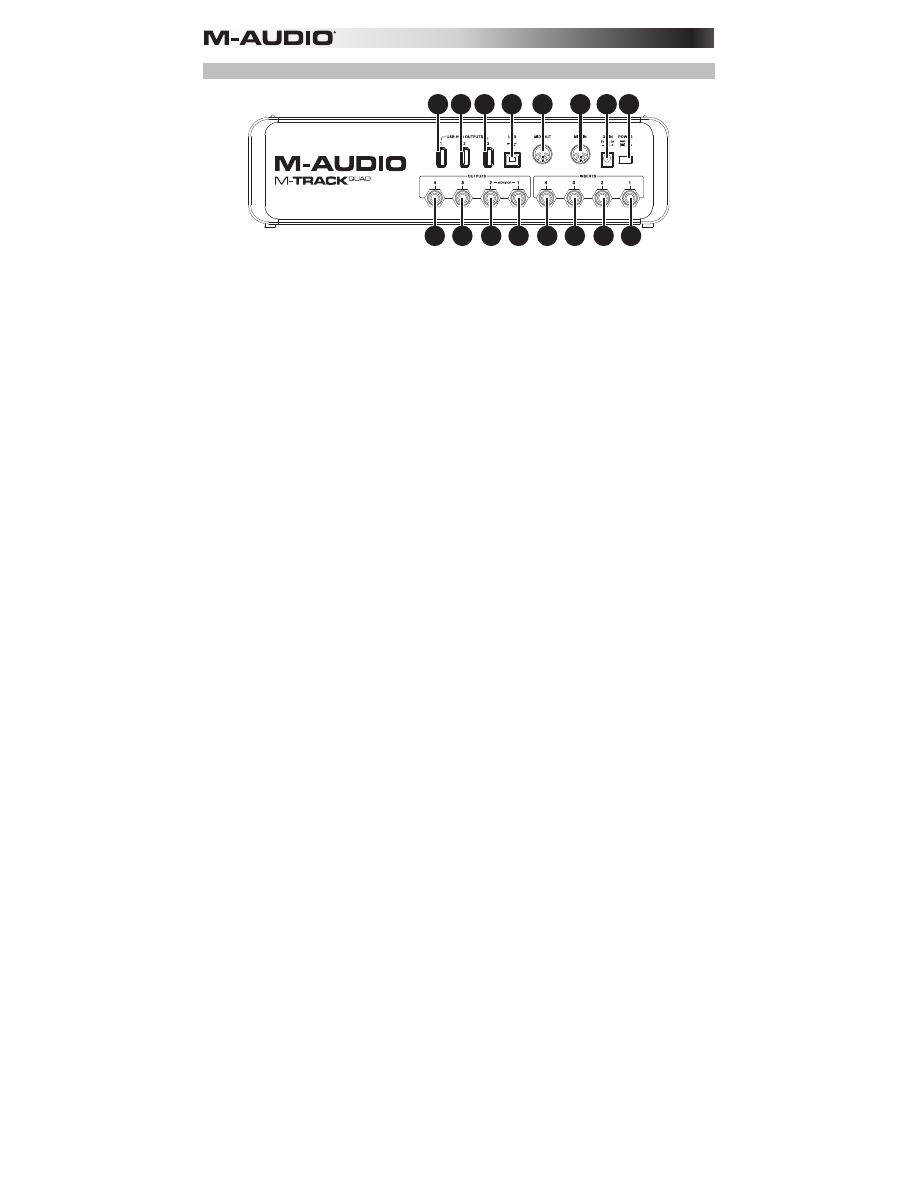
Rear Panel
9
8
5
6
6
7
7
5 5 5
3
4 4 4
1 2
1.
Power Input:
Connect the included power adapter (6V, 3A, center pin-positive) here,
then connect the adapter to wall power.
2.
Power Switch:
Turns the M-Track Quad on and off.
3.
USB Port:
This connection will allow you to send audio and MIDI information to/from a
computer. Use a USB cable to connect the M-Track Quad to a computer. The M-Track
Quad requires a USB 2.0 connection.
4.
USB Hub Outputs:
You can connect additional USB devices (controllers, hard drives,
etc.) to these powered USB ports. In addition to being an audio interface, these ports
allow M-Track Quad to function as a powered USB hub. This can be useful if you run out
of available USB ports on your computer.
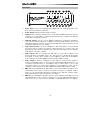
5.
Audio Inputs (Inserts):
You can use standard 1/4" TRS insert cables to connect external
processors (such as compressors, limiters, external EQ units, etc.) to these jacks. The
signal will be taken after the channel's gain control and returned before the channel's
audio signal is sent to the computer.
6.
Audio Outputs 1 & 2:
Use standard 1/4" TRS cables to connect these outputs to your
powered monitors, an amplifier system, etc. Their levels are controlled by the Monitor
Level knob. To monitor these outputs in your headphones, make sure the Headphone
Source Switch is set to
1/2
or
All
(which includes Audio Outputs 3 and 4).
7.
Audio Outputs 3 & 4:
Use standard 1/4" TRS cables to connect these outputs to
monitors, an amplifier system, etc. Their levels are automatically 0 dB (full volume), so we
recommend connecting these to a headphone amp or remote mixer to use as your
cue/monitor outputs. To monitor these outputs in your headphones, make sure the
Headphone Source Switch is set to
3/4
or
All
(which includes Audio Outputs 1 and 2).
8.
MIDI Out:
Use a standard five-pin MIDI cable to connect this output to the MIDI In of an
external MIDI device. This is useful for connecting, for instance, a hardware synth to
which you can send the MIDI data from your DAW session and then send the synth's
audio output back into a pair of the Mic/Line / Inst Inputs.
9.
MIDI In:
Use a standard five-pin MIDI cable to connect this input to the MIDI Out of an
external MIDI device. This is useful if you want to use an older MIDI keyboard without a
USB connection—you can connect it to this input to send MIDI data from your computer.