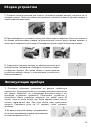
Installation instructions
3.
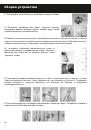
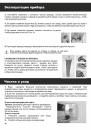
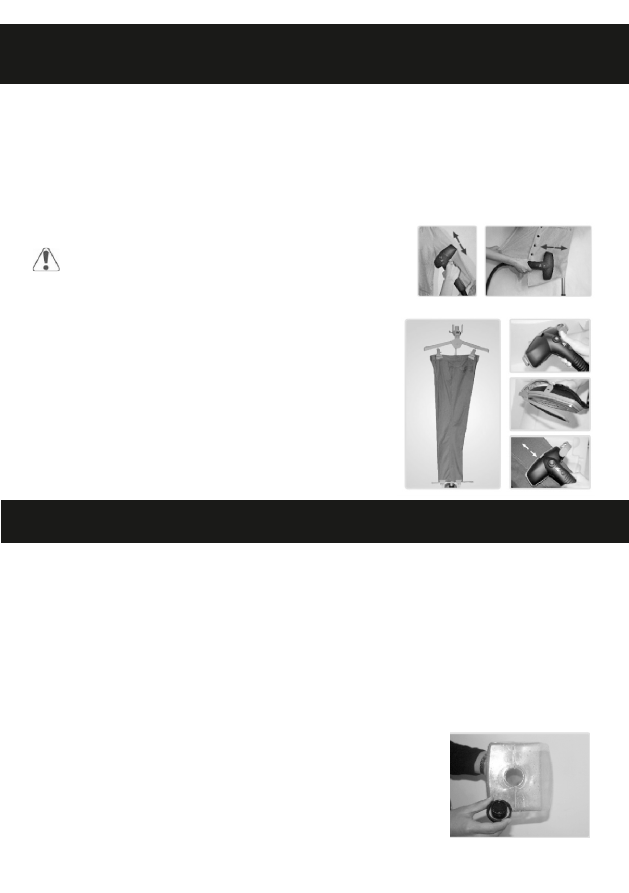
Press gently the metal panel of ironing brush on the clothes, move the brush up and down at
such a speed that the steam penetrates into the fibers appropriately for hot forming.
4.
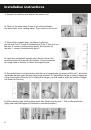
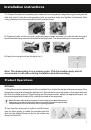
After ironing the main part, ironing the specific parts from up to down. When ironing the collar,
you may fold the whole collar back, hold one end of the collar by hand, move the ironing brush
horizontally and, during when, be careful of the hot steam (as shown in Picture 3).
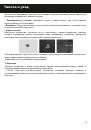
5.
When ironing the sleeves, pull the sleeves to straight and move the
ironing brush along the sleeves (as shown in Picture 4).
When the ironing brush shake or move from side to side, water bead
may be appeared on the handle of ironing brush ( Danger of scalding ).
7.
After ironing the front of clothes, turn the clothes over to iron its back.
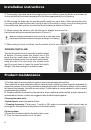
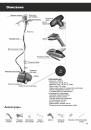
IRONING PANTS LINE:
Take out the pants line clip, insert the metallic clasps
at bottom of ironing brush into plastic slot of the
pants line clip, press down the handle to open the
interface between pants line clip and ironing brush,
clasp the pants line and move the ironing brush
gently up and down to make the pants line rightly
straight. The dismounting is in a reverse order.
1.
Purified water is recommended in order to avoid contaminating the textiles.
The contents of mineral substance differ in various kinds of water, so there would be sediments to
respective extents if the ironing machine is applied with water of different qualities, which makes
the steam flow lessens, intermits or even stops. Purified water is recommended in order to avoid
contaminating the textiles.
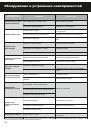
2.
To better maintain the machine, the machine, when used for a certain period, may be cleaned or
maintained as follows, in which we suggest to take the both steps together:
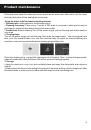
Cleaning the water tank
:
•
Related parts:
water tank and tank filter
•
Cleaning frequency:
Clean every 1 month or 20L water is consumed, which period may be
prolonged or shortened according to the actual water quality.
Cleaning steps:
1.
Screw out counterclockwise the water tank cover;
2.
Pour the remnant water out of the tank;
Р
roduct maintenance
8