www.modecom.eu
6
www.modecom.eu
the default condition. It shifts 400-800-1600 DPI circularly when press DPI switch
keystroke. The setup will not change when restart the computer if the mouse is
connecting with computer.
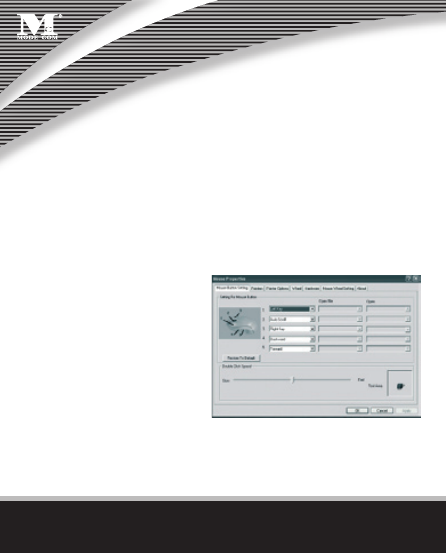
9. The Fourth and Fifth Key Function Setting
Customer can set the fourth and fi th key’s function:
insert the driver CD into CD-ROM
to install. There will appear a mouse
icon in the taskbar of window after
fi nishing installation, right click the
mouse icon, select „Control Panel”,
appear fi gure below, click „4” in the
„Mouse Button Setting”, then se-
lect the functions in the menu, click
„Yes”. The fi fth key function setting is the same as the fourth key. If you want to re-
set functions, repeat the above operations.