1
CKX41/CKX31
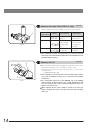
Observation tube
Binocular tube fixed
Replaceable
*
Stage center plate
–
Replaceable
**
Fig. 1
Fig. 2
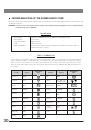
IMPORTANT
The difference between the CKX31 and CKX41 microscopes lie in the following basis systems.
CKX31
CKX41
Reflected fluorescence system
Not mountable
Mountable
*
The U-CBI30-2/U-BI30-2/U-CTBI/CKX-TBI binocular tube or U-CTR30-2/U-TR30-2 trinocular tube can be
mounted. But no intermediate attachment can be mounted.
**
The standard stage center plate can be replaced with the CK40-CPG glass center plate, IX-CP50 center
plate (50 mm), etc.
SAFETY PRECAUTIONS
1. After the equipment has been used in an observation of a specimen
that is accompanied with a potential of infection, clean the parts
coming in contact with the specimen to prevent infection.
· Moving this product is accompanied with the risk of dropping the speci-
men. Be sure to remove the specimen before moving this product.
· In case the specimen is damaged by erroneous operation, promptly
take the infection prevention measures.
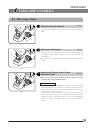
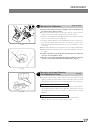
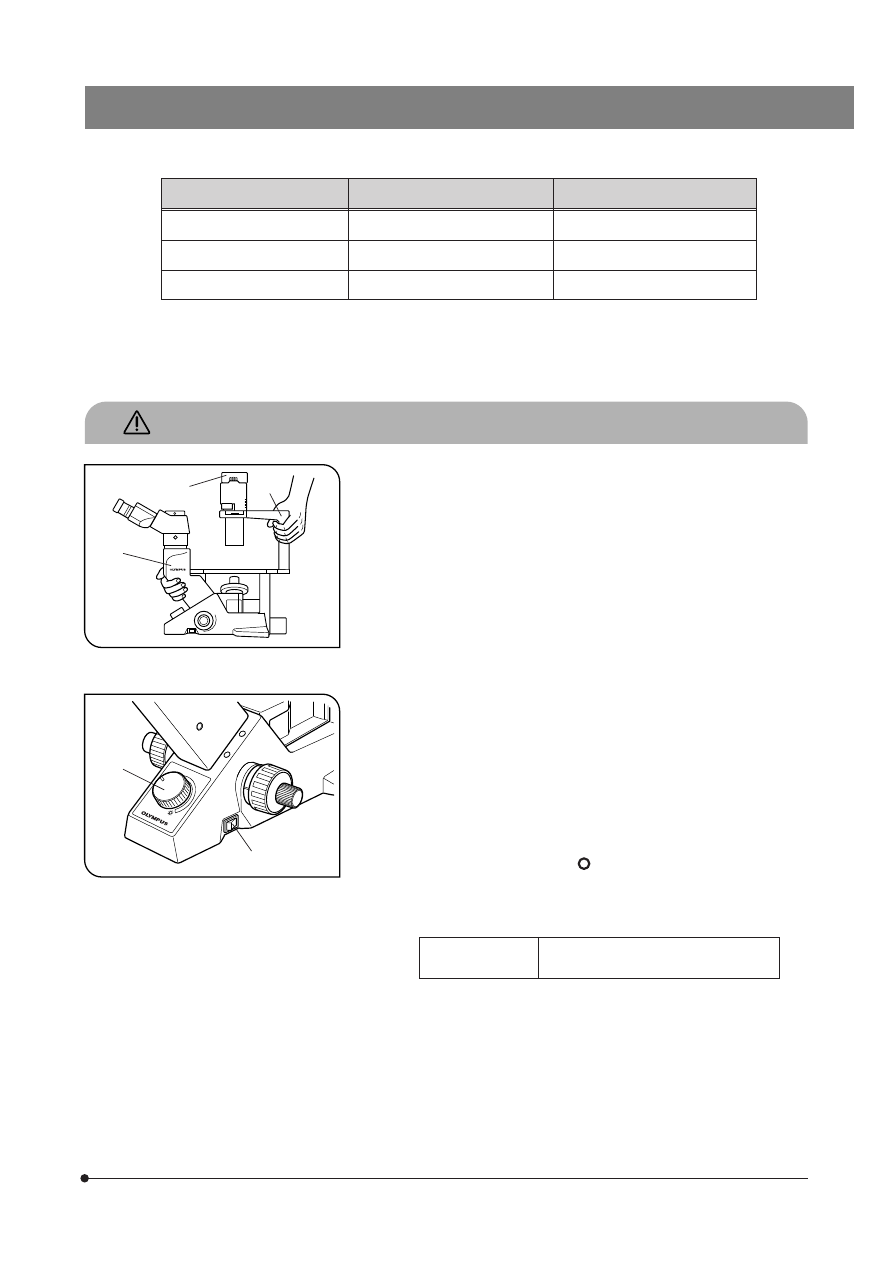
2. Install the microscope on a sturdy, level table or bench (Weight: CKX31
about 8 kg, CKX41 about 8.8 kg).
3. When transporting the microscope, be sure to keep it horizontal by holding
it by the root of the observation tube relay tube
1
and the illumination
column
2
. (Fig. 1)
Be sure to remove the specimen since it may fall.
# Do not tilt it during carrying to prevent damaging the desktop or
microscope.
4. Culture liquid or water spilt on the stage, objective or microscope frame
may damage the equipment. Immediately disconnect the power cord
from the wall outlet and wipe the liquid or water off if it is spilt on them.
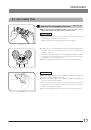
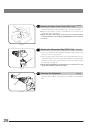
5. The surfaces of the lamp socket
3
of the illumination column will become
extremely hot during operation. When installing the microscope, make
sure to allow ample free space around and in particular above the lamp
socket. (Fig. 1)
When using the TV camera or photomicrographic system, install them so
that the connection cable does not come in contact with the lamp socket.
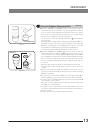
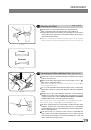
6. To avoid potential shock hazards and burns when replacing the light
bulb, set the main switch
4
to “ ” (OFF) then disconnect the power cord
from the wall outlet in advance. Whenever you replace the bulb during
use or right after use, allow the lamp socket
3
and bulb to cool before
touching. (Figs. 1 & 2)
Designated
bulbs:
6V30WHAL high-intensity halogen bulb
(PHILIPS 5761)
7. Always use the power cord provided by Olympus. If no power cord is
provided, please select the proper power cord by referring to the section
“PROPER SELECTION OF THE POWER SUPPLY CORD” at the end of
this instruction manual. If the proper power cord is not used, product
safety performance cannot be warranted.
8. Always ensure that the
grounding terminal
of the microscope and that
of the wall outlet are properly connected. If the equipment is not grounded,
Olympus can no longer warrant the electrical safety performance of the
equipment.
@
²
³
4
5