4
PRIOR TO USE
Caution:
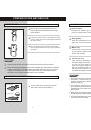
After using the freezer, don't forget to shut the drawer before closing the door.
Before electrifying the appliance, please check whether the rated voltage is in parallel
with the power source. The rated voltage is permitted within 187-242V.If your power
voltage is in discrepancy, an automatic voltage transformer above 500W shall be
necessary. You can get the suitable products from the market.
PREPARATIONS BEFORE USE
Clean the inner and outer of the appliance using
warm and wet cloth (some detergent is allowed in
the warm water)
The refrigerator is set under the initial status,
refer to temperature control (P-9) for adjustment
operation.
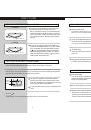
Remove the four sponge tapes from the two
ends of glass shelf and adjust the shelf at the
proper position.
MAINTENANCE & CLEANING
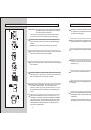
Interior parts
Dismantle all shelves, bars, trays, covers and
drawers, and clean with a warm damp cloth wiper.
Door gasket
Clean door gasket with care. Wipe the recessed
place with chopstick wrapped with cotton strip.
Water tray
Screw off the screw in the compressor cover, pull
up the water tray lightly and draw it out. Fix it as
before after washing.
Defrost approach
Thick frost layer depositing on the interior wall
will affect refrigeration effects. On that account,
you may cut off the power after taking out the
foods and placing somewhere in good package.
Wipe off the water soil with a soft cloth when the
frost layer thaws. Afterwards, switch on the power
and restart the machine to reset the temperature.
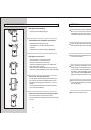
Cautions:
Never place the refrigerator upside down and
horizontally. If titling is required, the angle
between compartment body and the ground
shall be at least 45
.
In the initial use, remove the four sponge tapes
from the glass shelf and fit the shelf.Embed the
protuberance at both sides to the grooves to fix
them properly.
The intervals between plug pulling and plugging
shall be more than 5 minutes.
Never move the refrigerator by door handle or
impose large force on the handle up and down.
9
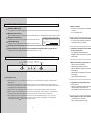
ASSEMBLING OF BOTTLE RACK
Before assembling
After assembling
Fix the bottle rack onto the glass shelf as
described in the left demonstration.