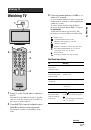
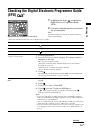
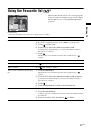
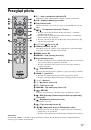
18
GB
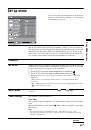
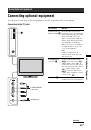
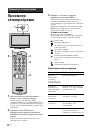
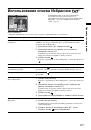
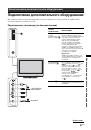
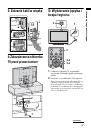
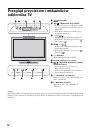
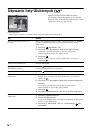
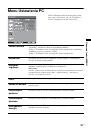
Viewing pictures from
connected equipment
Switch on the connected equipment, then
perform one of the following operation.
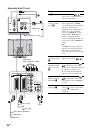
For equipment connected to the scart sockets using a
fully-wired 21-pin scart lead
Start playback on the connected equipment.
The picture from the connected equipment appears on
the screen.
For an auto-tuned VCR (page 6)
In analogue mode, press PROG +/-, or the number
buttons, to select the video channel.
For other connected equipment
Press
/
repeatedly until the correct input
symbol (see below) appears on the screen.
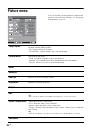
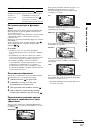
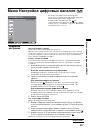
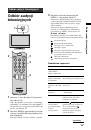
Additional operations
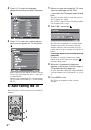
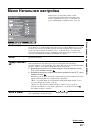
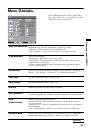
Using the Tools menu
Press TOOLS to display the following options when
viewing pictures from connected equipment other
than PC.
AV1/
AV1, AV2/
AV2:
Audio/video or RGB input signal through the scart
socket
/
1 or 2.
appears only if an RGB
source has been connected.
AV3:
Component input signal through the Y, P
B
/C
B
, P
R
/C
R
sockets
/
3, and audio input signal through the
L, R sockets
/
3.
AV4:
Digital audio/video signal is input through the HDMI IN
4 socket. Audio input signal is analogue only if the
equipment has been connected using the DVI and audio
out socket.
AV5/
AV5:
Video input signal through the video socket
5, and
audio input signal through the L (MONO), R audio
sockets
5.
appears only if the equipment is
connected to the S video socket
5 instead of the
video socket
5, and S video input signal is input
through the S video socket
5.
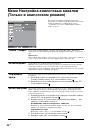
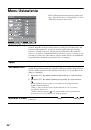
To
Do this
Return to the normal
TV operation
Press DIGITAL or ANALOG.
Access the Input
signal index table
Press
to access the Input signal
index table. (Then, only in
analogue mode, press
g
.) To
select an input source, press
F
/
f
,
then press
.
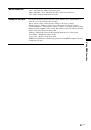
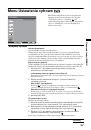
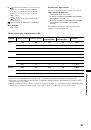
Options
Description
Power Saving
Picture Mode
Sound Mode
Auto Clock Set (in
analogue mode only)
Allows you to switch to digital
mode and obtain the time.
Sleep Timer
i
Volume
 1
1
 2
2
 3
3
 4
4
 5
5
 6
6
 7
7
 8
8
 9
9
 10
10
 11
11
 12
12
 13
13
 14
14
 15
15
 16
16
 17
17
 18
18
 19
19
 20
20
 21
21
 22
22
 23
23
 24
24
 25
25
 26
26
 27
27
 28
28
 29
29
 30
30
 31
31
 32
32
 33
33
 34
34
 35
35
 36
36
 37
37
 38
38
 39
39
 40
40
 41
41
 42
42
 43
43
 44
44
 45
45
 46
46
 47
47
 48
48
 49
49
 50
50
 51
51
 52
52
 53
53
 54
54
 55
55
 56
56
 57
57
 58
58
 59
59
 60
60
 61
61
 62
62
 63
63
 64
64
 65
65
 66
66
 67
67
 68
68
 69
69
 70
70
 71
71
 72
72
 73
73
 74
74
 75
75
 76
76
 77
77
 78
78
 79
79
 80
80
 81
81
 82
82
 83
83
 84
84
 85
85
 86
86
 87
87
 88
88
 89
89
 90
90
 91
91
 92
92
 93
93
 94
94
 95
95
 96
96
 97
97
 98
98
 99
99
 100
100
 101
101
 102
102
 103
103
 104
104
 105
105
 106
106
 107
107
 108
108
 109
109
 110
110
 111
111
 112
112
 113
113
 114
114
 115
115
 116
116
 117
117
 118
118
 119
119
 120
120
 121
121
 122
122
 123
123
 124
124
 125
125
 126
126
 127
127
 128
128
 129
129
 130
130
 131
131
 132
132