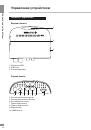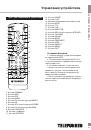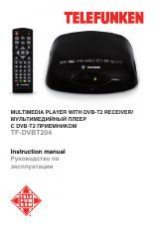
Operation
7
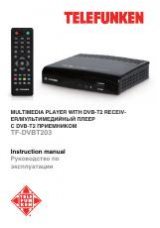
Operation
7
General operations
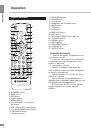
STANDBY
When this unit is connected to the mains,
it goes into operation mode. When the unit is
running, press STANDBY button to turn the
device into sleep mode. In sleep mode, press
STANDBY button on the remote to turn the
device from sleep mode.
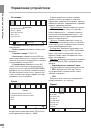
INFO
When viewing a TV channel, press this
button to display/hide the menu pages
containing various information about the current
channel (frequency, reception level etc.).
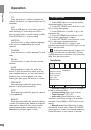
EPG
Press EPG button to display the menu of
the electronic TV guide (Electronic Program
Guide), which displays the schedule of
programs for a certain period of time for each
available channel. Using this function, you can
easily find programs you are interested in. Use
UP/DOWN cursor buttons to select the desired
TV program. Use LEFT/RIGHT cursor buttons
to switch pages of the interactive program
guide.
EPG-information cannot work if the
service is not provided by operator.
AUDIO
Press AUDIO to select the audio language
or audio channel, if this choice is supported by
the current channel.
CH+/CH-
Press these buttons to select the previous or
next channel.
Cursor
Press these buttons to navigate through the
various menus.
OK
Press this button to confirm the selection
options in the menu.
VOL-/VOL+
Press these buttons to adjust the sound
volume level.
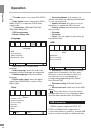
FAVOURITE
Go to “MENU”—“Channel”—“TV Channel
Editor”-use cursor to select the channel that
you want to make favourite--press “favourite”
button on RC—use left/right cursor to choose
which item(music/movie/shopping/car,etc) you
want to divide it in—press “OK” to confirm and
“EXIT” to exit menu.
While watching TV channels, press
“FAVOURITE” button first, and the “favouite
off” line will be shown on the TV screen. In
this mode, you can switch between all TV
channels. When pressing the “FAVOURITE”
button for a second time, it will simply switch
between your favourite channels.
The number buttons
Press number buttons to enter the channel
number you want or other numbers (such as
passwords, play time, etc.).
REV/FWD
When playing a media file, press these
buttons for fast forward or backward playback.
PAUSE
When playing a media file, press this button
to set the playback to pause.
PLAY
Click this button to start playing a media file.
Red/Green/Yellow/Cyan buttons
Press the colored buttons to perform various
operations in the edit menu of channels,
teletext recording.
MUTE
Press this button to enable/disable the sound.