En
glish
1
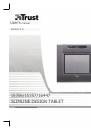
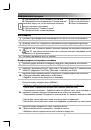
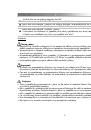
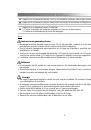
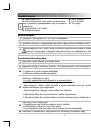
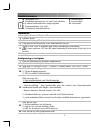
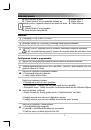
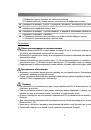
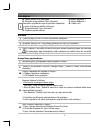
Product information
A: Tablet status LED
B: Pre-programmed ‘Hot Cells’ (tap on these to
execute commands or launch programs)
C: Programmable ‘Hot Cells’
D: Transparent overlay sheet
E: Pen button 2
F: Pen button 1
G: Pen tip
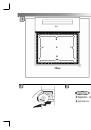
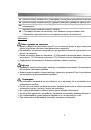
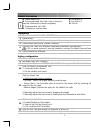
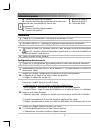
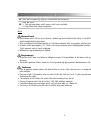
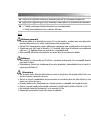
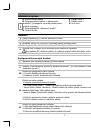
Installation
1 Place Trust installation CD in CD-ROM drive.
2 Install driver.
3 Windows Vista and XP: Allow and execute all necessary actions.
4 Follow setup instructions. Restart computer.
5
Connect USB. Wait until Windows completes installation automatically.
In XP, on some systems it may be needed to connect the tablet a second time for correct function.
6 Place batteries as indicated.
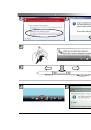
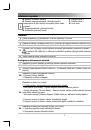
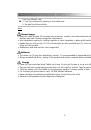
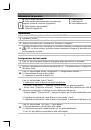
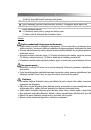
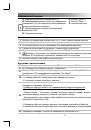
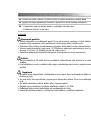
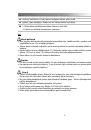
Hotkey configuration
7 Click on tablet icon in the Windows taskbar.
8 Windows Vista: click continue.
9 Select tablet PC feature ON/OFF. (Tablet PC mode supports ‘Pen Flicks’ in Vista)
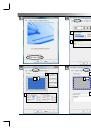
10
Click the Button configuration Tab.
1. Customize button actions
2. Set the double click speed
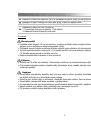
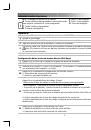
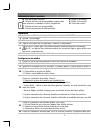
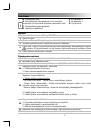
11
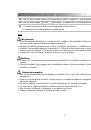
Click the Scope Tab.
U
1. Select the work area by presets:
- Full Area
:
Select the largest possibly working area.
- Screen Ratio
:
Set the tablet area as same as the screen size by reducing either the current width or
height of the Pen area.
- Reserve Edges: Allocate the space for the tablet’s hot cells.
2. Manually adjust the work area by dragging the edges.
3. Manually adjust the work area by setting the area dimensions and offset.
12
Click the Hot Cells Tab.
1. Enable/Disable Hot Cell edges.
2. Select a Hot Cell by clicking on it.
3. Click to define Hot Cell actions.
13 Click the Run Tab and Browse for program to launch or
14 Click the Internet Tab and Select action and type in the address or