16
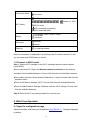
There are two types of charging, one is via Main charger, the other is via PC USB
cable.
Charging rates depend on whether the device is connected to the 3G network ,
whether the Wi-Fi is transmitting, and whether the device is connected to the mains
charger or to a PC. And the mains charger is recommended as the main charging.
Main charger:
When power off, it will take a maximum of 3 hours.
PC USB Cable:
When power off, it will take a maximum of 4 hours.
Note: In order to protect the battery, when low power
is indicated, please do
charging;
9 Warranty
•
The device is warranted against any deviation from technical specifications for a
period of twelve (12) months from the date specified on your original invoice
1
.
•
Under the terms of this warranty, you must immediately inform your vendor in
case of a conformity defect on this device, and present a proof of purchase.
•
The vendor or repair center will decide whether to replace or repair this device, as
appropriate.
•
Repaired or replaced this device are warranted ONE (1) month unless there are
statutory provisions to the contrary.
•
This warranty shall not apply to damage or defects to this device due to:
1) Not following the instructions for use or installation,
2) Not being compliant with technical and safety standards applicable in the
geographical area where this device is used,
3) Improper maintenance of sources of energy, and of the overall electric
installation,
1
The
mandatory
warranty
period
may
vary
if
overriding
statutory
provisions
are
applicable
in
your
jurisdiction.