73
74
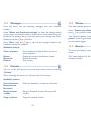
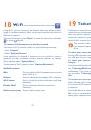
Tethering
19
.....................
Tethering is a method for connecting a computer or other devices to the
internet via an internet-capable mobile phone. They will then be able to
share your phone’s internet connection.
Access this feature by pressing “
Menu
” through Left softkey from the
Home Screen to enter the main menu, then selecting “
Tethering
”.
The functions below may incur additional network charges from
your network operator. Extra fees may also be charged in roaming
areas.
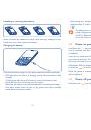
To share your home data connection via a USB cable
Use the USB cable that came along with your phone to connect the phone
to a USB port on your computer, and then press USB tethering.
To share your phone’s data connection as a portable Wi-Fi
hotspot
Your phone will become a Wi-Fi hotspot when you turn it on by selecting
the “
Tethering\Wi-Fi hotspot\Switch\On
” option.
Additionally, if you want to save power when there is no Wi-Fi client,
you can select “
Tethering\Wi-Fi hotspot\Switch\On\Auto turn off
\On
”.
To rename or secure your portable hotspot
When Portable Wi-Fi hotspot is activated, you can change the name of
your phone’s Wi-Fi network (SSID) and secure its Wi-Fi network by using
a password.
Access this feature by selecting the “
Tethering\Wi-Fi hotspot\Switch\
On
” to set or rename the SSID and when you activate the Wi-Fi hotspot,
please enter a password to secure your portable hotspot.
Wi-Fi
18
..............................
Using Wi-Fi, you can connect to the Internet when your phone is within
range of a wireless network. Wi-Fi can be used on phone even when no
SIM card is inserted.
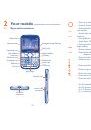
To access this function, press "
Menu"
to enter the main menu, and select
or press
directly.
To connect and disconnect to a wireless network
To connect a Wi-Fi network, select one of the following two ways:
•
Press "
Connect
"
•
Select "
Options\Connect
"
If the network you selected is secured, you are required to enter a
password or other credentials (contact network operator for details).
When finished, select "
Options\Done
".
To disconnect a Wi-Fi network, select "
Options\Disconnect
" .
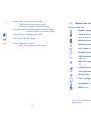
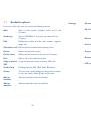
Available options:
Add
Press to add new Wi-Fi networks of your choice
when Wi-Fi is on
Refresh
Press to refresh all the available Wi-Fi networks
Wi-Fi status
Press to check the status of Wireless Local Area
Networks
Disable Wi-Fi
Press to deactivate Wireless Local Area
Networks
Define access point
Press to define access point