2
XENYX Q1202USB/Q1002USB/Q802USB/Q502USB User Manual
Thank you
Congratulations! In purchasing our XENYX Q1202USB/Q1002USB/Q802USB/Q502USB
you have acquired a mixing console whose small size belies its incredible versatility
and audio performance.
The XENYX Series represents a milestone in the development of mixing console
technology. With the new XENYX microphone preamps including phantom
power as an option, balanced line inputs and a powerful effects section, the
mixing consoles in the XENYX Series are optimally equipped for live and studio
applications. Owing to state-of-the-art circuitry, your XENYX console produces
a warm analog sound that is unrivalled. With the addition of the latest digital
technology, these best-in-class consoles combine the advantages of both analog
and digital technology.
Table of Contents
Thank you ....................................................................... 2
Important Safety Instructions ...................................... 3
Legal Disclaimer ............................................................. 3
Limited warranty ............................................................ 3
1. Introduction ............................................................... 4
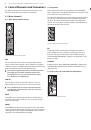
2. Control Elements and Connectors ........................... 5
2.1 Mono channels .................................................................... 5
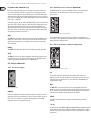
2.2 Stereo channels ................................................................... 6
2.3 Connector panel and main section ............................. 7
2.4 USB Connector .................................................................... 8
3. Installation ................................................................. 8
3.1 Mains connection ............................................................... 8
3.2 Audio connections ............................................................. 9
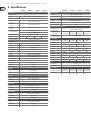
4. Specifications ........................................................... 10