10
GB
!
Do not open the oven door as this will disrupt the cooking time and
temperature.
BAKED CAKES
mode
This function is ideal for cooking desserts which are made using natural yeast,
baking powder and desserts which contain no yeast. Place the dish in the
oven while it is still cold. The dish may also be placed in a preheated oven.
BREAD
mode
Use this function to bake bread. To obtain the best results, we recommend
that you carefully observe the instructions below:
• follow the recipe;
• do not exceed the
maximum weight
of the dripping pan;
•
remember to pour 50 g (0,5 dl) of cold water into the baking tray in
position 5
.
• The dough must be left to rise at room temperature for 1 – 1 ½ hours
(depending on the room temperature) or until the dough has doubled in
size.
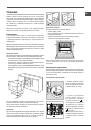
Recipe for BREAD:
1 Dripping pan holding 1000 g Max, lower level
2 Dripping pans each holding 1000 g Max, medium and lower levels
Recipe for 1000 g of dough: 600 g flour, 360 g water, 11g salt, 25 g fresh yeast
(or 2 sachets of powder yeast)
Method:
• Mix the flour and salt in a large bowl.
• Dilute the yeast in lukewarm water (approximately 35 degrees).
• Make a small well in the mound of flour.
• Pour in the water and yeast mixture.
• Knead the dough by stretching and folding it over itself with the palm of
your hand for 10 minutes until it has a uniform consistency and is not too
sticky.
• Form the dough into a ball shape, place it in a large bowl and cover it with
transparent plastic wrap to prevent the surface of the dough from drying
out. Select the manual LOW TEMPERATURE function on the oven and
set the temperature to 40°C. Place the bowl inside and leave the dough
to rise for approximately 1 hour (the dough should double in volume).
• Cut the dough into equal sized loaves.
• Place them in the dripping pan, on a sheet of baking paper.
• Dust the loaves with flour.
• Make incisions on the loaves.
• Place the food inside the oven while it is still cold.
• Start the
BREAD cooking mode.
• Once baked, leave the loaves on one of the grill racks until they have
cooled completely.
Programming cooking
!
A cooking mode must be selected before programming can take place.
Programming the cooking duration
1. Press the
icon until the icon and the numerical digits on the
display begin to flash.
2. Turn the TIMER knob towards and
to adjust the time as desired;
keep the knob in position to scroll through the numbers more quickly and
make the setting process easier.
3. Once you have reached the desired duration, press the
icon again.
The display will show the duration and set temperature alternately.
4. Press the
icon to begin cooking.
5. When cooking has finished, “END” appears on the display and a buzzer
sounds.
• For example: it is 9:00 a.m. and a duration of 1 hour and 15 minutes is
programmed. The programme will stop automatically at 10:15 a.m.
Setting the end time for a cooking mode
!
A cooking duration must be set before the cooking end time can be scheduled.
!
For the delayed programming to work properly, the clock should be set to
the correct time.
1. Follow steps 1 to 3 to set the duration as detailed above.
2. Press the
icon twice: the
icon and the numerical digits on the
display will begin to flash.
3. Turn the TIMER knob towards and to adjust the cooking end time value.
4. Once you have reached the desired end time, press the
icon
again. The display will show the duration, the cooking end time and the set
temperature alternately.
5. Press the
icon to activate the programmed mode.
Programming has been set when the and
icons light up alternately.
The DISPLAY shows the cooking end time, the cooking duration and the set
temperature alternately.
6. Once cooking has finished, “END” appears on the display and a buzzer
sounds.
• For example: it is 9:00 a.m. and a time of 1 hour and 15 minutes is
programmed, while the end time is set to 12:30. The programme will
start automatically at 11:15 a.m.
To cancel programming press the
icon.
Practical cooking advice
!
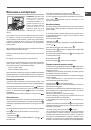
Do not place racks in position 1 and 5 during fan-assisted cooking. This is
because excessive direct heat can burn temperature sensitive foods.
!
In the GRILL and FAN GRILLING cooking modes, particularly when using
the rotisserie spit, place the dripping pan in position 1 to collect cooking
residues (fat and/or grease).
MULTILEVEL
• Use positions 2 and 4, placing the food which requires more heat on 2.
• Place the dripping pan on the bottom and the rack on top.
BARBECUE
• Place the rack in position 3 or 4. Position the food in the centre of the rack.
• We recommend that the temperature is set to its maximum level. The top
heating element is regulated by a thermostat and may not always operate
constantly.
PIZZA OVEN
• Use a lightweight aluminium pizza pan. Place it on the rack provided.
For a crispy crust, do not use the dripping pan as this extends the total
cooking duration and prevents the crust from forming.
• If the pizza has a lot of toppings, we recommend adding the mozzarella
cheese to the top of the pizza halfway through the cooking process.