IT
15
Avvio e utilizzo
ATTENZIONE!
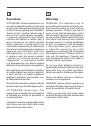
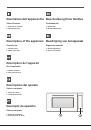
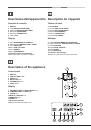
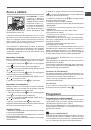
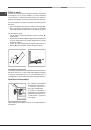
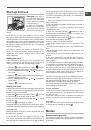
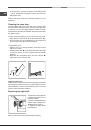
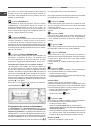
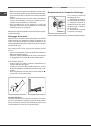
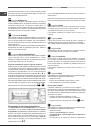
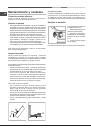
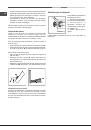
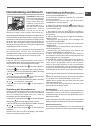
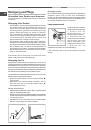
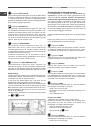
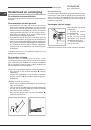
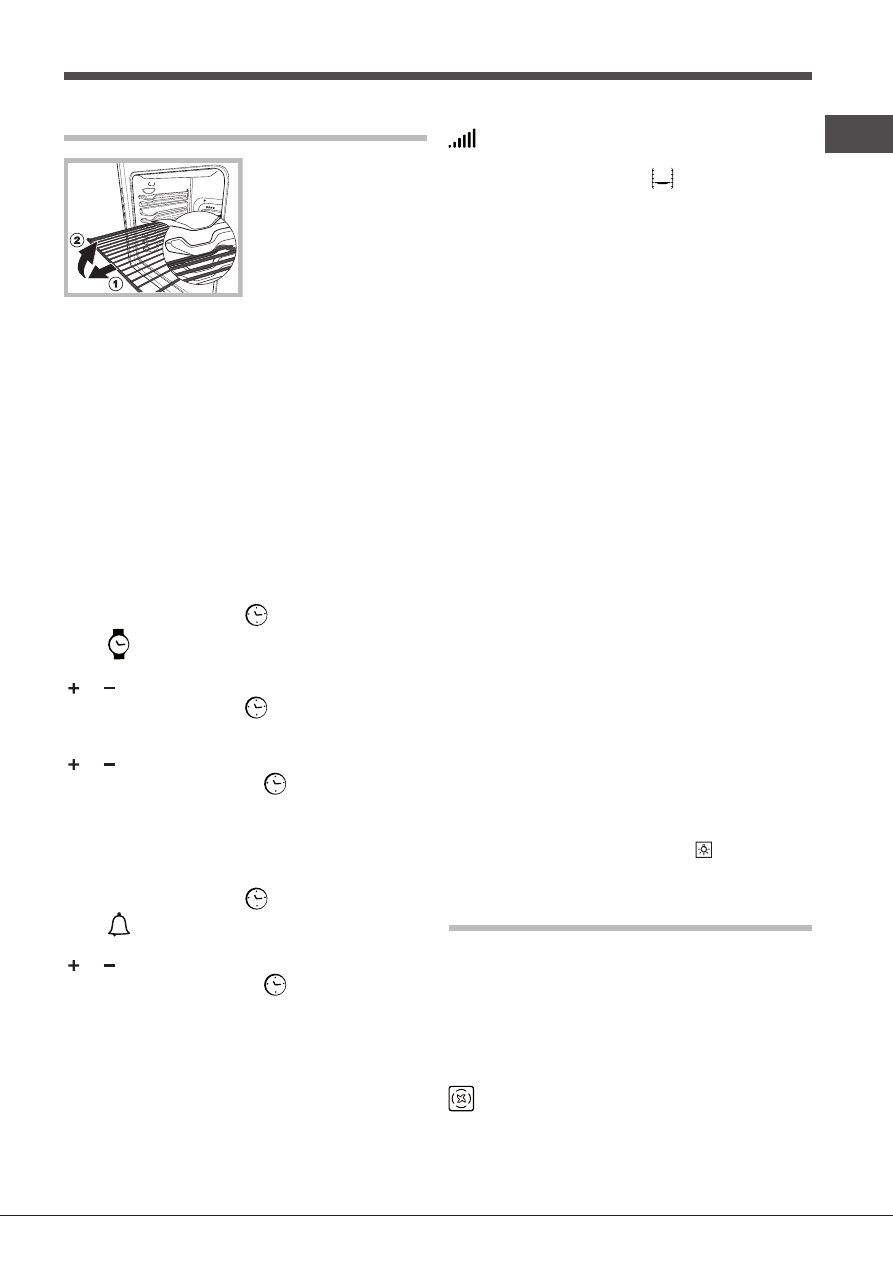
Il forno
è dotato di un sistema di
arresto griglie che consente
di estrarle senza che queste
fuoriescano dal forno. (1)
Per estrarre completamente
le griglie è sufficiente,
come indicato sul disegno,
alzarle, prendendole dalla
parte anteriore e tirarle. (2)
!
Alla prima accensione fare funzionare il forno a vuoto
per almeno un’ora con il termostato al massimo e a porta
chiusa. Poi spegnere, aprire la porta del forno e aerare il
locale. L’odore che si avverte è dovuto all’evaporazione
delle sostanze usate per proteggere il forno.
!
Per ottimizzare le performance di cottura, al momento
dell’attivazione della funzione selezionata viene effettuato
un settaggio dei parametri del prodotto, che potrebbe
comportare il ritardo dell’accensione della ventola e degli
elementi riscaldanti.
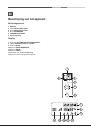
Impostare l’orologio
!
Si può impostare sia quando il forno è spento che quando
è acceso, ma non si è programmata la fine di una cottura.
1. Premere più volte il tasto
finchè non lampeggiano
l’icona
e i primi due digit numerici sul DISPLAY;
2. ruotare la manopola IMPOSTAZIONE TEMPI verso il
“ ” e “ ” per regolare l’ora;
3. premere di nuovo il tasto
finchè non lampeggiano
gli altri due digit numerici sul DISPLAY;
4. ruotare la manopola IMPOSTAZIONE TEMPI verso il
“ ” e “ ” per regolare i minuti;
5. premere nuovamente il tasto
per confermare.
Impostare il contaminuti
!
Questa funzione non interrompe la cottura e prescinde
dall’utilizzo del forno; permette solo di azionare il segnale
acustico allo scadere dei minuti impostati.
1. Premere più volte il tasto
finchè non lampeggiano
l’icona
e i tre digit numerici sul DISPLAY;
2. ruotare la manopola IMPOSTAZIONE TEMPI verso il
“ ” e “ ” per regolare i minuti;
3. premere nuovamente il tasto
per confermare.
Seguirà la visualizzazione del conto alla rovescia al termine
del quale si azionerà il segnale acustico.
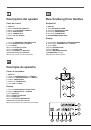
Avviare il forno
1. Selezionare il programma di cottura desiderato ruotando
la manopola PROGRAMMI.
2. Il forno entra nella fase di preriscaldamento, l’indicatore
del preriscaldamento si illumina.
È possibile modificare la temperatura ruotando la manopola
TERMOSTATO.
3. Quando si spegne l’indicatore del preriscaldamento
e si avverte un segnale acustico il preriscaldamento
è completo: introdurre gli alimenti.
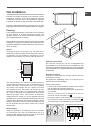
4. Il DISPLAY visualizza l’icona
che consiglia il livello
sul quale posizionare la teglia.
5. Durante la cottura è sempre possibile:
- modificare il programma di cottura agendo sulla manopola
PROGRAMMI;
- modificare la temperatura agendo sulla manopola
TERMOSTATO;
- pianificare la durata e l’ora di fine della cottura
(vedi programmi di cottura);
- interrompere la cottura riportando la manopola
PROGRAMMI in posizione “0”.
6. Trascorse due ore il forno si spegne automaticamente:
tale tempo è preimpostato per motivi di sicurezza in tutti i
programmi di cottura.
È possibile modificare la durata della cottura
(vedi programmi di cottura).
7. In caso di black-out, se la temperatura del forno non si è
abbassata troppo, l’apparecchio è dotato di un sistema che
riattiva il programma dal punto in cui è stato interrotto. Le
pianificazioni in attesa di avvio, invece, non vengono ripristinate
al ritorno della corrente e devono essere riprogrammate.
!
Nei programmi BARBECUE non è previsto il
preriscaldamento.
!
Non appoggiare mai oggetti sul fondo del forno perché si
rischiano danni allo smalto.
!
Porre sempre i recipienti di cottura sulla griglia in dotazione.
!
Il forno entra nella fase di preriscaldamento dopo 2 sec
dalla selezione del ciclo desiderato.
Ventilazione di raffreddamento
Per ottenere una riduzione delle temperature esterne, una
ventola di raffreddamento genera un getto d’aria che esce
tra il pannello di controllo e la porta del forno.
!
A fine cottura la ventola rimane attiva finché il forno non
è sufficientemente freddo.
Luce del forno
A forno spento la lampadina può essere accesa in
qualunque momento premendo il tasto .
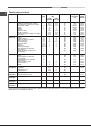
Programmi
Programmi di cottura manuali
!
Tutti i programmi hanno una temperatura di cottura
preimpostata. Essa può essere regolata manualmente,
impostandola a piacere tra 40°C e 250°C.
Nel programma BARBECUE il valore preimpostato è un
livello di potenza espresso in %. Anch’esso può essere
regolato manualmente.
Programma
MULTILIVELLO
Si attivano tutti gli elementi riscaldanti ed entra in funzione
la ventola. Poiché il calore è costante in tutto il forno, l’aria
cuoce e rosola il cibo in modo uniforme. È possibile utilizzare
fino a un massimo di due ripiani contemporaneamente.