22
GB
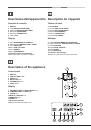
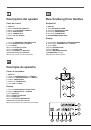
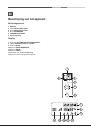
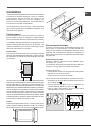
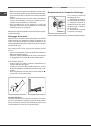
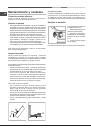
Connecting the supply cable to the mains
Install a standardised plug corresponding to the load
indicated on the data plate. When connecting the cable
directly to the mains, install an omnipolar circuit-breaker with
a minimum contact opening of 3 mm between the appliance
and the mains. The omnipolar circuit breaker should be
sized according to the load and should comply with current
regulations (the earth wire should not be interrupted by the
circuit breaker).
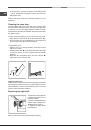
The supply cable should be positioned so that it does not
reach a temperature of more than 50°C with respect to the
room temperature, anywhere along its length.
Before making the connection, check that:
• The electrical safety of this appliance can only be
guaranteed if the cooker is correctly and efficiently
earthed, in compliance with regulations on electrical
safety. Always ensure that the earthing is efficient; if you
have any doubts call in a qualified technician to check
the system. The manufacturer declines all responsibility
for damage resulting from a system which has not been
earthed.
• Before plugging the appliance into the mains, check that
the specifications indicated on the date plate (on the
appliance and/or packaging) correspond to those of the
electrical mains system of your home.
• Check that the electrical capacity of the system and
sockets will support the maximum power of the appliance,
as indicated on the data plate. If you have any doubts,
call in a qualified technician.
• If the socket and appliance plug are not compatible, have
the socket replaced with a suitable model by a qualified
technician. The latter, in particular, will also have to
ensure that the cross section of the socket cables are
suitable for the power absorbed by the appliance. The
use of adapters, multiple sockets and/or extensions,
is not recommended. If their use cannot be avoided,
remember to use only single or multiple adapters and
extensions which comply with current safety regulations.
In these cases, never exceed the maximum current
capacity indicated on the single adapter or extension and
the maximum power indicated on the multiple adapter.
!
Once the appliance has been installed, the power supply
cable and the electrical socket must be easily accessible.
!
The cable must not be bent or compressed.
!
The cable must be checked regularly and replaced by
authorised technicians only (see Assistance).
!
The manufacturer declines any liability should these
safety measures not be observed.
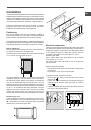
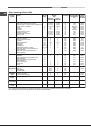
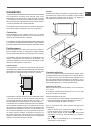
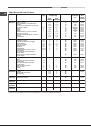
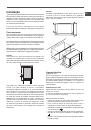
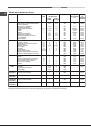
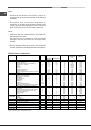
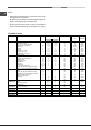
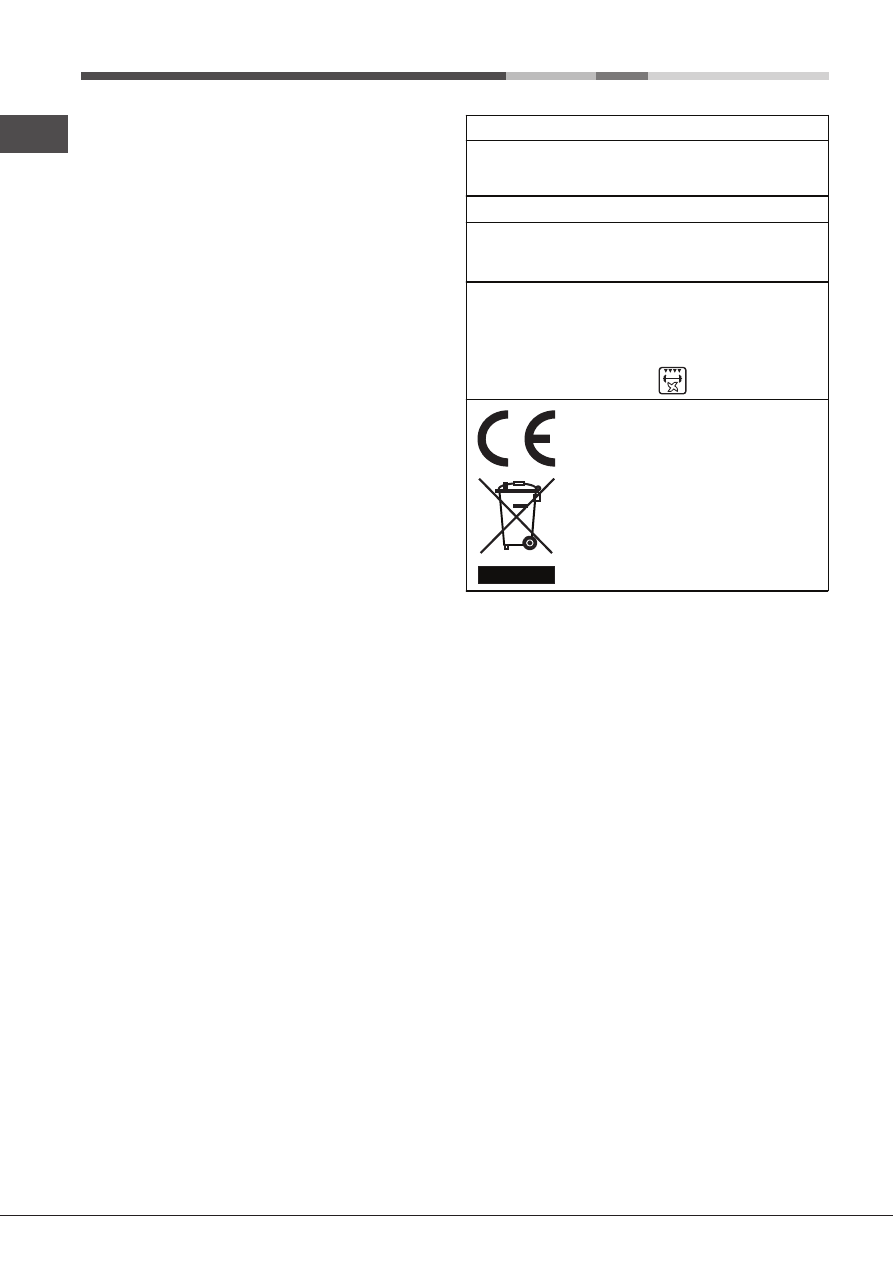
APPLIANCE SPECIFICATIONS
Dimensions
width 59,5 cm
height 32,9 cm
depth 39,4 cm
Volume
78 l
Electrical
connections
voltage: 220-240V ~ 50Hz
(see data plate)
maximum power absorbed 2800 W
ENERGY
LABEL
Directive 2002/40/EC on the label
of electric ovens. Standard EN 50304-60350
Declared energy consumption
for Forced convection Class –
heating mode: Gratin.
This appliance conforms to the following
European Economic Community directives:
- 2006/95/EEC dated 12/12/06 (Low
Voltage) and subsequent amendments.
- 2004/108/EEC dated 03/05/89
(Electromagnetic Compatibility) and
subsequent amendments.
- 93/68/EEC dated 22/07/93 and
subsequent amendments.
- 2012/19/EC and subsequent amendments.
- 1275/2008 standby/off mode.