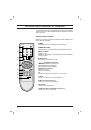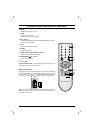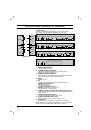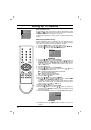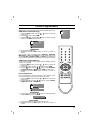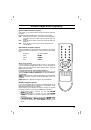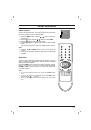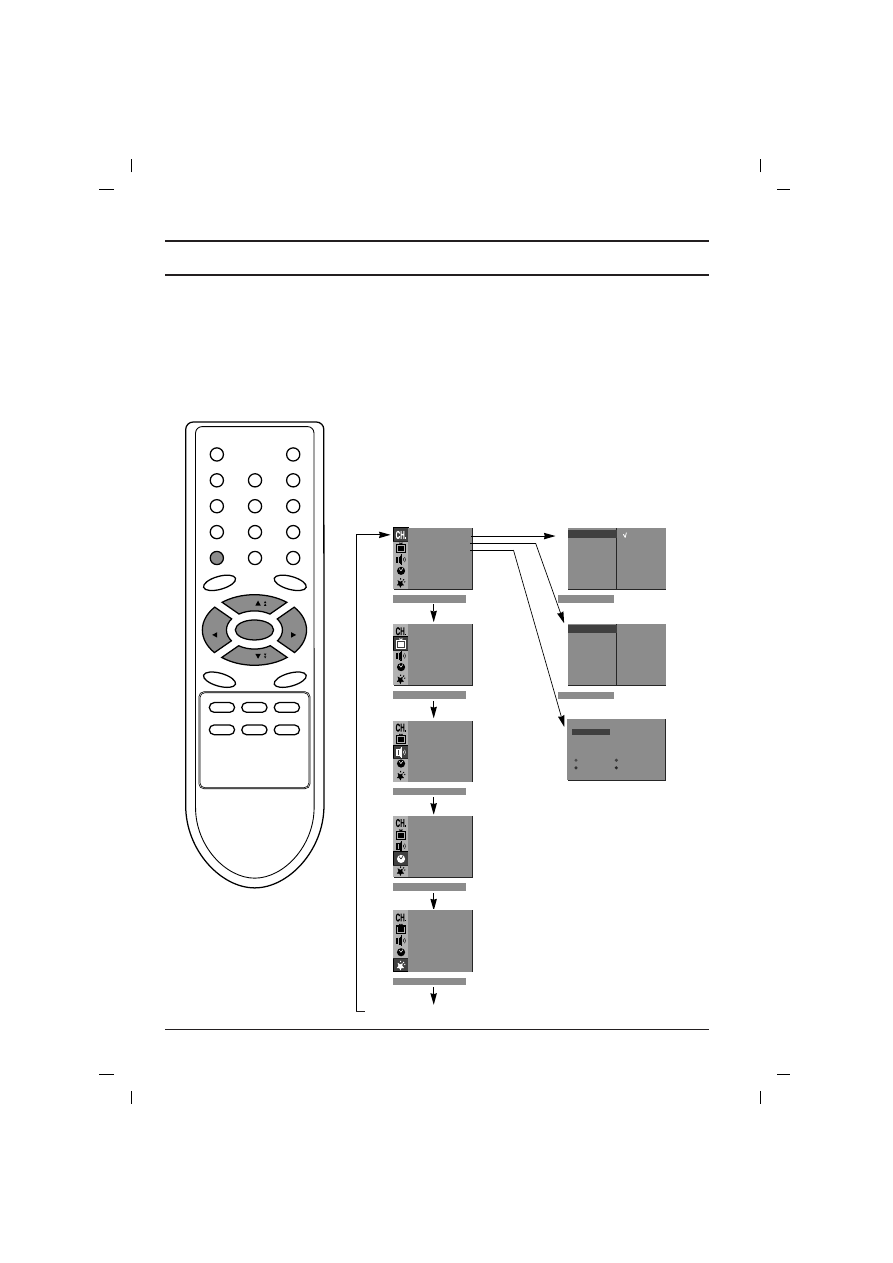
The dialogue between you and your set takes place on screen with
an operator menu. The buttons required for the operating steps are
also displayed.
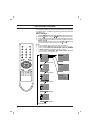
Menu selection
1.
Press the MENU button and then
D
D
/
E
E
button to display each menu.
2. Press the
G
G
button and then
D
D
/
E
E
button to select a menu item.
3.
Press the
G
G
button to display the sub menu or the pull-down menu.
4. Change the setting of an item in the sub or pull-down menu with
F
F
/
G
G
or
D
D
/
E
E
.
You can move to the higher level menu with OK or
F
F
button and
to move to the lower level menu press the
G
G
button.
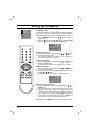
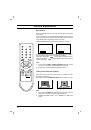
Note :
a. In mono models, the Sound menu does not appear.
b. In some models,
Turbo Pic.
will not display in the Picture menu.
c.
In some models,
Turbo.Snd.
,
AVL
,
Balance
,
Woofer
,
X-WAVE
or
Treble
,
Bass
will not display in the Sound menu.
d. In some models,
Language
,
Blue back
,
Game
,
Booster
will not display in the Special menu.
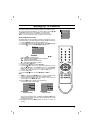
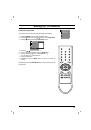
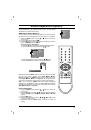
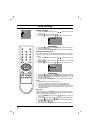
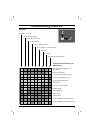
On screen menus
8
MENU
( )
PR
( )
PR
OK
VOL
VOL
TV programme
Auto
O
prog.
{
Manual
{
Prog.
O
edit
{
Favourite
{
)
O
}
i
{
O
OK
O
MENU
System
{
Storage
{
Normal
{
Turbo
{
Delete
OOO
Copy
Move
OOOOO
Skip
Station menu
Storage
{
System
{
Channel
{
Fine
{
Search
{
Name
{
System
{
Storage
{
BG
I
DK
M
2
(
)
O
}
i
{
O
OK
O
MENU
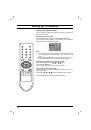
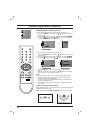
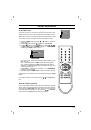
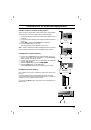
(
)
O
}
i
{
O
OK
O
MENU
(
)
O
}
i
{
O
OK
O
MENU
(
PSM
{
Turbo
O
Pic.
{
CSM
{
Contrast
{
Brightness
{
Colour
{
Sharpness
{
)
O
}
i
{
O
OK
O
MENU
Picture menu
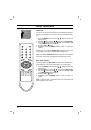
(
SSM
{
Turbo
O
Snd.
{
AVL
{
Balance
{
Woofer
{
Treble
{
Bass
{
X
-
WAVE
{
)
O
}
i
{
O
OK
O
MENU
Sound menu
(
Clock
{
Off
O
time
{
On
O
time
{
Auto
O
off
{
)
O
}
i
{
O
OK
O
MENU
Time menu
(
Language
{
Input
{
Blue
O
back
{
Child
O
lock
{
)
O
}
i
{
O
OK
O
MENU
Special menu
(
O
O
OO
C
O
1D
OOOO
5
OO
S
O
69
O
1
OO
C
O
03
O
OOO
6
OO
S
O
17
O
2
OO
C
O
12
OOOO
7
OO
S
O
22
O
3
OO
S
O
66
OOOO
8
OO
C
O
09
O
4
OO
S
O
67
OOOO
9
OO
C
O
11