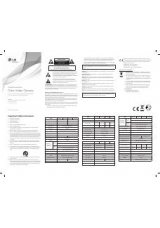
Инструкция для LG LD120

(скачивание инструкции бесплатно)
Формат файла: PDF
Доступность: Бесплатно как и все руководства на сайте. Без регистрации и SMS.
Дополнительно: Чтение инструкции онлайн
background image

5

Safety Precautions

Do not attempt to disassemble 

the camera

To prevent electric shock, do not remove 

screws or covers. There are no user service-

able parts inside. Ask a qualified service 

personnel for servicing. 

Do not use strong solvents or 

detergents

Use a dry cloth to the camera when it is 

dirty. If it is hard to remove the dirt on the 

camera, use a mild detergent and wipe it 

gently. 

Before operating, please check 

proper temperature, humidity 

and power source ratings.

Use the camera under conditions where 

temperature is between -10 °C to +50 °C.

Do not expose the camera  in 

such conditions as shown 

below.

Use in a room or area filled with cigarette 

smoke, dust or gas.

Avoid the camera with direct 

sunlight

Do not aim the camera at bright objects. 

Never face it with direct sunlight or other 

extremely bright objects. Otherwise bloom-

ing or smear may be caused.

Handle the camera with care

Do not abuse the camera. Avoid striking, 

shaking, etc. The camera could be damaged 

by improper handling or storage. 

Do not expose the camera to 

rain or moisture

This product is designed for indoor use 

or location where it is protected from rain 

and moisture. When exposed to moisture, 

turn the power off immediately and ask a 

qualified service personnel for servicing. 

Moisture can damage the camera and also 

create the danger of electric shock. 

1
2
3
4
5
6
7
8
9
10
11
12
13
14
15
16
Оглавление инструкции
  • Страница 1 из 17
    OWNER'S MANUAL Color Video Camera Please read this manual carefully before operating your set and retain it for future reference. MODEL LD120P LD120N P/NO : MFL62723786
  • Страница 2 из 17
    CAUTION RISK OF ELECTRIC SHOCK DO NOT OPEN CAUTION: TO REDUCE THE RISK OF ELECTRIC SHOCK DO NOT REMOVE COVER (OR BACK) NO USER-SERVICEABLE PARTS INSIDE REFER SERVICING TO QUALIFIED SERVICE PERSONNEL. This lightning flash with arrowhead symbol within an equilateral triangle is intended to alert the
  • Страница 3 из 17
    Impo­rtant Safety Instructions 1. Read these instructions. - All these safety and operating instructions should be read before the product is operated. 2. Keep these instructions. - The safety, operating and use instructions should be retained for future reference. 3. Heed all warnings. - All
  • Страница 4 из 17
    Impo­rtant Safety Instructions 9. Do not defeat the safety purpose of the polarized or groundingtype plug. A polarized plug has two blades with one wider than the other. A grounding type plug has two blades and a third grounding prong. The wide blade or the third prong are provided for your safety.
  • Страница 5 из 17
    Safety Precautions Do not attempt to disassemble the camera Avoid the camera with direct sunlight Do not use strong solvents or detergents Handle the camera with care To prevent electric shock, do not remove screws or covers. There are no user serviceable parts inside. Ask a qualified service
  • Страница 6 из 17
    What's in the box Video Cable Camera Body M3 Tapping Screws (2 EA) (Pan Lock Screw) 
  • Страница 7 из 17
    Construction Front View Tilt Base Side View Tilting Lock Screw Lens Dome Cover 
  • Страница 8 из 17
    Installation Camera Installation 1 Installation Label 2 Dome cover 3 Lens cover 4~6 Hole for Fixing Tilting Lock Screw (B) M3 Tapping Screw (A) Pan lock Screw (C)  1. Use the installation label to check the place that you wish to install. 2. Turn the Dome Cover counterclockwise simultaneously. 3.
  • Страница 9 из 17
    Installation Camera Connection Connect the Power Adapter (12 V, 300 mA; optional) to the Power Input Jack of the camera as shown below. Cautions for Safe Operation This camera must be operated a DC 12 V Certified/listed, class 2 power supply. Power Input Jack Power Adapter (Not supplied) Adapter
  • Страница 10 из 17
    Setup 4-pin Dip Switch Setting This camera has the 4-pin Dip Switch for setting. 1. AGC (Auto Gain Control) - ON : If the image is too dark, increase the AGC value to make the image bright. - OFF : Not used. 2. BLC (Back Light Compensation) - ON : Sets to this position when strong light comes in
  • Страница 11 из 17
    Troubleshooting Contrast of the screen is not clear. Check the condition of the monitor. A light source such as a spot light causes burn-in on the display screen. Adjust position or angle of the camera to eliminate strong background light. Check the following guide for the possible cause of a
  • Страница 12 из 17
    Specifications Model Signal System Total / Effective Pixels Pick-Up Device Lens Day / Night Scanning System Scanning Frequency Resolution S/N Ratio Minimum Illuminance Video Output Signal Shutter Speed Dip switch Power Source Power Consumption Operating Temp. Storage Temp. Weight Dimensions 12
  • Страница 13 из 17
  • Страница 14 из 17
  • Страница 15 из 17
  • Страница 16 из 17
  • Страница 17 из 17