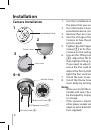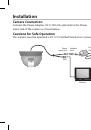
Installation
Camera Installation
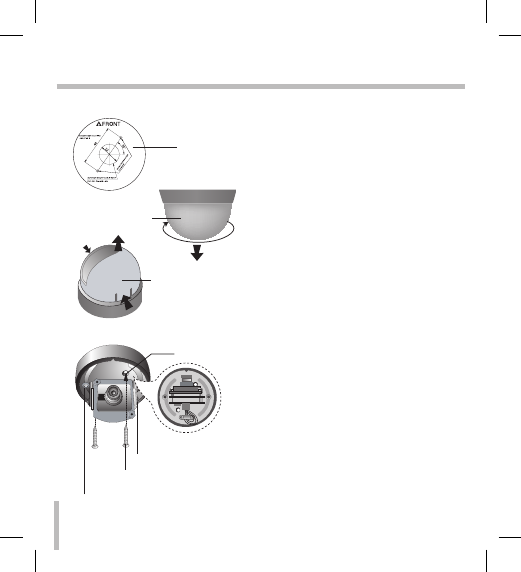
1. Use the installation label to check
the place that you wish to install.
. Turn the Dome Cover
counterclockwise simultaneously.
. Remove the Lens cover.
. Aim the LG logo of the Dome
Camera to face the place that you
wish to watch.
5. Tighten the M Tapping
Screws(
A
) to fix the Dome
Camera on the ceiling.
. Loosen the Tilting Lock Screw
(
B
). Adjust the Tilt (Up/Down)
then tighten Tilting Lock Screw.
If you need to adjust the Pan,
Loose the Pan Lock Screw (
C
).
Adjust the Pan (Left/Right) then
tight the Pan Lock Screw.
7. Install the Lens cover.
. Install the Dome Cover to the
main body by turning it clockwise.
Notes
•
When you install the camera,
handle with care. The camera could
be damaged by improper handling
or storage.
•
If this camera is mounted on the
other places except ceiling, you
need an extra bracket for mounting.
(not supplied)
Installation Label
Dome cover
Lens cover
Hole for Fixing
Tilting Lock Screw (
B
)
M Tapping Screw (
A
)
Pan lock Screw (
C
)
1
2
4~6
3