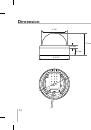
1
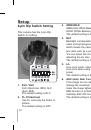
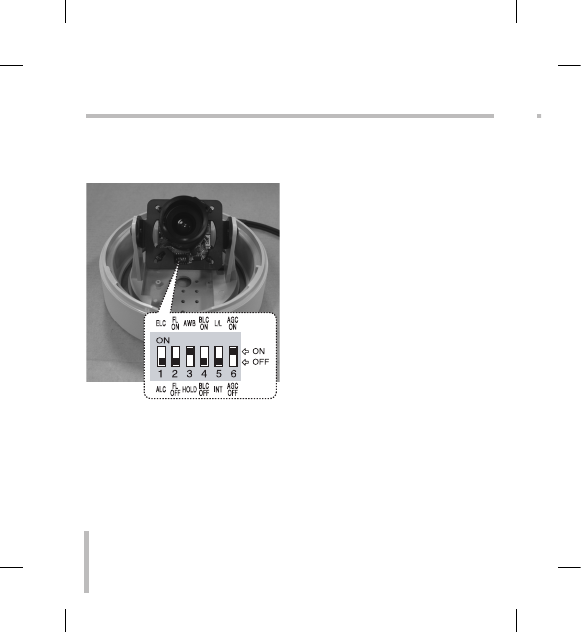
6-pin Dip Switch Setting
This camera has the 6-pin Dip
Switch for setting.
1. ELC / ALC
ELC (Electronic IRIS), ALC
(Auto IRIS)
The default setting is ALC.
2. FL (Flickerless)
Use for removing the flicker of
picture.
The default setting is OFF.
3. AWB/HOLD
AWB (Auto White Balance),
HOLD (White Balance Hold).
The default setting is AWB.
4. BLC
Backlight compensation elimi-
nates strong background light
which makes the camera pic-
ture dark such as a spotlight.
You can select the mode for
adjusting the iris lens.
The default setting is OFF.
5. L/L
Line-Lock mode, Internal Mode.
Line-Lock when using AC 4 V
power.
The default setting is INT.
6. AGC (Auto Gain Control)
If the image are too dark,
change the maximum value to
make the image lighter. The
D&N function is activated auto-
matically AGC ON mode.
The default setting is ON.
Setup
Troubleshooting
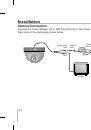
Check the following guide for the
possible cause of a problem before
contacting service.
The picture is poor
Does the Dome Cover have lots of
dust on the surface?
- Use a dry cloth to clean the
camera when it is dirty.
Smear may be caused to the
screen of night than daytime.
- Adjust the Focus by moving the
Focus Lens.
Contrast of the screen is not
clear.
Check the condition of the monitor.
A light source such as a spot light
causes burn-in on the display
screen. Adjust position or angle
of the camera to eliminate strong
background light.
Background screen appears
white extremely.
You can set the background
compensation to OFF.