15
15
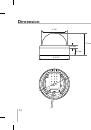
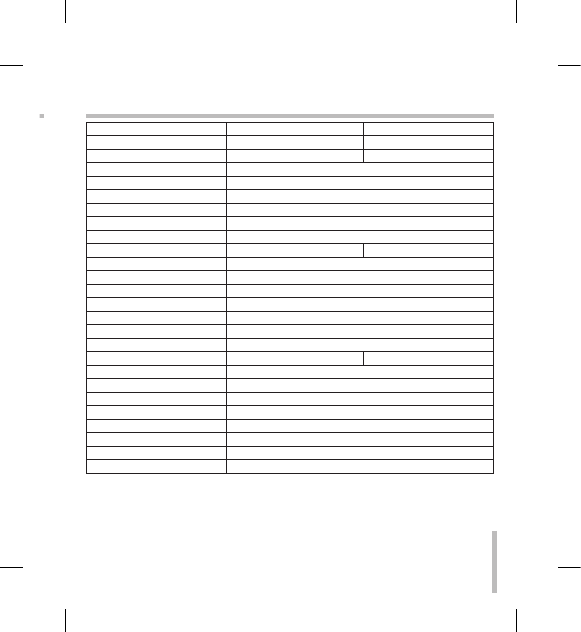
Dimension
91 mm
ø 11.5
ø 100
ø 90
10 mm
31 mm
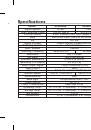
Specifications
Model
LV300N-B
LV300P-B
Signal System
NTSC
PAL
Total / Effective Pixels
410 K / 380 K
470 K / 440 K
Pick-Up Device
6 mm Interline Color CCD (Super HAD)
Lens
Vari-Focal Lens (f=4.0 to 9.0 mm/F=1.6)
Iris
DC Iris
Signal Process
Digital Signal Process (SS11X)
Scanning System
: 1 Interlace
Sync. System
Internal
Scanning Frequency
59.94 Hz(VD)
50 Hz(VD)
Resolution
50 TV Lines
S/N Ratio
More than 48 dB
Standard Illuminance
000 lx (3 00 K)
Sensitivity (1/3 output)
0.5 lx (F1.)
Video Output Signal
1 Vp-p Composite (75 Ω)
Gain Control
Auto
Exposure
Automatic control with DC Iris motor
Shutter Speed
1/60 to 1/100 000 s
1/50 to 1/100 000 s
White Balance
Auto
Back Light
Compensation Auto / OFF
Power Source
DC 1 V
Power Consumption
Less than .3 W
Operating Temp.
-10 °C to 50 °C (Humidity : 0 % RH to 80 % RH)
Storage Temp.
-0 °C to 60 °C (Humidity : 0 % RH to 85 % RH)
Net Weight
70 g
Dimensions
ø 11.5 (Diameter) x 91 mm(H)