4
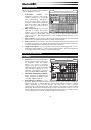
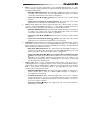
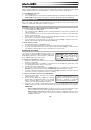
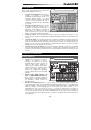
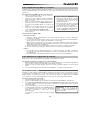
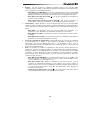
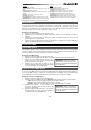
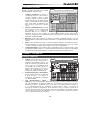
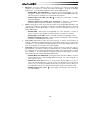
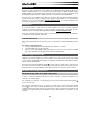
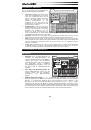
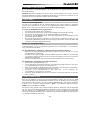
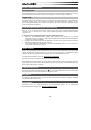
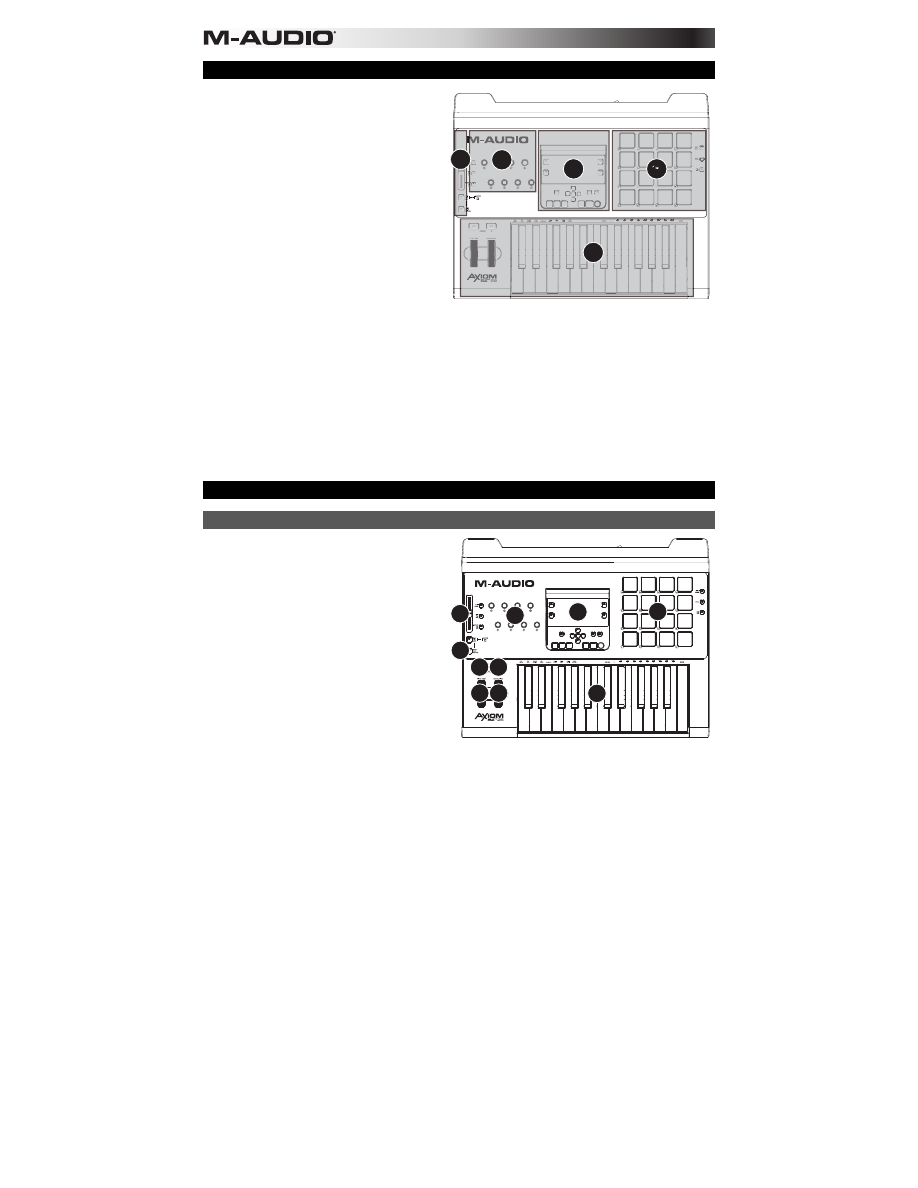
General Overview
This is a broad overview of Axiom AIR 25's
controls, divided into sections:
1.
Performance Controls:
The
keyboard is pressure- and velocity-
sensitive, allowing for a comfortable
and natural-feeling performance.
Access the entire 88-note range by
using the octave buttons, and use the
pitch bend wheel and modulation
wheel to give your sound even more
expressiveness.
2.
Main Control Panel:
Use this panel
and LCD to navigate Axiom AIR's
settings. You can edit and identify
what's assigned to Axiom AIR's controls as well as store and load your settings as
"memory locations." The transport buttons control standard transport functions in your
DAW, as well.
3.
Knob Controls:
Use the knobs to mix and control plug-in parameters. The three Mode
buttons to the left of the knobs determine how this section functions.
4.
Fader Controls:
Use the faders to mix and control plug-in parameters. The buttons below
the faders let you mute, solo, and record-arm tracks. The three Mode buttons to the left of
the faders and fader buttons determine how this section functions.
5.
Trigger Pad Controls:
Use these pressure- and velocity-sensitive trigger pads to create
drum parts, trigger samples, or control certain software features. The three Mode buttons
on the right of the pads determine how this section functions.
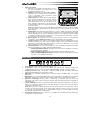
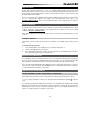
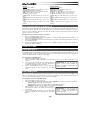
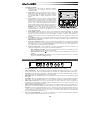
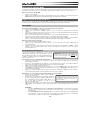
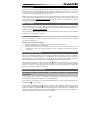
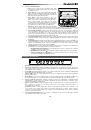
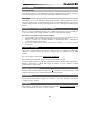
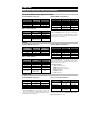
Controls & Connections
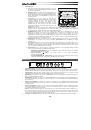
Top Panel
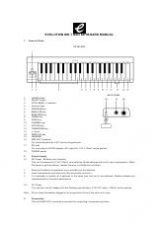
1.
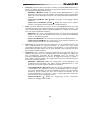
Keyboard:
This 25-note keyboard is
velocity- and aftertouch-sensitive and,
in conjunction with the Octave
buttons, can control a ten-octave
range. You can also use the keys with
labels above them (in the keyboard's
lower and upper registers) to access
extended programming functions
when your Axiom AIR is in Edit Mode.
2.
Pitch Bend and Modulation Wheels:
These controls let you bend pitch and
trigger parameter modulation when
controlling a MIDI instrument.
3.
Octave/Transpose Buttons ( – / + ):
By default, these buttons shift the keyboard up or down one octave at a time, extending its
playable range. The "+" shifts it upward (e.g., Note F3 becomes F4), while the "–" button
shifts it downward (e.g., Note F3 becomes F2). Press both "–" and "+" buttons
simultaneously to switch between this octave function or the transpose function. When
transposing, these buttons shift keyboard up or down one half-step at a time, so you can
play in a different key. The buttons' lights change color with each press to indicate how far
you are transposed. You can also view the transposition in the LCD.
1
3
2
5
4
1
2 2
3 3
4
8
5
7
6