3
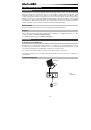
Recommended Installation
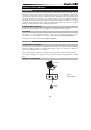
Ableton Live Lite:
We've included Ableton Live Lite with your Keystation so you can get started making
music with professional software right out of the box. Select the Ableton Live Lite software, open the "setup"
application or
.exe
(Windows) or
.mpkg
file (Mac OS X), and then follow the on-screen instructions to install
the software. Also, visit
ableton.com
to check for any available software updates.
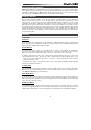
Getting Started
Once you have finished installation you will need to configure your MIDI software to use the Keystation.
Please note that when you press a key on the keyboard, you will not hear any sound. This is because
pressing a key causes the keyboard to send out MIDI data. MIDI data gives instructions on how a sound
should play, but in order to actually hear that sound you need to configure your music software to read the
MIDI data being sent from the Keystation and play the sound back accordingly. This setup will more than
likely entail going into an Options or Device Set-Up menu in your music software application and selecting
the appropriate device. The Keystation should appear under the name “USB Audio Device” for Windows XP,
Windows Vista, Windows 7, Windows 8
or as “Keystation 49” for other operating systems in the MIDI devices
section of your music software application. Please consult the manual that came with your software for the
proper setup procedure.
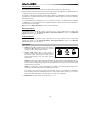
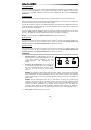
Features
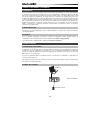
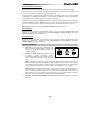
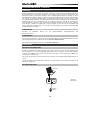
Top Panel
Keyboard
Most of the white keys and black keys on the Keystation are labeled with names. When in the Advanced
menu, pressing any of the labeled keys will allow for special operations such as adjusting the MIDI channel,
transposing, and sending program change messages.
Octave Buttons
If you press the octave “+” button once, the LED above the octave “-” button will turn off, indicating the
keyboard’s octave is now shifted up. If you press the octave “+” key again, you will shift one more octave up,
and so on. It is possible to shift the keyboard up 3 octaves or down 3 octaves from 0 octave shift.
To shift the octave down, press the octave “-” button and notice that the LED above the octave “+” turns off. If
only the LED above the octave “-” key is lit, the octave is shifted down and, if only the LED above the octave
“+” key is lit, the octave is shifted up. The octave “+” and octave “-” LEDs will change color when moving up
or down more than one octave.
To return the octave shift to 0, press both the octave “+” and “-” keys together. Both LEDs will light, indicating
that the octave shift has returned to 0.
Volume Slider
The Volume Slider sends a MIDI message that controls the volume of the notes you are playing. The Volume
Slider can also be assigned to different effects such as pan (balance), attack, reverb, chorus and many more.
(See
Advanced Functions
for more information.)
Pitch Bend Wheel
As the name indicates, the pitch bend wheel is primarily used to bend the notes played on the keyboard up or
down. This allows you to play phrases not normally associated with keyboard playing, such as guitar-style
riffs. Your sound source determines how far you can bend the note. The usual setting is two semitones, but it
can be up to two octaves up or down.
Modulation Wheel
The modulation wheel is typically used for modulation of the sound you are playing. This type of real-time
controller was originally introduced on electronic keyboard instruments to give the performer options such as
adding vibrato, just like players of acoustic instruments do. The modulation wheel is fully MIDI-assignable.