4
8.
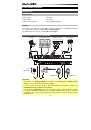
Direct Mono Selector:
Leave this switch in the raised position (off) to monitor the direct input
signal with
Inputs 1
,
3
,
5
, and
7
in the left channel and
Inputs 2
,
4
,
6
, and
8
in the right
channel. Put this switch in its depressed position (lit) to monitor the direct input signal with all
inputs summed and heard equally on each side. This switch does not affect the DAW playback
or how your sound is recorded into your DAW; it affects only how you hear the input signal in
the
Headphone Outputs
(when the
Headphone Source Selector
is set to
1/2
) and
Monitor
Outputs
.
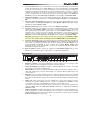
9.
Headphone Outputs:
Connect 1/4" TRS headphones to these outputs. The mix you hear from
these outputs will be determined by the
Headphone Source Selector
and
Monitor Mix
knob.
10.
Headphone Source Selector:
This switch selects which outputs (on the rear panel) are also
sent to the
Headphone Output
:
Monitor Outputs 1–2
(
1/2
) or
Outputs 3–4
(
3/4
).
11.
Headphone Volume:
Adjusts the output volume of the
Headphone Output
.
12.
Mono Selector:
Leave this switch in the raised position (off) to monitor the signal sent to
Monitor Outputs 1–2
in stereo. Put this switch in its depressed position (lit) to monitor the
signal sent to
Monitor Outputs 1–2
with summed to mono and heard equally on each side.
This switch does not affect how your sound is recorded into your DAW; it affects only how you
hear the signal in the
Headphone Outputs
(when the
Headphone Source Selector
is set to
1/2
) and
Monitor Outputs
.
Important:
This switch affects any audio signal sent out of
Monitor Outputs 1–2
. This includes
any direct input signal (if the
Monitor Mix
knob is set towards
Direct
).
13.
Dim Selector:
Put this switch in its depressed position (lit) to reduce the gain of
Monitor
Outputs 1–2
by
20dB
. This can be useful for quickly checking how your mixes sound at lower
levels without moving the
Monitor Level
knob from a preferred setting. This is also useful if you
find the
Monitor Outputs
are too loud even while using M-Track Eight's front panel
volume/level controls in their lowest ranges.
14.
Monitor Level:
Adjusts the output volume of
Monitor Outputs 1–2
, which should be
connected to your powered monitors or amplifier system.
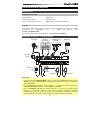
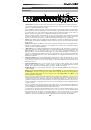
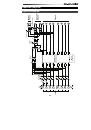
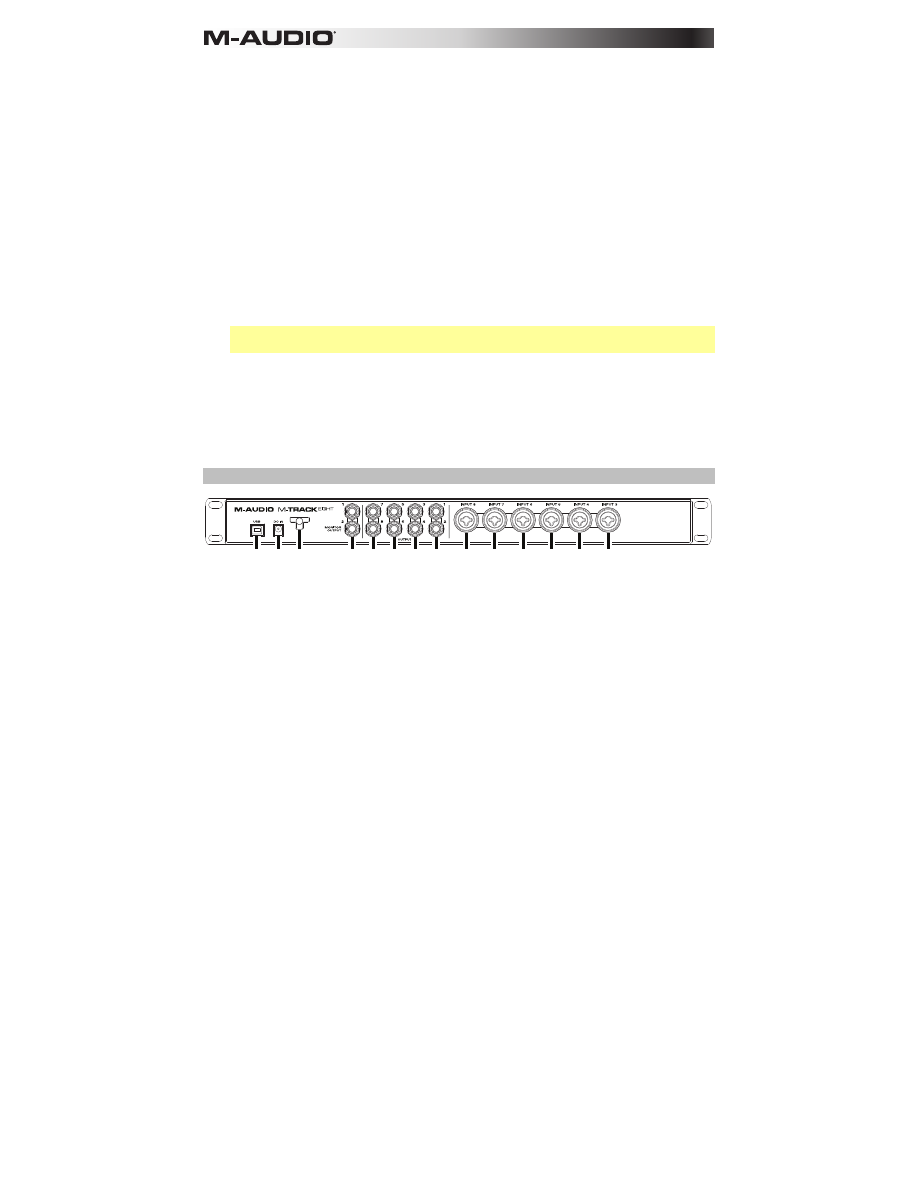
Rear Panel
4
5
5
5
5
4 4 4 4 4
1
3
2
6
1.
Power Input:
Connect the included power adapter (19V, 2.37A, center-positive) here, and then
connect the adapter to a power outlet.
2.
Power Adapter Restraint:
You can secure a power adapter cord to this restraint to help avoid
disconnecting it accidentally.
3.
USB Port:
This connection will allow you to send audio to/from a computer. Use a USB cable
to connect the M-Track Eight to a computer. The M-Track Eight requires a USB 2.0 connection.
4.
Inputs 3–8:
Connect microphones or line-level devices to these inputs with an XLR or 1/4" TRS
cable. (For mic-level signals, use an XLR cable. For line-level signals, use a 1/4" TRS cable.)
View the input signal levels in the front panel's display.
5.
Outputs 1–8:
Use standard 1/4" TRS cables to connect these outputs to powered monitors, an
amplifier system, etc. Their levels are automatically
+10 dBu
, so we recommend connecting
these to a headphone amp or remote mixer.
Channels 1-8 of your computer's outgoing USB audio signal will be sent to these outputs. You
can send
Outputs 3–4
to the
Headphone Outputs
by setting the
Headphone Source
Selectors
to
3/4
.
6.
Monitor Outputs 1–2:
Use standard 1/4" TRS cables to connect these outputs to your
powered monitors, an amplifier system, etc. Their levels are controlled by the
Monitor Level
knob. To monitor these outputs in your headphones, make sure the
Headphone Source
Selector
is set to
1/2
.