6
14
18
15
14
16 16
17
18
17
15
22
23
19
21
20
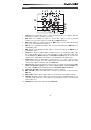
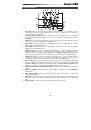
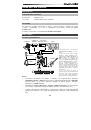
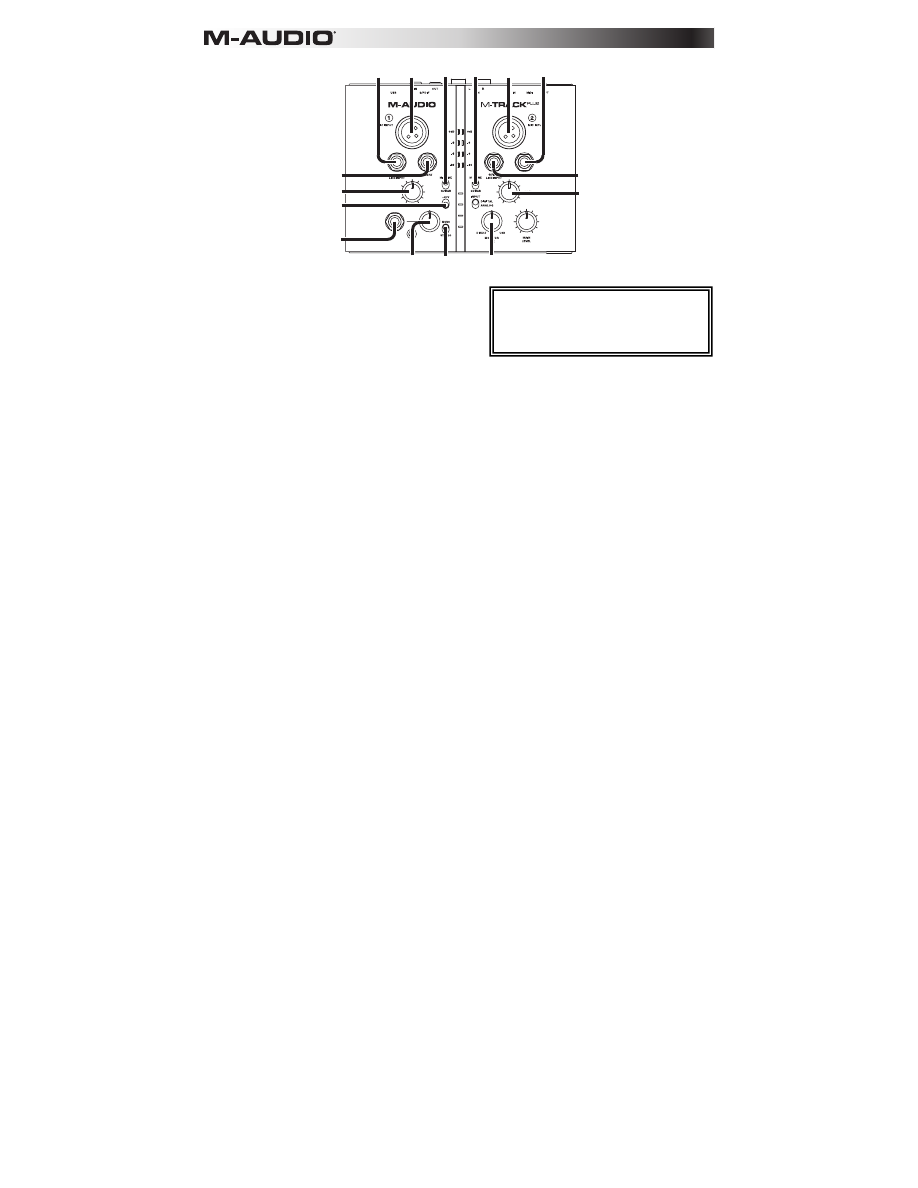
14.
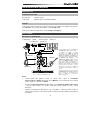
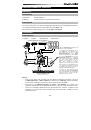
Mic Input:
Connect a microphone to this input with
an XLR cable.
15.
Guitar / Line Input:
Connect a line-level device or
guitar to this input with a 1/4" cable. This input can
accept a balanced or unbalanced signal.
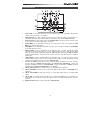
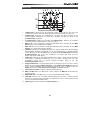
16.
Mic/Line / Guitar Switch:
When this switch is in
the
Guitar
position, the channel will serve as a high-impedance input for connecting guitar or bass
instruments. When the switch is in the
Mic/Line
position, the channel will accept mic or line-level
signals.
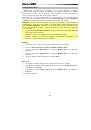
17.
Gain:
Adjusts the channel's input gain level. For your signal's gain to be at an optimally high level,
make sure that its loudest output causes the amber lights on the
LED Meters
to illuminate. (Higher
levels can result in "clipping" or distortion of the signal, and signals recorded at lower levels may not
be heard in the mix.) After that, do the same in your software using its meters.
18.
Insert:
The insert jack allows you to insert a compressor, EQ, or any other signal processor in
between the M-Track Plus's preamplifier and A/D converter. Any processing done by a connected
insert processor will be recorded into your software.
19.
Phantom Power Switch:
This switch activates and deactivates phantom power. When activated,
phantom power supplies +48V to both XLR mic inputs. Please note that most dynamic microphones
do not require phantom power, while most condenser microphones do. Do
not
use phantom power
with any ribbon microphones as it will damage them. Consult your microphone's documentation to
find out whether it needs phantom power.
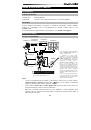
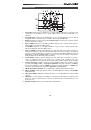
20.
Monitor Mix:
Blend in any amount of zero-latency signal (direct monitoring) from your inputs with the
output from your DAW. When fully in the
USB
position, you will hear only sound from your DAW. When
fully in the
Direct
position, you will hear only your source through M-Track Plus's inputs.
This knob is useful during recording when dealing with the "buffer size" and "latency." The computer
takes a short amount of time to process the incoming audio before sending it back out; this time is
determined by the buffer size setting. Latency is the resulting delay between the incoming sound
(playing your instrument, singing, etc.) and outgoing sound (when you hear it in the DAW). Higher
buffer sizes result in higher latency.
If your computer is powerful enough, you may be able to set your buffer size low enough such that
you may never need direct monitoring. In this case, set the knob all the way to the
USB
position to
monitor only the audio output of your DAW.
In other cases, though, low buffer sizes can consume a lot of your computer's CPU and cause audio
glitches, so you may need to use a higher buffer setting, resulting in latency. In this case, use a higher
buffer size and turn the knob more towards the
Direct
position to monitor your incoming signal
without latency. When listening to the playback, turn it all the way to the
USB
position.
21.
Mono / Stereo:
Switches the headphones and
Main
Out
mixes between mono or stereo operation.
Use the stereo setting to direct-monitor the input signal when recording a stereo source, if you want to
hear each channel in their respective left and right sides. Use the mono setting to direct-monitor the
input signal when recording only one source or if you want to hear both channels equally on each
side. This switch does not affect the DAW playback or how your sound is recorded into your DAW; it
affects only how you hear the input signal in the headphones and
Main Out
.
22.
Headphones:
Connect your 1/4" headphones to this output.
23.
Headphone Volume:
Adjusts the volume level of the headphone output.
Note:
Do not use the
Mic Input
and
Guitar/Line Input
at the same time on one
channel. This may overload the channel
and cause distortion.