4
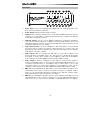
Setup
Driver Installation
IMPORTANT!
: Before connecting M-Track Quad to your computer, install the drivers:
1.
Go to
m-audio.com/drivers
and download the latest M-Track Quad driver for your
operating system.
2.
Open the file you downloaded
and double-click the driver installer file.
3.
Follow the on-screen instructions to install the drivers. (You may be asked to connect M-
Track Quad to your computer during the installation process.)
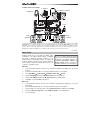
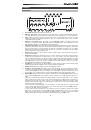
Quick Setup / Connection Diagrams
•
WARNING:
Only put on your headphones or turn on your speakers
AFTER
turning on the M-
Track Quad. Also, start with all of your volume levels low before increasing them to a
comfortable listening level.
•
When recording a guitar or bass with an active pickup, set the M-Track Quad's Mic/Line Inst
Switch to
Mic/Line
. If your instrument uses a passive pickup, set the switch to
Inst
.
•
To reduce electrical hum at high gain settings, keep the M-Track Quad's
power supply away
from your guitar cable and the M-Track Quad's
channel inputs.
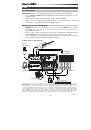
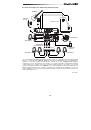
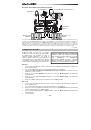
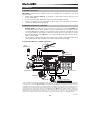
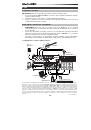
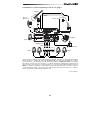
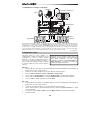
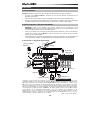
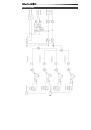
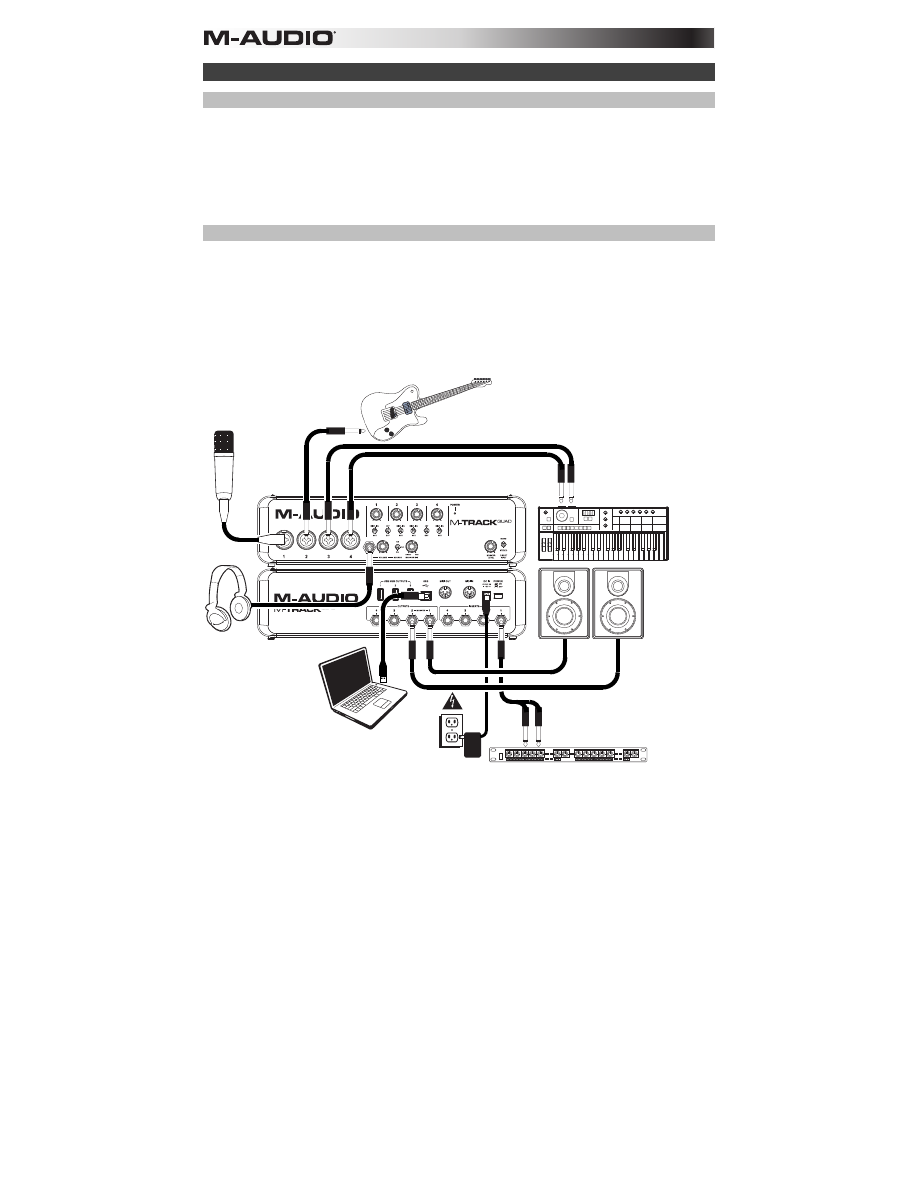
Setup Scenario 1: General usage:
Headphones*
Guitar*
(Vocal)
Microphone*
Keyboard
synthesizer*
Monitors*
Power
Use this setup to record in your home studio. Connect your computer to the rear panel USB port, and remember to select
M-Track Quad
as your computer's default device for recording and playback (see the following
section for
more information). Connect your microphone to Channel 1 and activate the phantom power switch for Channels 1 and 2.
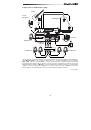
Connect other instruments to Channels 2-4. (If you are recording any instruments with left and right channels, make sure
you use either Channels 1 and 2 or Channels 3 and 4. For microphones and keyboards, set the channel's Mic/Line/Inst
Switch to
Mic/Line
. For guitars and basses, set it to
Inst
. Connect your monitors to the rear panel Audio Outputs 1 and 2
and your headphones to the front panel headphone jack. You can adjust the volume of all these monitoring options with the
Monitor Level knob. Boost your vocal mic signal by connecting an outboard compressor to the rear panel Insert 1.
*
not included
.
Computer*
Compressor*