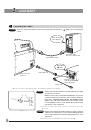
2
FLUOVIEW
FV10i-DOC
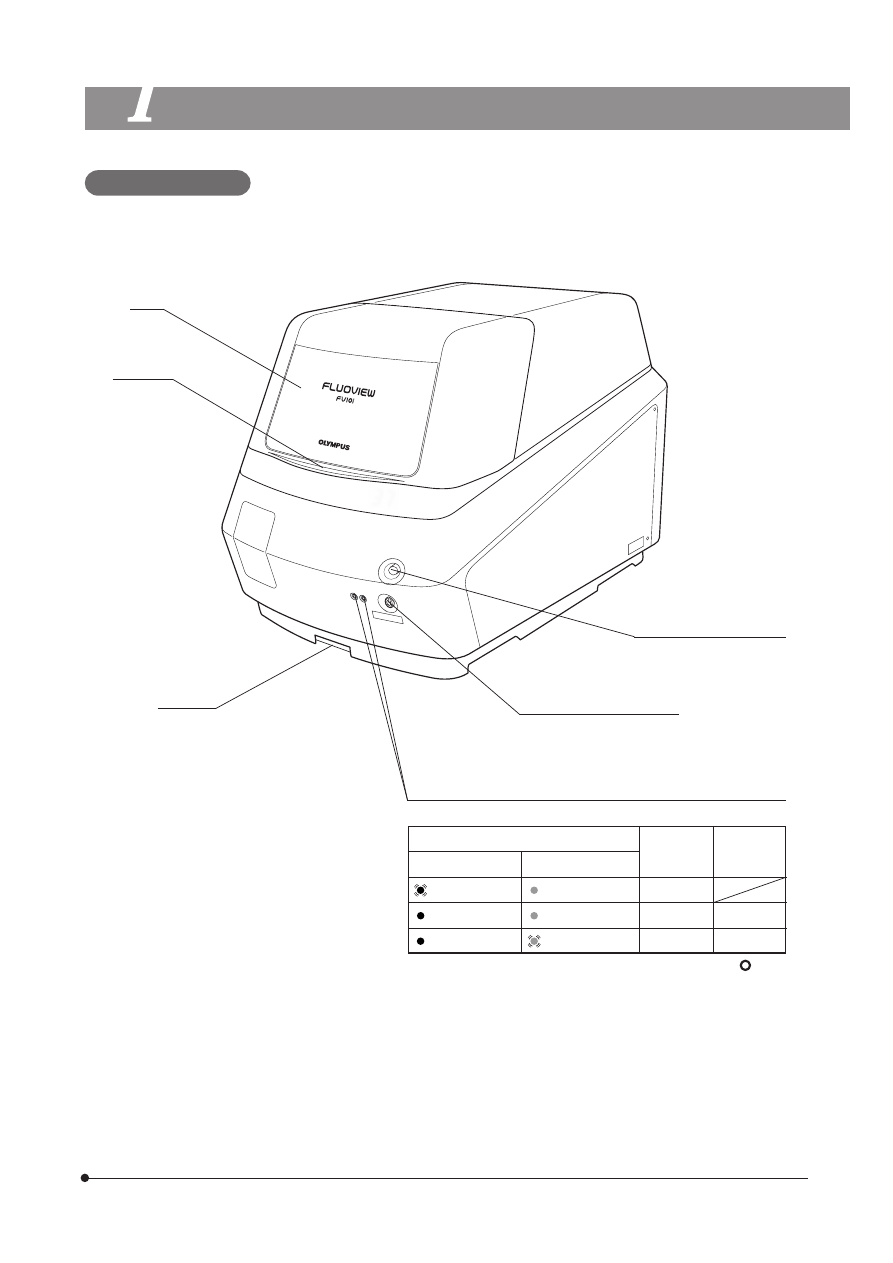
Cover lock buttons
Push the botton to open the
cover.
1
SYSTEM AND MAIN CONTROLS
Main Unit: FV10C-O3
Close lever
Cover
Water tray
Sub-switch
Press and hold for 3 seconds
to switch the system OFF.
Status LEDs
}Status LEDs when both the main and sub switches are ON.
LEDs
Laser
Software
Left
Right
Green blinking
Orange lighting
Initializing
Green lighting
Orange lighting
Standby
Not run
Green lighting
Orange blinking
Standby
Running
· The left LED lights in red when the main switch is set to “ ” (ON).
· Both the left LED (green) and right LED (orange) blink when the
cover is open.