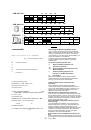
2
,
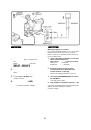
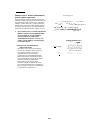
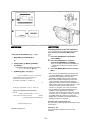
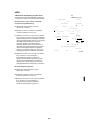
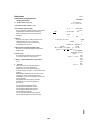
wamitinm
OmiL^it'l
[D.FADE1]
0i5is;iiiit2[D.FADE2]
Omitiimt3\D.fADE3]
1
^iiiiSll[EFFECT
2
(^'ii^
2
)]i
:tii№
2
> f#siST[FADE
(iriiifc)] ia°
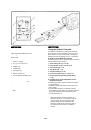
3
’ wmim^m±m - nii&ia
4
3 - 4 ©ii ’ mmm [
fade
] la °
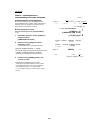
■iiiith
5 im^ ’
■ it*fS[±[FADE]ffl =
6
• #±»
«■>
7
^JIS[FADE(;iJ^ib)]Sa“
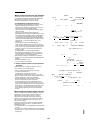
xmxiijbhl
bOZiAym^:
ill
'
nXXm/:xXXJfi'lXXHbin
X c ■ j#?xjii+[FbF=CTb(>:ii^b)iXI№bi>b5iX^ ’ itm
^-XXir^F'-X ^
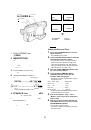
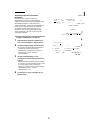
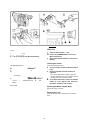
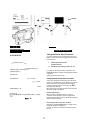
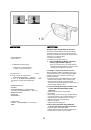
ENGLISH
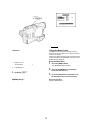
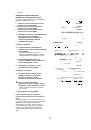
Digital Fade
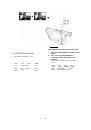
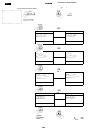
There are 3 Digital Fade Modes available,
o
Digital Fade 1 [D.FADE1]
0 Digital Fade 2 [D.FA0E2]
©Digital Fade 3 [D.FADE3]
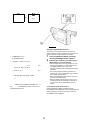
1
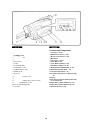
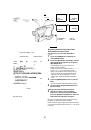
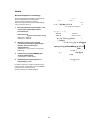
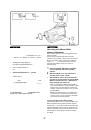
Press the [EFFECT2] Button repeatedly
until the desired Digital Fade Indication
appears.
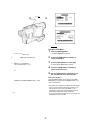
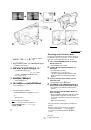
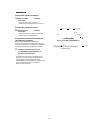
■ Fading In
2
With the Movie Camera in the Recording
Pause Mode, keep the [FADE] Button
pressed.
•The picture disappears gradually with the selected
digital fade effect.
When the picture has completely
disappeared, press the Recording Start/
Stop Button to start recording.
Wait 3-4 seconds and then release the
[FADE] Button.
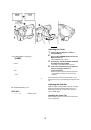
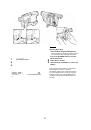
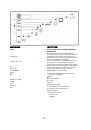
Fading Out
During recording, press the [FADE] Button
at the point where you want to fade out,
and keep it pressed.
After the picture has completely
disappeared, press the Recording Start/
Stop Button to stop recording.
•The Movie Camera is now in the Recording Pause
Mode.
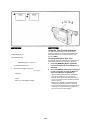
7
Release the [FADE] Button.
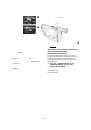
Cancelling the Selected Digital Fade Function
Press the [EFFECT2] Button repeatedly until none of the
Digital Fade Indications are displayed any more.
Or, press the [EFFECT2] Button for more than 2 seconds
to make the Digital Fade Indication disappear at once.
90
 1
1
 2
2
 3
3
 4
4
 5
5
 6
6
 7
7
 8
8
 9
9
 10
10
 11
11
 12
12
 13
13
 14
14
 15
15
 16
16
 17
17
 18
18
 19
19
 20
20
 21
21
 22
22
 23
23
 24
24
 25
25
 26
26
 27
27
 28
28
 29
29
 30
30
 31
31
 32
32
 33
33
 34
34
 35
35
 36
36
 37
37
 38
38
 39
39
 40
40
 41
41
 42
42
 43
43
 44
44
 45
45
 46
46
 47
47
 48
48
 49
49
 50
50
 51
51
 52
52
 53
53
 54
54
 55
55
 56
56
 57
57
 58
58
 59
59
 60
60
 61
61
 62
62
 63
63
 64
64
 65
65
 66
66
 67
67
 68
68
 69
69
 70
70
 71
71
 72
72
 73
73
 74
74
 75
75
 76
76
 77
77
 78
78
 79
79
 80
80
 81
81
 82
82
 83
83
 84
84
 85
85
 86
86
 87
87
 88
88
 89
89
 90
90
 91
91
 92
92
 93
93
 94
94
 95
95
 96
96
 97
97
 98
98
 99
99
 100
100
 101
101
 102
102
 103
103
 104
104
 105
105
 106
106
 107
107
 108
108
 109
109
 110
110
 111
111
 112
112
 113
113
 114
114
 115
115
 116
116
 117
117
 118
118
 119
119
 120
120
 121
121
 122
122
 123
123
 124
124
 125
125
 126
126
 127
127
 128
128
 129
129
 130
130
 131
131
 132
132
 133
133
 134
134
 135
135
 136
136
 137
137
 138
138
 139
139
 140
140
 141
141
 142
142
 143
143
 144
144
 145
145
 146
146
 147
147
 148
148
 149
149
 150
150