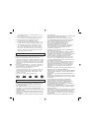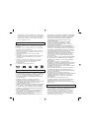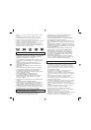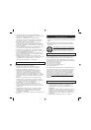
HOOD
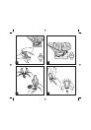
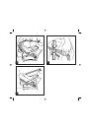
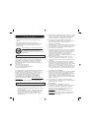
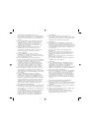
11• To fit the hood, push the handle rearwards, place
the hood adjusting couplings onto the handle,
then tie up the fastening strings as shown in the
figure. To remove the hood, reverse operations.
12• The hood can be adjusted to two positions: To
raise or lower it, push on the inner sides of the
adjusting couplings and bring the hood up or
down till the next click.
REMOVABLE LINING
13• To remove the lining from the car seat, detach the
hood. Unfasten the safety belt and slip it out of
the sack at the back.
14• Slip the fastener tabs on the sack out from under
the car seat.
15• Slip the leg-divider belt buckle out of the opening
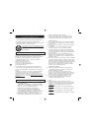
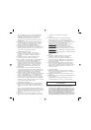
in the sack.
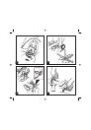
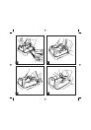
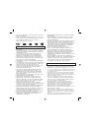
•
The hood is made of plastic, and can be washed
without being removed.
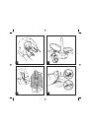
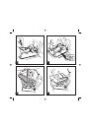
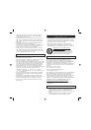
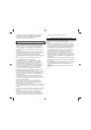
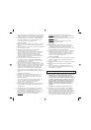
INSTRUCTIONS FOR USE IN THE VEHICLE
IMPORTANT:
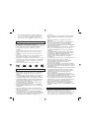
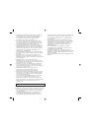
16• The "Primo Viaggio" car seat can be fastened
to the front seat of a car that does not have an
air bag system installed, or to the back seat
of the car. The seat may be fastened using
only three-point safety belts (see figure). It
is forbidden to use a two-point or abdominal
safety belt to attach the child car seat, since
these belts do not guarantee the child's safety.
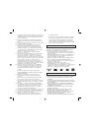
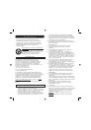
FASTENING THE BASE TO THE VEHICLE
17• Place the base for the child car seat on the seat
of the vehicle. Since not all vehicle seats slope at
the same angle, the height-adjustable base will
allow you to keep the child car seat in the correct
position, parallel to the ground.
•
The position of the base is correct when the
bubble on the gauge is completely visible.
•
To adjust the base, use one hand to turn knob A,
and the other hand to push down on point B to
simulate the childʼs weight. Adjust the base so
that the bubble is completely visible in the gauge.
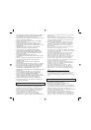
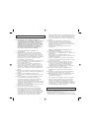
18• Slip the vehicle seat belt through the two side
slots on the base, as shown in the figure.
19• Fasten the buckle to the vehicle seat, as shown in
the figure.
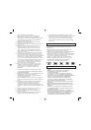
20• If your vehicle is equipped with a seat belt with a
free-sliding buckle (like most modern vehicles),
you must attach a Surefix Clip to it. Using a
Surefix Clip guarantees correct attachment of the
child car seat to the base.
•
Remove the Surefix Clip from its housing, as
shown in the figure.
21• Grab the vehicle shoulder strap (the free strap)
just above the buckle, and hold it taut while
slipping the Surefix Clip onto the free strap, as
shown in the figure. The Surefix Clip must hold
the strap taut. (Once the Surefix Clip has been
mounted correctly, it can be left on the vehicle
seat belt to make it easier to fasten the base each
time).
22• After mounting the Surefix Clip, check the tilt of
the base again. If the bubble is not completely
visible in the gauge, turn the knob again to
tighten the belt.
•
The base is ready for fastening the child car seat
to it.
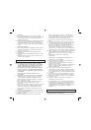
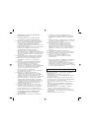
FASTENING THE CHILD CAR SEAT TO THE BASE IN
THE VEHICLE
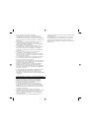
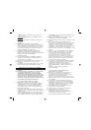
23• Place your child in the child car seat, and fasten
the safety belt.
•
The car seat must be positioned backwards, in
relation to the direction of the vehicle.
•
Fasten the car seat to the base, pressing with
both hands until it clicks into place.
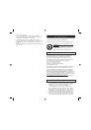
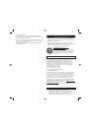
24• With the child car seat mounted in the vehicle, the
handle on the seat must be lowered all the way
against the back of the vehicle seat, as shown
in the figure. Push the handle until it clicks into
place.
25• Pass the vehicle seat belt around the backrest of
the child seat.
26• Slip the vehicle seat belt through the slot on the
back of the seat, as shown in the figure.
27• Check to make sure that the seat belt is taut and
securely fastened, for maximum safety.
•
To remove the child car seat from the vehicle,
remove the vehicle seat belt from the back of the
child seat. Pull the handle until it clicks into place
in an upright position, and unfasten the child
seat from its base. Leave the base mounted in the
vehicle, ready for use.
CLEANING & MAINTENANCE
Your product requires only minimal maintenance.
Cleaning and maintenance operations must be
performed only by adults.
• Be sure to keep all moving parts clean, lubricating
them with light oil if necessary.
• Regularly clean the plastic parts with a damp cloth.
Do not use solvents or similar products.
• Brush the fabric parts to remove dust.