40
Getti
ng Sta
rted
2
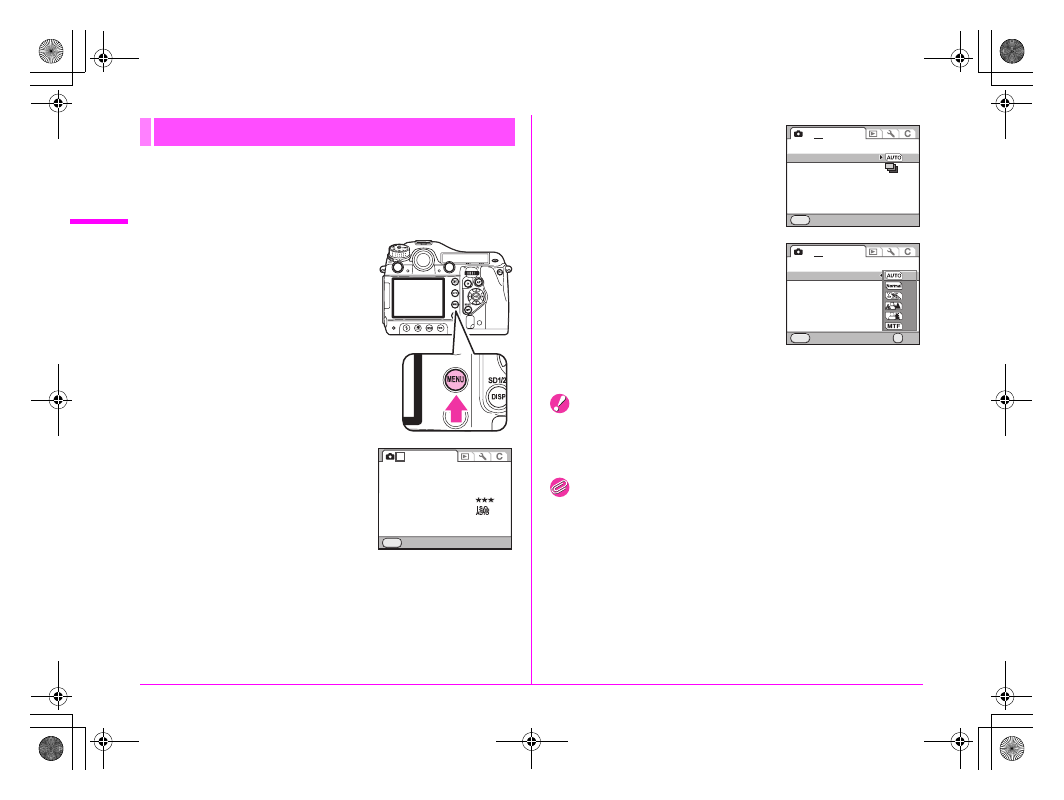
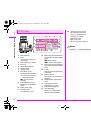
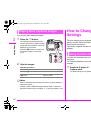
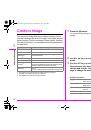
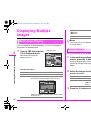
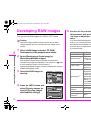
This section explains how to use the menus: [
A
Rec. Mode],
[
Q
Playback], [
R
Set-up] and [
A
Custom Setting].
The following explains how to set [Program Line] in the [
A
2]
menu as an example.
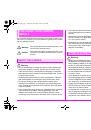
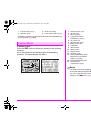
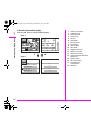
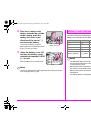
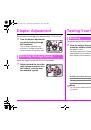
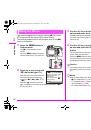
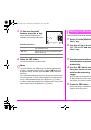
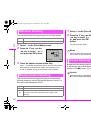
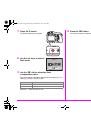
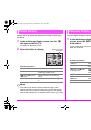
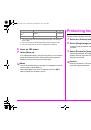
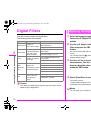
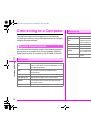
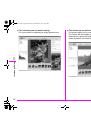
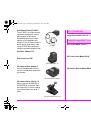
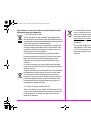
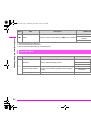
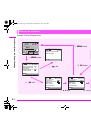
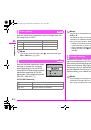
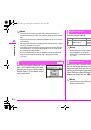
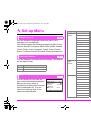
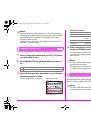
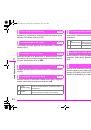
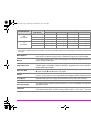
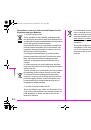
1
Press the
3
button in
Capture mode.
The [
A
1] menu appears on the
monitor.
Press the
3
button in Playback
mode to display the [
Q
1] menu first.
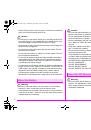
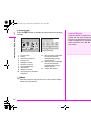
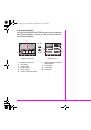
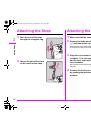
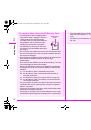
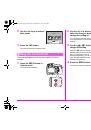
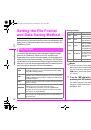
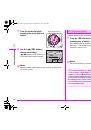
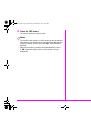
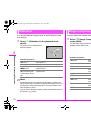
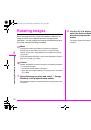
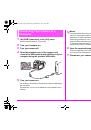
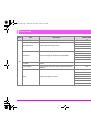
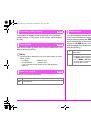
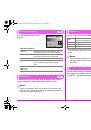
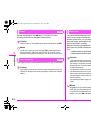
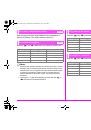
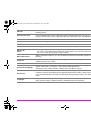
2
Press the
5
key or turn the
S
dial to the right (
y
).
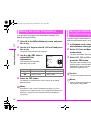
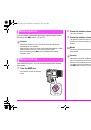
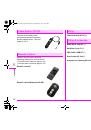
Each time the
5
key is pressed, the
menu will change in the following
sequence: [
A
2], [
A
3], [
A
4], [
Q
1]
...[
A
1].
When the
R
dial is turned to the
right, the category will change in the following sequence: [
A
1],
[
Q
1], [
R
1], [
A
1].
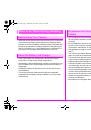
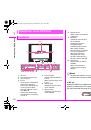
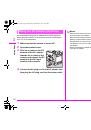
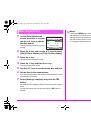
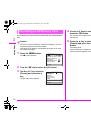
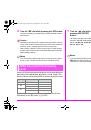
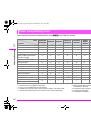
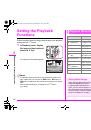
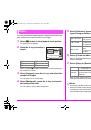
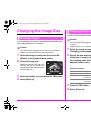
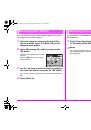
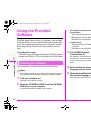
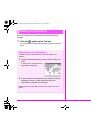
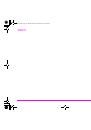
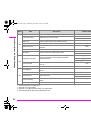
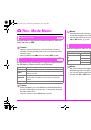
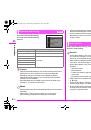
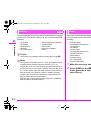
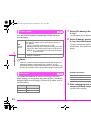
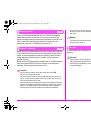
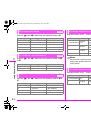
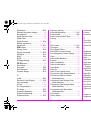
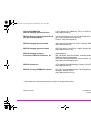
3
Use the
23
keys to select
an item and press the
5
key.
Available settings are displayed.
The frame moves to the pop-up menu
if there is one.
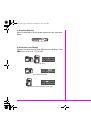
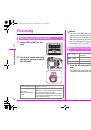
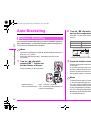
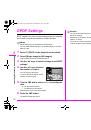
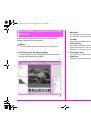
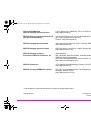
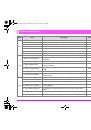
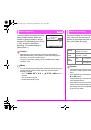
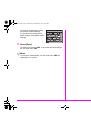
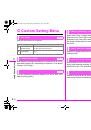
4
Use the
23
keys to select
an item and press the
4
button.
The camera returns to the menu
screen. Next, set other items.
Press the
3
button to exit the
menu and return to the screen that
was displayed before the menu was selected.
Caution
• Your settings may not be saved if the camera is turned off
improperly (such as by removing the battery while the camera is
on).
Memo
• Refer to “Menu Reference” for details on each menu.
•
z
•
z
•
z
•
z
Using the Menus
JPEG
JPEG
L
Exit
MENU
1
2 3 4
SD1 Image File Format
SD2 Image File Format
JPEG Recorded Pixels
JPEG Quality
ISO AUTO Adjustment
D-Range Setting
Program Line
Lens Correction
Extended Bracketing
HDR Capture
Multi-exposure
Interval Shooting
Exit
MENU
1
2
3 4
Off
OFF
OFF
Program Line
Lens Correction
Extended Bracketing
HDR Capture
Multi-exposure
Interval Shooting
Cancel
OK
OK
MENU
1
2
3 4
OFF
OFF
e_kb487.book Page 40 Wednesday, December 8, 2010 9:49 AM
 1
1
 2
2
 3
3
 4
4
 5
5
 6
6
 7
7
 8
8
 9
9
 10
10
 11
11
 12
12
 13
13
 14
14
 15
15
 16
16
 17
17
 18
18
 19
19
 20
20
 21
21
 22
22
 23
23
 24
24
 25
25
 26
26
 27
27
 28
28
 29
29
 30
30
 31
31
 32
32
 33
33
 34
34
 35
35
 36
36
 37
37
 38
38
 39
39
 40
40
 41
41
 42
42
 43
43
 44
44
 45
45
 46
46
 47
47
 48
48
 49
49
 50
50
 51
51
 52
52
 53
53
 54
54
 55
55
 56
56
 57
57
 58
58
 59
59
 60
60
 61
61
 62
62
 63
63
 64
64
 65
65
 66
66
 67
67
 68
68
 69
69
 70
70
 71
71
 72
72
 73
73
 74
74
 75
75
 76
76
 77
77
 78
78
 79
79
 80
80
 81
81
 82
82
 83
83
 84
84
 85
85
 86
86
 87
87
 88
88
 89
89
 90
90
 91
91
 92
92
 93
93
 94
94
 95
95
 96
96
 97
97
 98
98
 99
99
 100
100
 101
101
 102
102
 103
103
 104
104
 105
105
 106
106
 107
107
 108
108
 109
109
 110
110
 111
111
 112
112
 113
113
 114
114
 115
115
 116
116
 117
117
 118
118
 119
119
 120
120
 121
121
 122
122
 123
123
 124
124
 125
125
 126
126
 127
127
 128
128
 129
129
 130
130
 131
131
 132
132
 133
133
 134
134
 135
135
 136
136
 137
137
 138
138
 139
139
 140
140
 141
141
 142
142
 143
143
 144
144
 145
145
 146
146
 147
147
 148
148
 149
149
 150
150
 151
151
 152
152
 153
153
 154
154
 155
155
 156
156
 157
157
 158
158
 159
159
 160
160